


Have You Ever Tried Free Crochet Labubu Patterns and Felt Lost?
Have you ever searched for free crochet Labubu patterns and ended up disappointed by incomplete directions or confusing diagrams? I’ve been there. The first time I tried making a Labubu, it was supposed to be a cute gift for my niece’s birthday. But let me tell you, what came off my hook looked more like a sea urchin than a monster doll.
That experience lit a fire in me. I knew I could do better, but only if I could find reliable, well-written, free crochet Labubu patterns with clear instructions, stitch counts, and photos. But when even Ravelry’s massive pattern library didn’t offer anything clear enough, I knew I had to make my own. And now, after many stitches and cups of tea, I’ve gathered the very best ones to help you succeed, just like I did with my first amigurumi project.
Jump to a section
My First Labubu Crochet Adventure (and Why I Had to Share)
I still remember the first time I came across Labubu, those wide eyes, the mischievous smile, and that quirky charm instantly melted my heart. I was scrolling through a Russian crochet group when a tiny yellow Labubu plushie popped up. It wasn’t just cute, it had personality. I knew right then I had to make one of my own.
Back then, there weren’t many free crochet Labubu patterns available in English. Most tutorials were scattered across forums, untranslated, or missing key steps. So I did what any determined crocheter would do: I grabbed my yarn, stitched and frogged through the confusion, and learned the hard way. But oh, was it worth it!
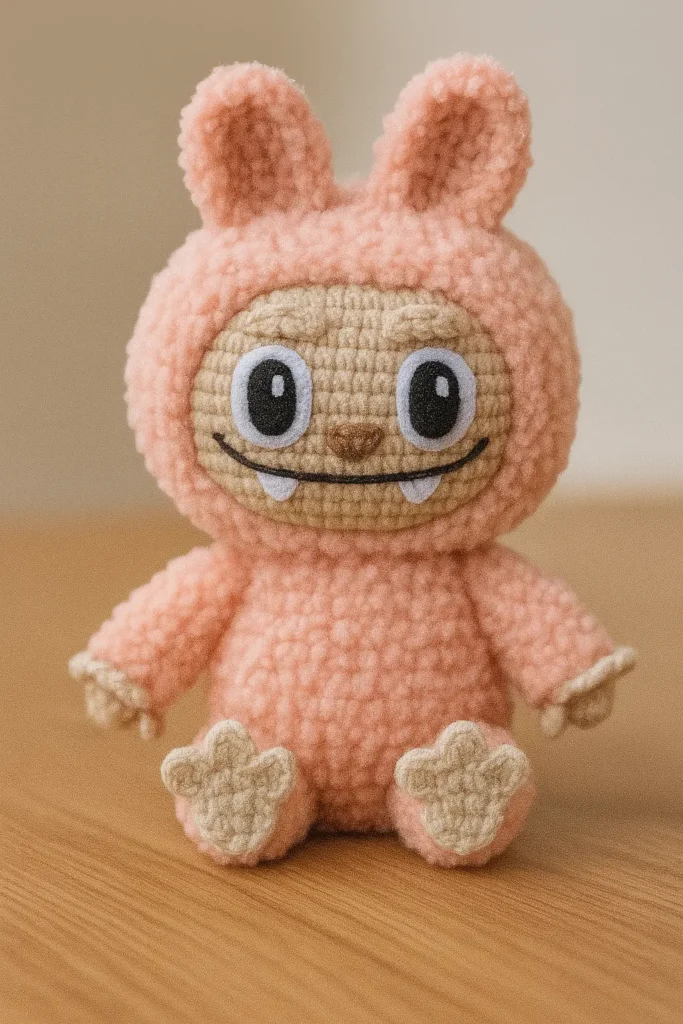
After weeks of trial, I finally held my own Labubu, in soft pink yarn with a squishy belly and stitched grin. It became my granddaughter’s favorite bedtime buddy. That little plush brought more smiles than I ever imagined. That’s why I’m thrilled to share this step-by-step free crochet Labubu pattern with you, adapted from the original Russian version, translated clearly, and tested by my own aging but steady hands.
This guide breaks down every part of the Labubu, from head to tiny toes, in easy-to-follow steps with detailed images. Whether you’re a curious beginner or a seasoned hooker, you’ll find the joy of stitching this whimsical character just as rewarding as I did.
And here’s the best part: it’s completely free.
A Wobbly Start and a Lesson in Determination
When I first tried this Labubu pattern, I didn’t have the right yarn. I used leftovers from an old bunny project, fuzzy yellow for the body and pale beige for the face. The result? A plushie that looked more like a confused chicken than a mythical monster. My color changes were clumsy, and the ears were sewn backward (oops!).
But with each attempt, my stitches got neater, my tension improved, and I discovered the importance of strategic yarn choices. Eventually, I landed on a soft pink Alize Softy for the body, and suddenly, Labubu came to life.
Tools & Step-by-Step Instructions for FREE Crochet Labubu Patterns
What You’ll Need to Start Your Labubu (Materials & Setup)
Before diving into the stitches, let’s set you up for success. These free crochet Labubu patterns are built on simple materials, and everything listed here has been tested and tweaked by these very hands. Remember, we’re making the adorable pink Labubu version, soft, sweet, and perfect for gifting.
The Right Yarn and Tools (That Actually Work)
For this version of Labubu, I used:
- Alize Softy in soft pink (body)
- YarnArt Jeans in beige (face, feet, hands, ears, and brows)
- Crochet hooks: 1.75 mm and 2.0 mm
- White soft felt (for eyes)
- Black and white acrylic paint (for pupils and highlights)
- Brown, black, and white embroidery thread (for nose, mouth, and teeth)
- Fiberfill stuffing
- Long needle for assembling
- “Moment Crystal” glue
If you’re following other free crochet Labubu patterns, you might find different hook sizes or brands suggested , and that’s okay. Just make sure your yarn and hook are a good match for tight, plushy stitches, or check this yarn weight, gauge, and hook size guide to get it right. This helps prevent stuffing from poking through.
Abbreviations
Let’s take a quick look at the abbreviations used throughout these free crochet Labubu patterns.
| Abbreviation | Meaning |
|---|---|
| MR | Magic Ring (Amigurumi Ring) |
| ch | Chain |
| sc | Single Crochet |
| inc | Increase |
| dec | Decrease |
| sl st | Slip Stitch |
| BLO | Back Loop Only |
| FLO | Front Loop Only |
| dc | Double Crochet |
Finished Size: About 12 cm tall (just under 5 inches)
The beauty of these free crochet Labubu patterns is how beginner-friendly they are once you have all the pieces laid out in front of you. The trickiest part is just getting started, and that’s what this list solves.
Step-by-Step Instructions: Head, Hood & Body
Ready to bring your Labubu plushie to life? This is where the magic begins! These free crochet Labubu patterns are written with love and tested by my own yarn-worn hands. Every stitch and curve has been carefully translated to help you succeed , even if this is your very first try.
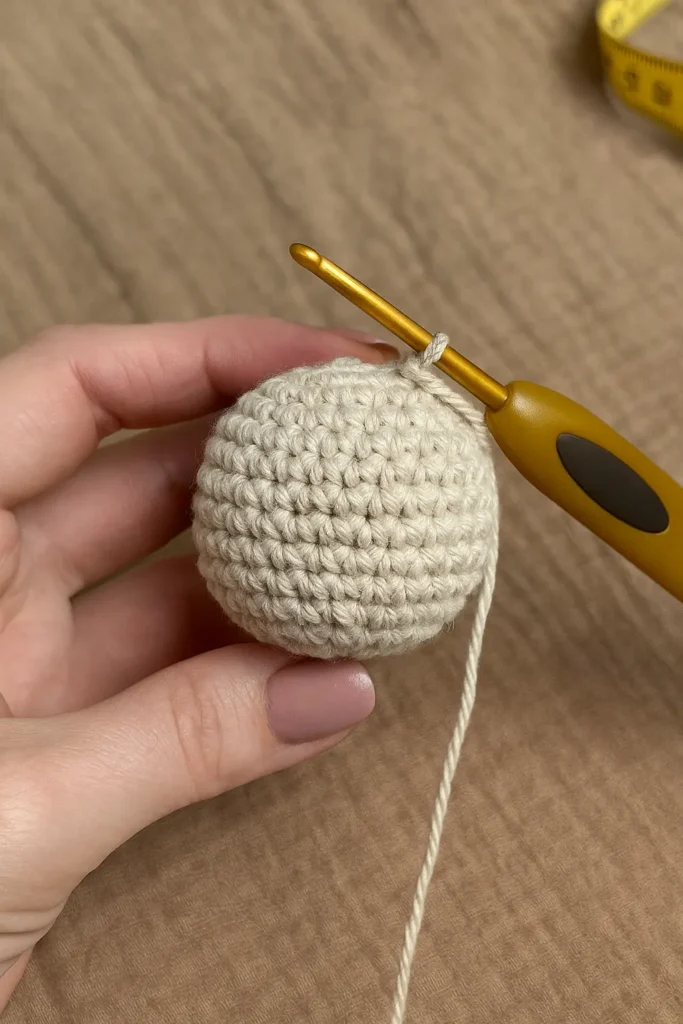
🧶 Head (Beige Yarn, 1.75 mm Hook)
This part kicks off your free crochet Labubu pattern journey with a soft, rounded head that gives Labubu its signature look. Start with YarnArt Jeans 05 (beige) and a 1.75 mm crochet hook.
- Round 1: Make a magic ring (amigurumi ring), work 6 single crochets (sc) into it. (6)
- Round 2: Increase in every stitch. (12)
- Round 3: (1 sc + inc) repeat 6 times. (18)
- Round 4: (2 sc + inc) repeat 6 times. (24)
- Round 5: (3 sc + inc) repeat 6 times. (30)
- Round 6: (4 sc + inc) repeat 6 times. (36)
- Round 7: (5 sc + inc) repeat 6 times. (42)
- Round 8: (6 sc + inc) repeat 6 times. (48)
- Round 9: (7 sc + inc) repeat 6 times. (54)
- Rounds 10–17: Work even (54 sc) for 8 rounds.
- Round 18: (7 sc + dec) repeat 6 times. (48)
- Round 19: (6 sc + dec) repeat 6 times. (42)
- Round 20: (5 sc + dec) repeat 6 times. (36)
- Round 21: (4 sc + dec) repeat 6 times. (30)
- Round 22: (3 sc + dec) repeat 6 times. (24)
- Round 23: (2 sc + dec) repeat 6 times. (18)
- Round 24: (1 sc + dec) repeat 6 times. (12)
—🧸 Stuff the head well at this point. - Round 25: 6 decreases to close. (6)
—Pull the hole tight and hide the yarn end.
This head is the heart of our free crochet Labubu pattern. Keep your tension even and stuff well to get that iconic shape.
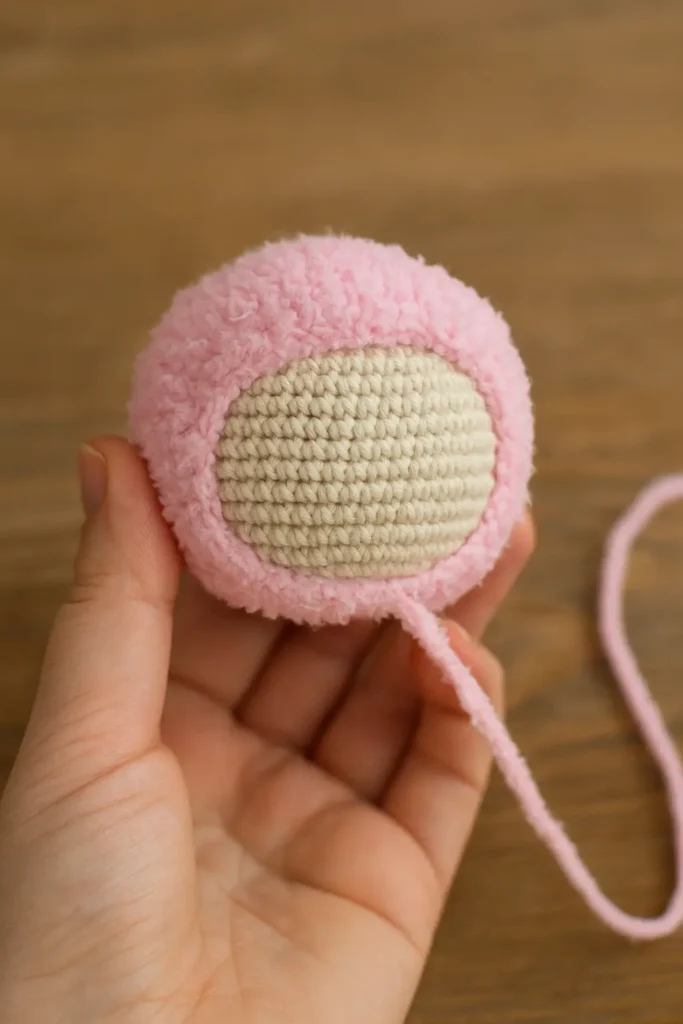
🧶 Hood (Soft Pink Yarn, 2.0 mm Hook)
The hood wraps gently over Labubu’s head like a snug hat. In this free crochet Labubu pattern, the hood adds a charming softness to the expression.
- Use Alize Softy 187 (pink) and a 2.0 mm hook.
- Start with a magic ring, 6 sc into it. (6)
- Round 2: Increase in every stitch. (12)
- Round 3: (1 sc + inc) x6. (18)
- Round 4: (2 sc + inc) x6. (24)
- Round 5: (3 sc + inc) x6. (30)
- Round 6: (4 sc + inc) x6. (36)
- Round 7: (5 sc + inc) x6. (42)
- Round 8: (6 sc + inc) x6. (48)
- Round 9: (7 sc + inc) x6. (54)
- Rounds 10–20: Work even (54 sc) for 11 rounds.
- Place the hood snugly over the finished head.
- Crochet around both hood and head to join them together.
- Leave a long tail and sew around the neck.
One of the things I love about this free crochet Labubu pattern is how seamless the hood feels once joined. Make sure it sits snug before sewing.
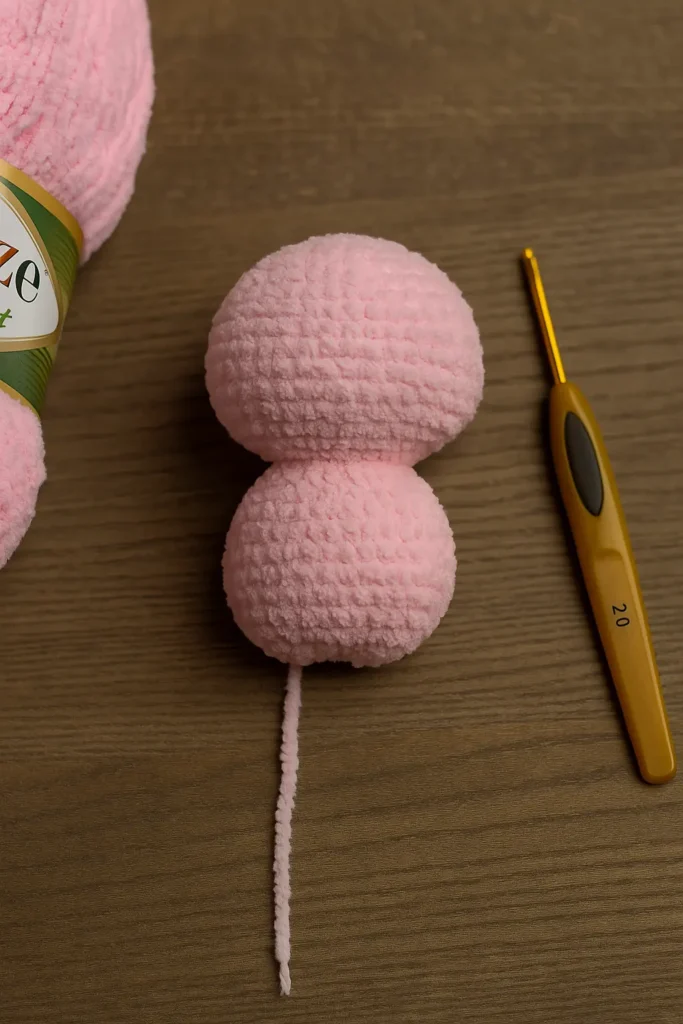
🧶 Body (Soft Pink Yarn, 2.0 mm Hook)
No free crochet Labubu pattern would be complete without Labubu’s huggable little body. Here’s how to shape it with softness and structure.
- Start again with Alize Softy 187 (pink) and a 2.0 mm hook.
- Round 1: Magic ring, 6 sc. (6)
- Round 2: Increase in every stitch. (12)
- Round 3: (1 sc + inc) x6. (18)
- Round 4: (2 sc + inc) x6. (24)
- Round 5: (3 sc + inc) x6. (30)
- Round 6: (4 sc + inc) x6. (36)
- Rounds 7–11: Work even (36 sc) for 5 rounds.
- Round 12: (4 sc + dec) x6. (30)
- Round 13: 30 sc — pause to stuff the body
- Round 14: (3 sc + dec) x6. (24)
- Round 15: 24 sc
- Round 16: (2 sc + dec) x6. (18)
—Stuff again and shape the bottom with your palm. - Leave a long tail for sewing.
- Sew to the base of the head and fill the neck well so it doesn’t flop.
This part completes the core of your plush using our free crochet Labubu patterns, and now you’re ready to move to ears, arms, and the fun personality details.
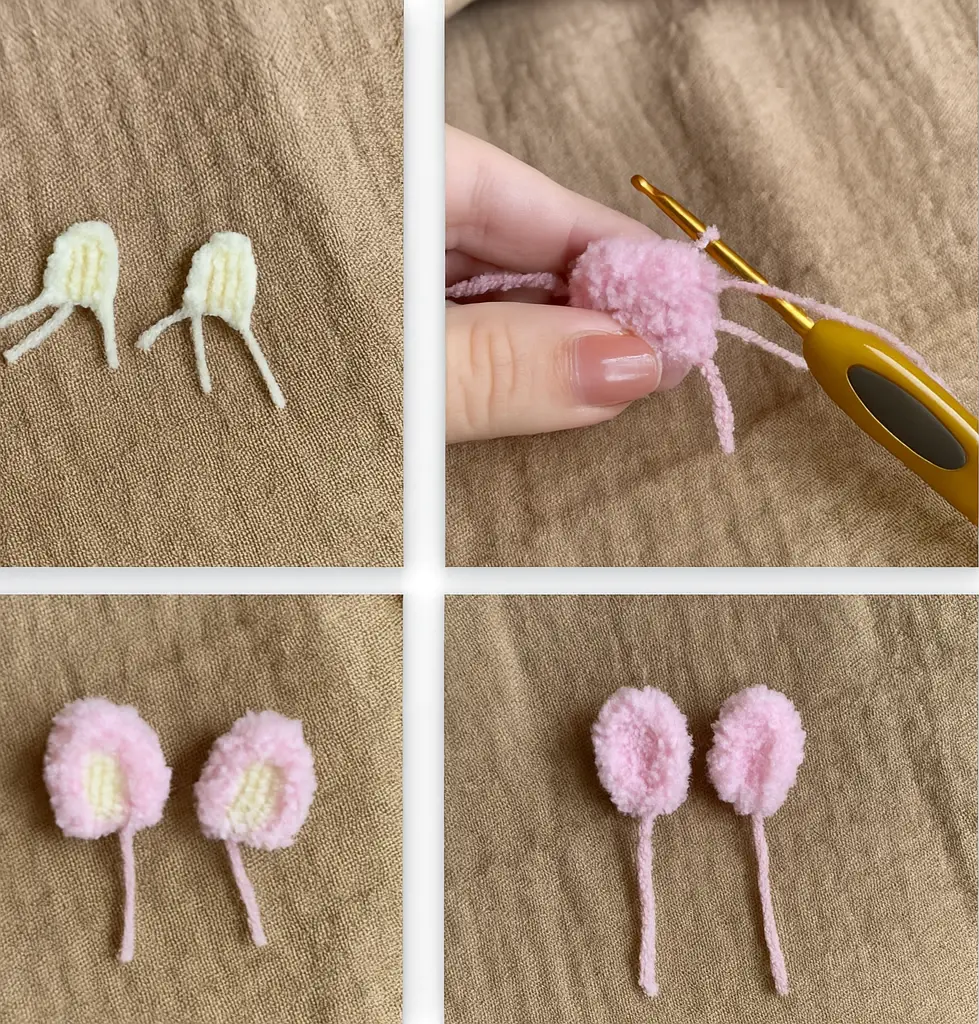
🧶 Ears (worked in two-layered pieces)
First Inner Layer – Beige yarn (YarnArt Jeans 05), 1.75 mm hook
This part adds structure and detail beneath the fuzzy outer ear.
- Start with 5 chains using lemon (light yellow) yarn.
- Work 1 sc in 2nd chain from hook, then 2 more sc.
- Make 3 sc in the last chain, turning your work.
- Work 3 sc along the other side of the chain. You should have 9 stitches total.
- Switch to beige yarn.
- Chain 1, turn.
- Work 3 sc, 3 increases, then 3 sc. (12)
- Fasten off and cut the yarn.
Second Outer Layer – Pink yarn (Alize Softy 187), 2.0 mm hook
- Start with 5 chains again.
- Work 1 sc in 2nd chain from hook, 2 more sc, then chain 1 and turn.
- Work 3 sc, 3 increases, 3 sc again. Chain 1 and turn. (12)
Join & Finish the Ear
- Place the beige piece behind the pink piece, wrong sides facing.
- Crochet around both layers with 5 sc on the side, 2 increases at the top, and 5 sc down the other side.
- Chain 1, make a final round if needed, and slip stitch to finish. (19 stitches)
- Leave a long tail for sewing.
- Sew each ear to the top of the head.
🧶 Arms (Soft Pink + Beige yarn, 1.75 mm, and 2.0 mm hooks)
Start with beige yarn (YarnArt Jeans 05), 1.75 mm hook
- Round 1: Magic ring, 6 sc. (6)
- Round 2: 1 sc, then make fingers:
- Chain 3, work into 2nd chain from hook:
slip stitch, sc, then work 1 sc back into the arm. - Repeat 3 times total to form 3 fingers.
- Work 2 sc in the remaining base stitches. (6)
- Chain 3, work into 2nd chain from hook:
Round 3: (Back to beige)
- 1 sc across the remaining front loops, then 3 sc to finish the round. (6)
Switch to pink yarn (Alize Softy 187), 2.0 mm hook
- Round 4: 6 increases. (12)
5–9. Work 12 sc evenly for 5 rounds. - Fold the piece in half and sc through both edges to close. (6)
- Leave a long tail for sewing.
Attach the Arms
- Sew the arms slightly angled down along the sides of the body.
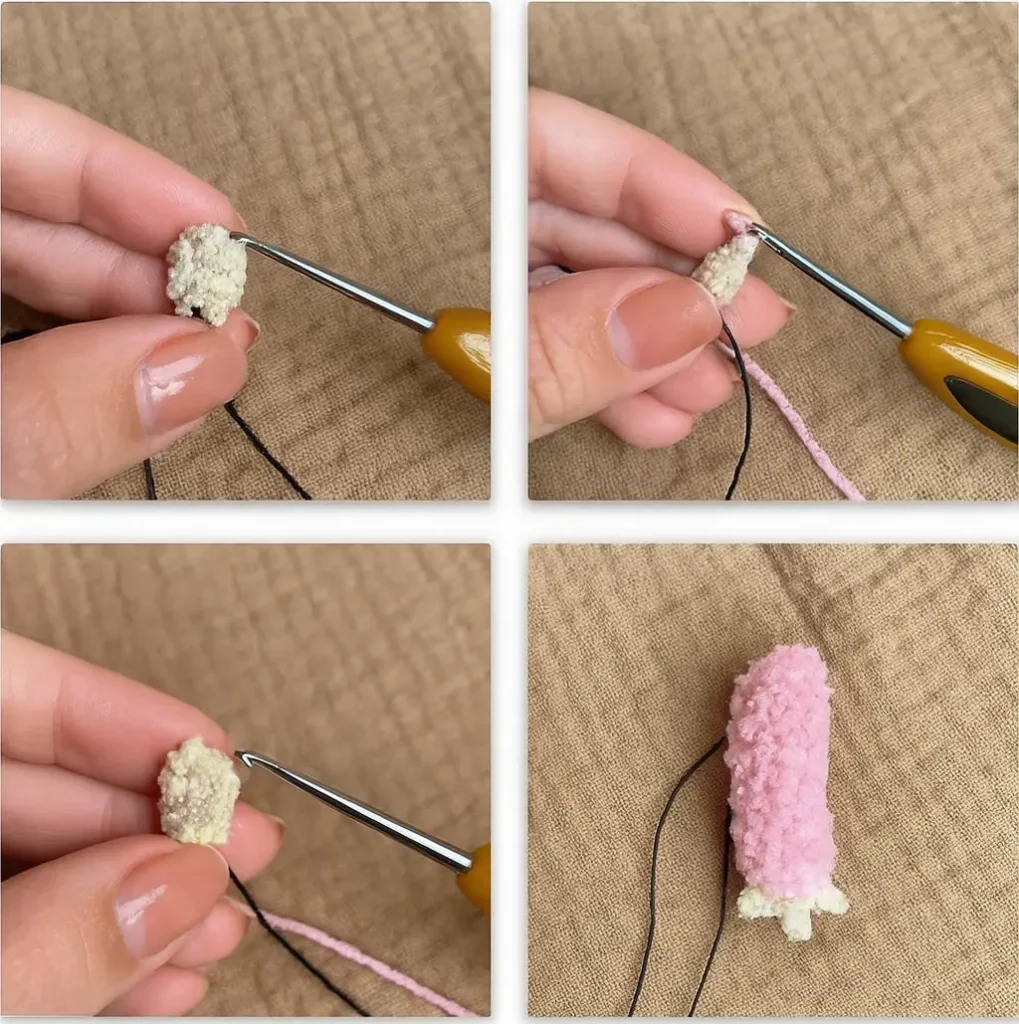
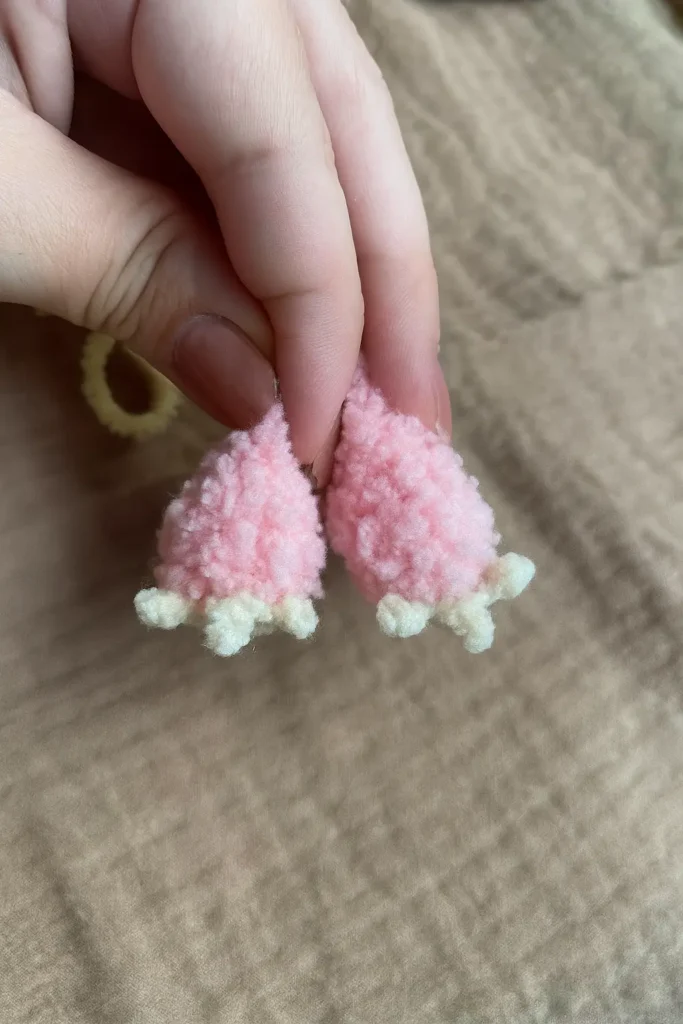
🧶 Legs (Soft Pink + Beige yarn, 1.75 mm, and 2.0 mm hooks)
- Start with beige yarn (YarnArt Jeans 05) and a 1.75 mm hook.
- Round 1: Begin with a magic ring, work 6 sc. (6)
- Round 2: Time to shape the tiny toes! Work:
1 sc, (in front loop only: 3 dc, chain 2, slip stitch into the same stitch) — repeat this mini toe cluster 3 times. Then finish with 2 sc. (6) - Round 3: Work across the unused back loops of the previous round with 3 sc. Then continue 3 sc across to finish the round. (6)
- Switch to pink yarn (Alize Softy 187) and a 2.0 mm hook.
- Round 4: Increase in each stitch around. (12)
- Round 5: (1 sc + inc) repeat 6 times. (18)
- Rounds 6–7: Work even (18 sc) for 2 rounds.
- Round 8: (1 sc + dec) repeat 6 times. (12)
- Fold the piece in half and crochet 6 sc through both sides to close it.
- Leave a long yarn tail.
✂️ Sew the legs to the bottom sides of the body, slightly angled toward the belly. Tug them into shape with a few invisible stitches for a snug, cute pose.
🧶 Eyebrows (Thin beige Eyelid Curves)
Yarn: Alize Softy 187 (beige)
Hook: 2.0 mm
Instructions:
- Chain 7.
- Starting in the 2nd chain from the hook, work 6 slip stitches across.
- Fasten off and leave a long tail.
- Sew each eyebrow slightly curved over the eye area.
- Shape the curve while stitching to give a slightly mischievous look.
Use pins to position before sewing if needed for symmetry.
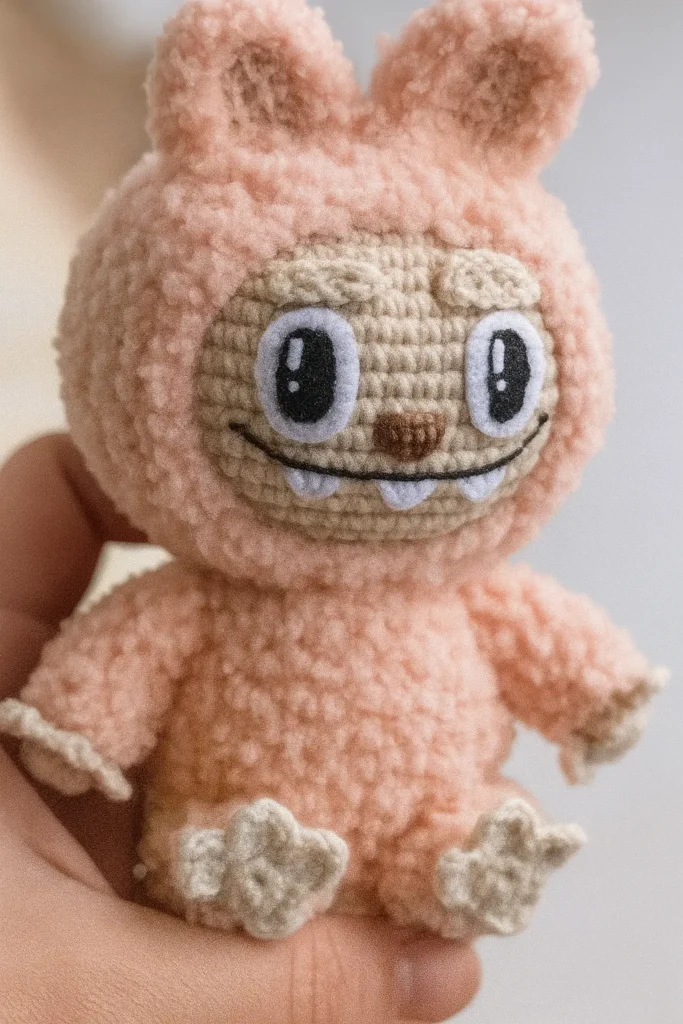
🧵 Face Details (Eyes, Nose, Mouth & Embroidery)
Now that our Labubu plushie is stitched together from ears to legs, it’s time to give this little character some real personality. This is where the magic happens!
🧶 Materials Needed:
- Black embroidery floss or fine black yarn (for mouth and nose)
- White and black safety eyes (or you can crochet/felt your own)
- Thin needle
- Scissors
- Optional: A white thread for small tooth stitching
✨ Steps:
- Eyes:
- Use 10 mm black safety eyes or crochet two small circles with white yarn and sew tiny black pupils.
- Position them about 5–6 rounds down from the center of the head, spaced about 8 stitches apart.
- Secure tightly from inside the head. If needed, use a hot needle method to pierce fuzzy yarn cleanly.
- Nose:
- Embroider a tiny triangular nose centered between the eyes, about 2 rows below, using black floss.
- Stitch 3–4 tiny satin stitches stacked to shape a small nose blob.
- Mouth:
- Use a long black thread and embroider the signature mischievous smile—a slight curve beneath the nose.
- Add small vertical lines to make “teeth” if you’d like. I recommend 3 or 5 to keep it symmetrical.
- Eyebrows & Detail (Optional):
- Use small angled stitches above the eyes to give a cheeky expression.
- Keep it simple, Labubu’s charm is in the expression!
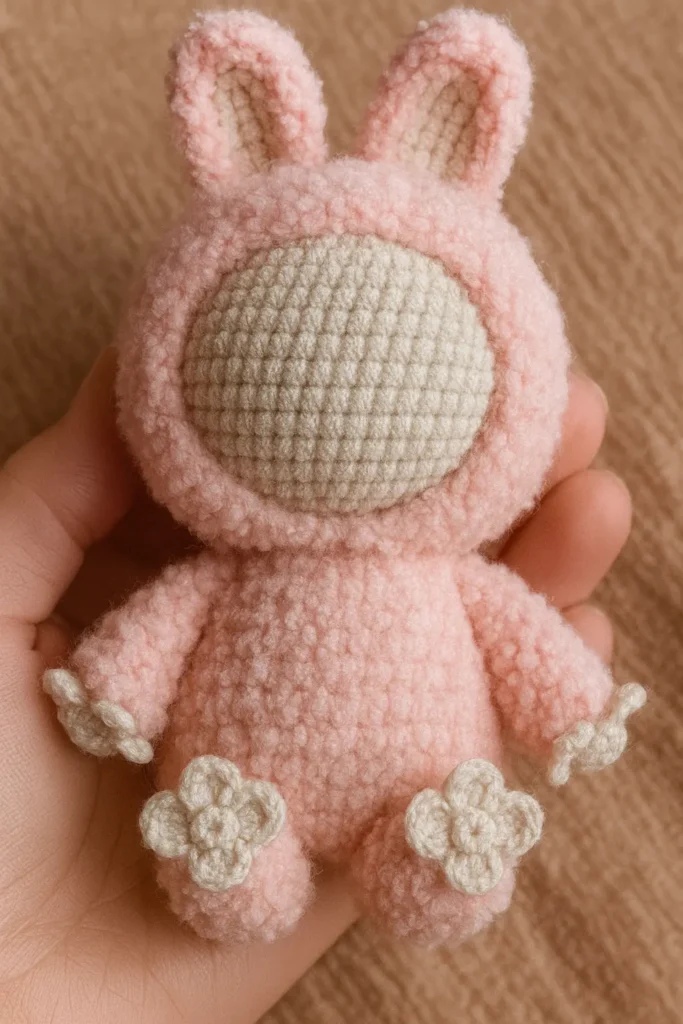
🧸 Let’s Assemble Your Pink Labubu — Piece by Piece!
Now that every part is finished and fluffed, it’s time to bring your adorable Labubu to life. This is where the magic happens , where all those rounds of single crochet become a cuddly character your loved ones will treasure. Whether you followed this free crochet Labubu pattern exactly or added your own twist, you’re about to meet your very own Labubu in pink!
Grab your tapestry needle and let’s assemble step by step.
Start by pinning the head and body together. If you’re worried about lopsided pieces, revisit these top amigurumi mistakes to avoid to troubleshoot. Align the base of the head with the center of the body and stitch securely using the tail you left earlier. This is a critical step in our free crochet Labubu patterns because proper positioning ensures Labubu doesn’t end up with a wobbly neck (ask me how I know!).
Next, attach the legs. The best position is slightly angled toward the front, near the bottom edge of the body. Use small hidden stitches and check that both feet point forward. This tip is a must-follow in all quality free crochet Labubu patterns if you want a balanced and adorable pose.
More Free Amigurumi Patterns You’ll Love
")

")
")
Now for the arms. Place them just under the hood, angled gently downward along the sides. This gives your plushie a natural, relaxed look, like it’s about to reach out for a hug. Again, use tight invisible stitches. One of my favorite tricks I’ve picked up while testing different free crochet Labubu patterns is stuffing just a little fiberfill in the arms before sewing, it helps them sit just right.
The ears go last, but they make all the difference. Position them evenly at the top of the head and sew carefully so they mirror each other. You’ll know you’ve nailed it when Labubu’s mischievous expression comes through, especially with the layered pink and beige ears standing tall.
🧵 Add the Final Face Details
Don’t forget the face! If you haven’t already, now’s the perfect time to stitch on Labubu’s nose, mouth, and eyes. Whether you’re using safety eyes or embroidery, this part of the free crochet Labubu pattern brings the whole character to life. Add those iconic brows for a cheeky expression, it’s Labubu’s signature look and one of the cutest moments in the whole project.
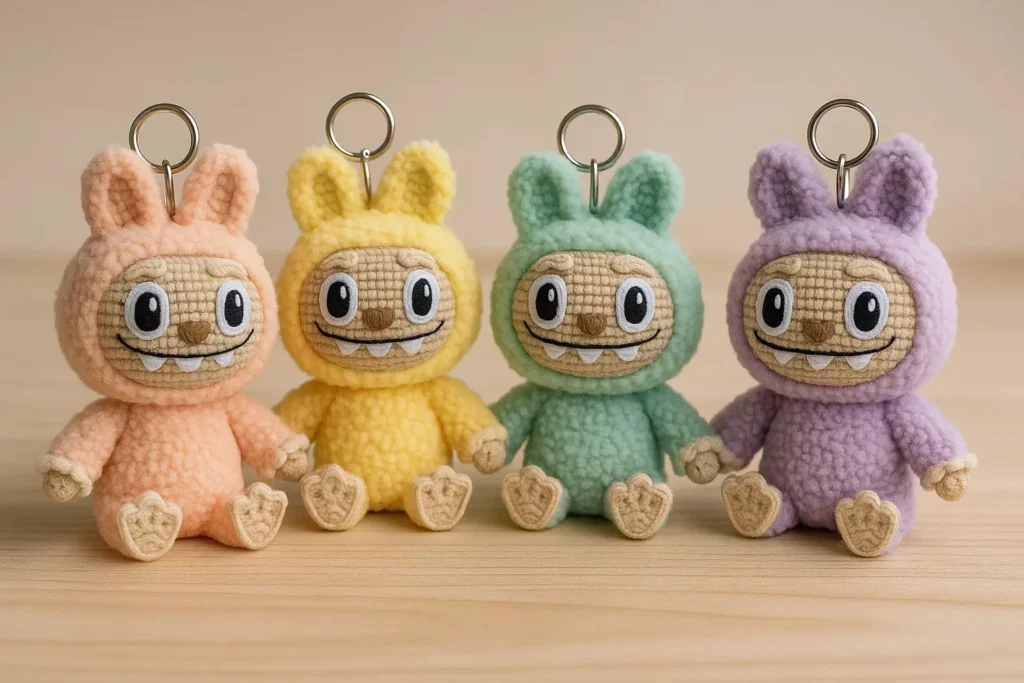
✨ Looking for a mini version?
Don’t miss this adorable Labubu Crochet Pattern Free Keychain — it’s soft, pocket-sized, and just as expressive with a fluffy hood and quirky smile!
Free Labubu Clothes Crochet Pattern
Want to Dress Your Labubu Next? (Free Clothes Pattern)
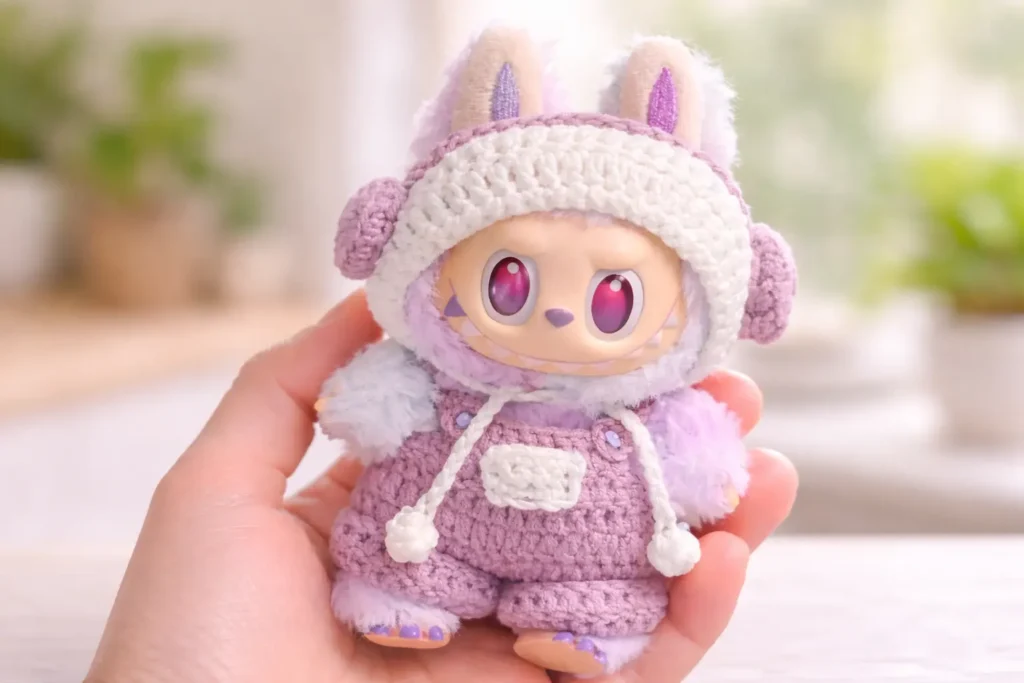
Now that your Labubu doll is finished, you can make it even cuter with a full outfit set! I just published a free labubu clothes crochet pattern that includes a cozy hood hat with ear holes + ties + pom-poms, matching earmuffs, and overalls with a pocket and adjustable straps.
👉 Read the full Labubu clothes crochet pattern here: [Labubu Clothes Crochet Pattern (Free): Hood Hat + Earmuffs + Overalls]
🎀 Bonus Ideas to Customize Your Labubu
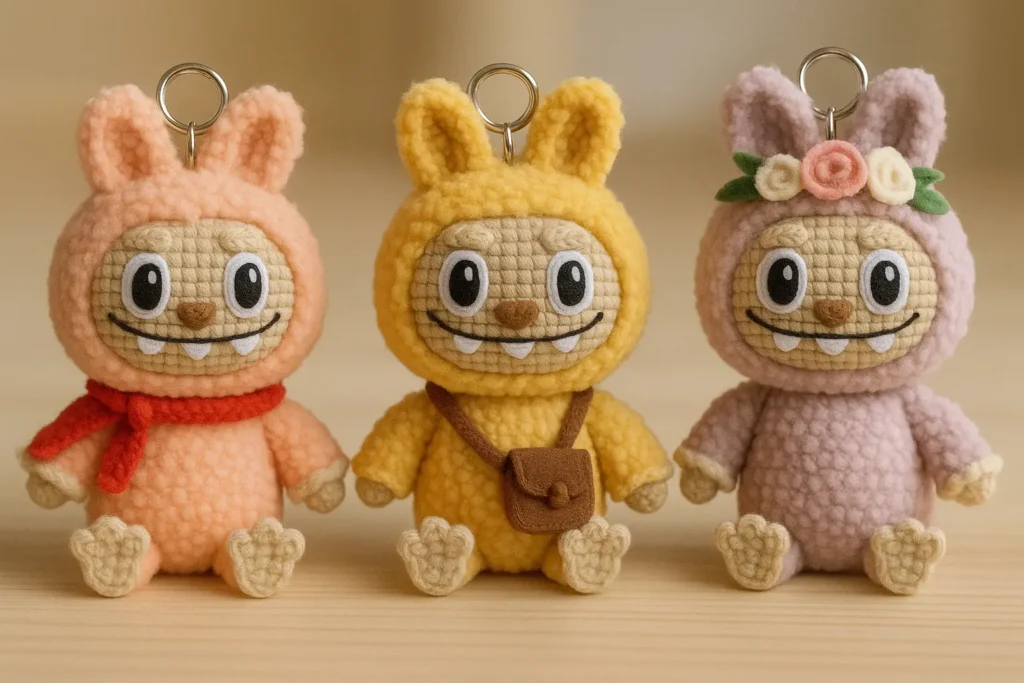
Want to personalize your Labubu even more? This free crochet Labubu pattern leaves plenty of room for creativity. Try adding a tiny scarf, a mini satchel, or a felt flower crown. I’ve even turned mine into a backpack charm with a little loop at the top. Your imagination’s the limit , and that’s half the fun!
🧶 This final step is always the most satisfying moment for me. It’s when Labubu goes from “a pile of soft pieces” to “a handmade toy full of love.” And thanks to these free crochet Labubu patterns, you’ve done it from scratch.
Frequently Asked Questions About Free Crochet Labubu Patterns
1. What yarn is best for a free crochet Labubu pattern?
For the softest, fluffiest results, I highly recommend using Alize Softy for the body and YarnArt Jeans for the face and details. This combo gives the plush its signature texture. The yarns used in this free crochet Labubu pattern were tested for both feel and stitch clarity. If you’re just starting, check out our yarn weight guide to choose the right match.
2. Can beginners try this free crochet Labubu pattern?
Absolutely! This free crochet Labubu pattern is beginner-friendly and fully guided with step-by-step photos and stitch counts. Even if you’ve never made a doll before, you’ll feel supported the whole way through. Just take it one round at a time , and don’t skip the shaping tips in the head and body sections.
3. How long does it take to finish a free crochet Labubu pattern?
It depends on your speed and how many breaks you take for tea ☕, but most crafters finish this free crochet Labubu pattern in about 6–8 hours total. That includes stuffing, embroidery, and sewing the parts together. If you like cozy projects you can spread over a weekend, this one’s a great pick!
4. Can I sell finished toys made from this free crochet Labubu pattern?
Yes, you’re welcome to sell the finished plushies made using this free crochet Labubu pattern, especially at craft fairs or Etsy. Just please credit TopAmigurumi.com as the pattern source. And if you share your Labubu online, tag us so we can cheer you on!
Final Thoughts: Stitching Joy With Every Loop 🧶
So there you have it, your very own handmade Labubu, brought to life one stitch at a time. From those wide eyes to the cheeky little toes, this journey through the free crochet Labubu pattern was more than just following instructions. It was about patience, creativity, and pouring love into every loop.
If you made it this far (and your yarn didn’t run away halfway through), you’ve done something truly special. Whether it’s a gift for a child, a keepsake for your shelf, or a new little buddy for your craft room, your Labubu holds the spirit of handmade magic.
Don’t forget to share your finished creation! Tag @TopAmigurumi on Pinterest or Instagram and let me see your version. And if this free crochet Labubu pattern made you smile, stay tuned, more adorable characters are coming soon. 💕
📌 Follow me on Pinterest for daily pin-worthy amigurumi tips, free patterns, and adorable project inspiration:
👉 TopAmigurumi on Pinterest
✍️ Read more behind-the-scenes crochet stories and deep dives on Medium:
👉 Follow TopAmigurumi on Medium
Happy stitching,
Martha 🧵
3 comments
This was actually really helpful
Thanks
Très bonnes explications , c’est dommage qu’elle ne soit pas en pdf pour imprimer
love these little Keychain creatures, your work is fantastic. easy to follow and understand. thanks for sharing your art with all of us.