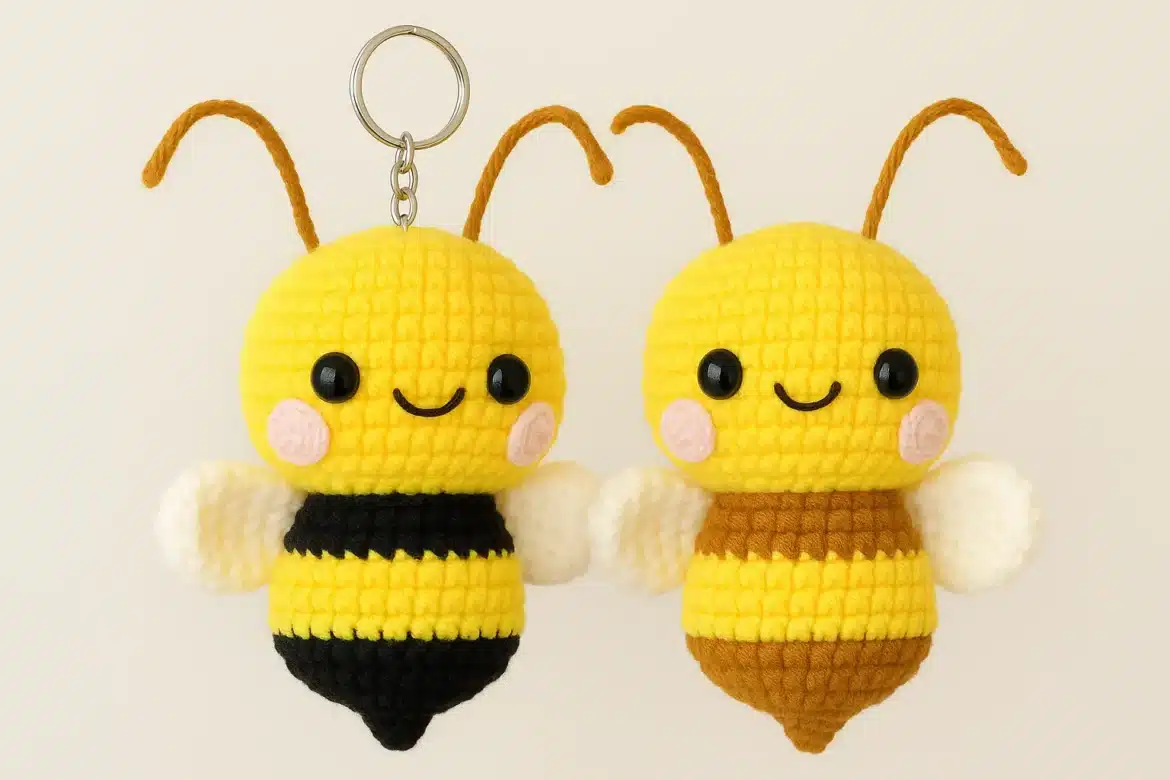
Crochet bees have become one of the most popular amigurumi projects in recent years, and it’s easy to see why! They’re cute, beginner-friendly, and quick to make. Whether you want a buzzing crochet bee keychain 🐝 for your bag or a larger plush version to cuddle, this pattern is the perfect starting point.
If you’re completely new to amigurumi, I recommend checking out our First Amigurumi Step-by-Step Guide before diving into this bee project. It explains the basics in detail, making sure you’re comfortable with stitches like the magic ring and invisible decrease, both of which you’ll use here.
Crochet bees are also fantastic stash-buster projects. With just a bit of yellow and brown yarn, you can create a cheerful little insect that makes a great gift, toy, or decoration. And if you enjoy whimsical designs, you might also love our Amigurumi Frog Keychain or the quirky Pikachu Crochet Pattern, both share the same quick, fun vibe.
✨ In this guide, you’ll get:
- A free crochet bee pattern (mini version with keychain option).
- Tips for making larger plush or giant bees.
- Fun variations like crochet bumble bee and Minecraft bee.
- Beginner tips, and FAQs.
Jump to section
Materials & Tools for Your Crochet Bee
Before you start crocheting, make sure you have the right materials on hand. This bee is a small amigurumi project, so you won’t need much yarn, but choosing the right type will make a big difference in how your bee looks and feels.
🧶 Yarn
- Yellow & Brown Yarn – Cotton or acrylic, size 2–3 mm.
- For a squishy crochet bee plush, switch to plush chenille yarn like Himalaya Dolphin Baby or Bernat Blanket.
If you’re unsure which yarn weight or hook to use, check out our Yarn Weight, Gauge & Hook Size Guide for clear advice.
🪝 Hook
- 2.0–2.5 mm for standard cotton or acrylic yarn.
- 4.0–5.0 mm if you’re using bulky/plush yarn.
✨ Beginners often struggle with tension, if your stitches are too loose or too tight, our Top 10 Amigurumi Mistakes to Avoid explains how to fix common issues.
👀 Safety Eyes
- 6–8 mm for the mini bee.
- Larger (10–12 mm) for plush or giant bees.
- For baby-safe toys, you can embroider eyes instead of using safety eyes.
🧵 Other Supplies
- Stuffing (polyfill).
- Yarn needle.
- Stitch marker (to keep track of rounds).
- Keychain ring (optional, if making a crochet bee keychain).
🛒 Crochet Bee Kits
If you prefer everything in one package, you can grab a crochet bee kit online from:
These kits usually include yarn, safety eyes, stuffing, a hook, and sometimes even a PDF pattern.
Abbreviations (US Terms)
Most amigurumi patterns (including this crochet bee) use abbreviations to keep instructions short and clear. If you’re new to reading crochet patterns, don’t worry, we’ve got a full guide on How to Read an Amigurumi Pattern that walks you through it step by step.
Here are the stitches and abbreviations you’ll see in this pattern:
- MR = Magic Ring (learn the difference between a magic ring and chain circle)
- sc = single crochet
- inc = increase (2 sc in the same stitch)
- dec = invisible decrease (check out our Invisible Decrease Crochet Tutorial)
- (x, y) × n = repeat the sequence inside brackets n times
✨ Tip for beginners: Always use a stitch marker to keep track of rounds in amigurumi. It will save you from having to count every single stitch.
Crochet Bee Pattern (Free Tutorial)
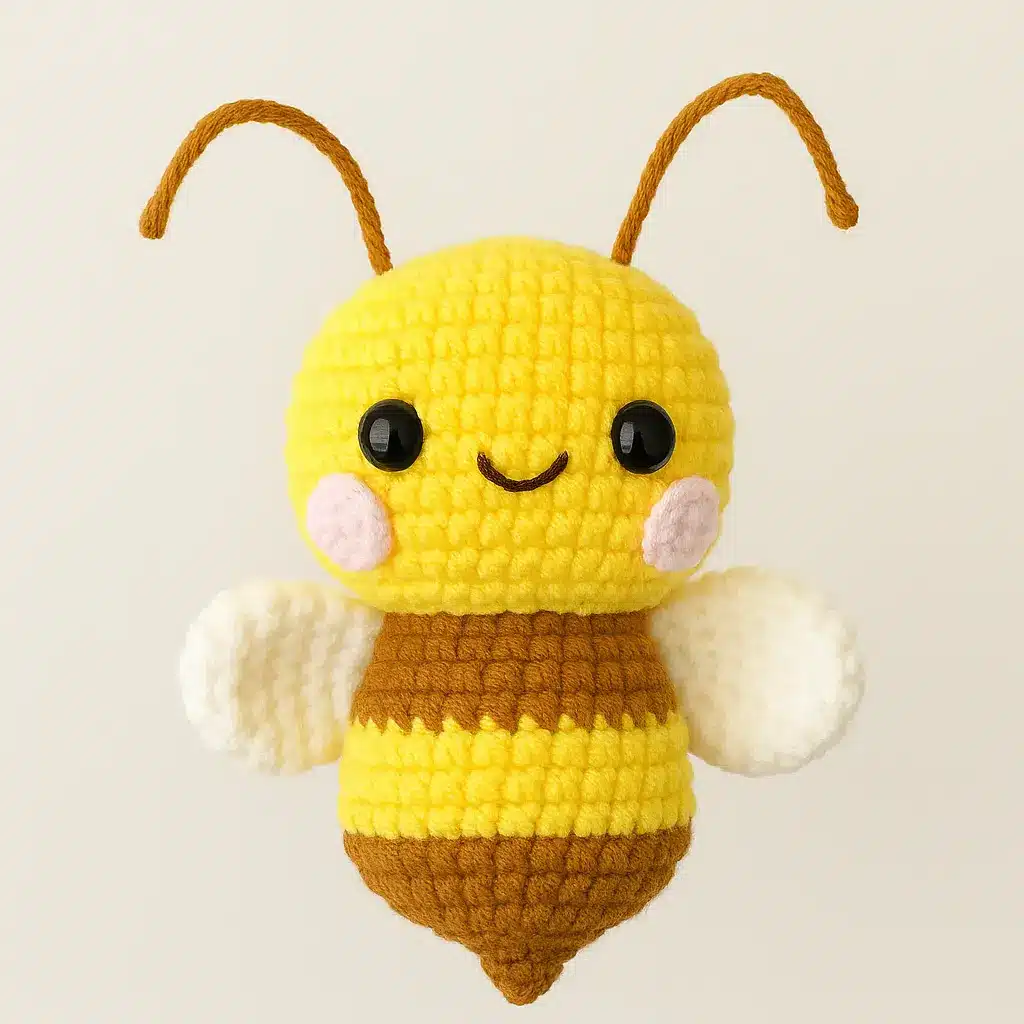
This free crochet bee pattern is designed for beginners and works up quickly. You can finish one in just a few hours, perfect for gifts, keychains, or market prep.
Before starting, make sure you know how to:
- Make a Magic Ring (to start the rounds).
- Use the Invisible Decrease (to shape the bee neatly).
- Change yarn colors cleanly, check out our guide on Changing Colors in Amigurumi to avoid messy stripes.
🟡 Head (Yellow)
- R1: MR 6 [6]
- R2: inc ×6 [12]
- R3: (sc, inc) ×6 [18]
- R4: (2sc, inc) ×6 [24]
- R5: (3sc, inc) ×6 [30]
- R6: (4sc, inc) ×6 [36]
- R7: (5sc, inc) ×6 [42]
- R8: (6sc, inc) ×6 [48]
- R9–14: 48 sc [48]
- R15: (6sc, dec) ×6 [42]
- R16: (5sc, dec) ×6 [36]
- R17: (4sc, dec) ×6 [30]
- R18: (3sc, dec) ×6 [24]
✨ Insert safety eyes between R11–12, about 6 stitches apart.
✨ Stuff firmly, fasten off, leave tail.
🟤 Body (Brown with One Yellow Stripe)
- R1 (brown): MR 3 [3]
- R2: 3 sc [3]
- R3: inc ×3 [6]
- R4: (sc, inc) ×3 [9]
- R5: (2sc, inc) ×3 [12]
- R6: (3sc, inc) ×3 [15]
- R7: (4sc, inc) ×3 [18]
- R8: (5sc, inc) ×3 [21]
- R9: (6sc, inc) ×3 [24]
- R10: (7sc, inc) ×3 [27]
- R11: (8sc, inc) ×3 [30]
- R12 (brown): 30 sc [30]
- R13–15 (yellow): 30 sc [30]
- R16–17 (brown): 30 sc [30]
- R18: (3sc, dec) ×6 [24]
- R19: 24 sc [24]
- R20 (optional for height): 24 sc [24]
✨ Stuff firmly, fasten off, leave long tail to sew to head.
🤍 Wings (Brown, make 2)
- R1: MR 6 [6]
- R2: inc ×6 [12]
- R3: (sc, inc) ×6 [18]
- R4: 18 sc [18]
- R5: (2sc, dec) ×6 [12]
- R6: 12 sc [12]
✨ Flatten, stuff lightly (or leave flat).
✨ Leave long tail to sew.
🐝 Antennae (Brown, make 2)
- Ch 12, sl st back along chain.
- Fasten off, leave tail to sew.
😊 Cheeks (Pink, make 2)
- R1: MR 8 [8]
- Fasten off, leave tail to sew under eyes.
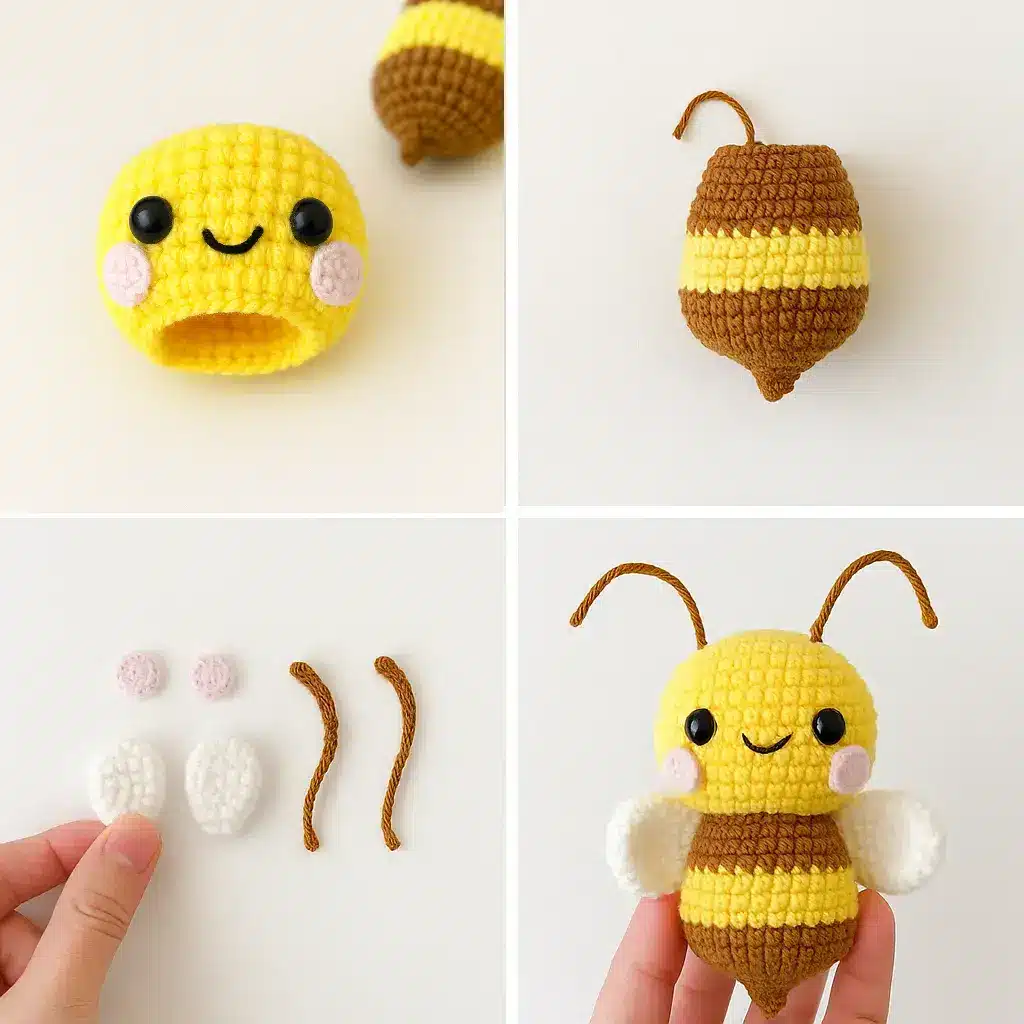
🔧 Assembly
- Sew body to head.
- Attach wings to body sides (around R15–17), slightly angled back.
- Sew antennae on top of the head.
- Add cheeks under the eyes and embroider a smile.
- Optional: attach a keychain ring to make a crochet bee keychain.
✨ Related Free Keychains You Might Like:
These make a great collection if you’re building a set of mini amigurumi keychains.
Variations of the Crochet Bee
One of the best things about crocheting bees is how versatile the design can be. With just a few color swaps or yarn changes, you can create different versions of the same bee pattern.
🐝 Crochet Bumble Bee Pattern
Swap brown yarn for black and add one or two extra yellow/black stripes, and you’ll have the classic crochet bumble bee. This version is a little more realistic but still just as adorable.
👉 If you like working with bold color contrasts, you might also enjoy the Strawberry Crochet Pattern or the fun Candy Corn Amigurumi.
🎮 Crochet Minecraft Bee
For a gamer-friendly twist, try a Minecraft bee crochet pattern. Instead of working in spirals, make a cube-shaped body with flat panels and stitch them together. Add blocky wings and square eyes to match the Minecraft style.
👉 Fans of playful or themed amigurumi might also love the Mushroom Pop-It or the quirky Labubu Crochet Pattern.
🧸 Crochet Bee Plush
If you want something bigger and cuddlier, switch to plush chenille yarn (like Himalaya Dolphin Baby or Bernat Blanket) and use a larger 4–5 mm hook. This will give you a giant crochet bee plush that’s perfect for hugging.
👉 If plush toys are your style, check out our Loaf Cat Crochet Pattern or the squishy Whale Crochet Pattern — both use soft yarn for a similar cozy effect.
🛏️ Crochet Bee Blanket
Want to go bigger? Use this bee motif as part of a bee-themed granny square blanket. Create multiple bees and join them together with simple squares for a buzzing home accessory.
👉 If you’re interested in trying other creative home-decor patterns, take a look at our Amigurumi Owl or Realistic Snake — both can be adapted into fun display pieces.
Tips & Beginner Fixes
Even though this crochet bee pattern is beginner-friendly, a few common mistakes can make your bee look less polished. Here are some troubleshooting tips to help you get it right the first time.
🎨 Tip 1: Clean Color Changes for Stripes
Switching yarn colors can sometimes leave visible jogs in your stripes. To avoid this, try the jogless stripe technique.
👉 Learn step by step in our guide on Changing Colors in Amigurumi.
🧶 Tip 2: Keep Your Stitches Tight
Loose stitches may cause stuffing to peek through your bee’s body. Use a smaller hook size if this happens, or tighten your tension slightly.
👉 More tension tips in Top 10 Amigurumi Mistakes to Avoid.
👀 Tip 3: Safety Eyes vs Embroidered Eyes
For a toy meant for children, replace safety eyes with embroidered ones. It takes a little longer but ensures your bee is baby-safe.
🧵 Tip 4: Stuff Firmly but Evenly
If you overstuff the head, it may look lumpy. Add stuffing gradually and shape it with your fingers as you go.
🌸 Tip 5: Experiment with Extras
Your bee doesn’t have to be plain yellow and brown! Add tiny flowers, a scarf, or even make a bee family in different sizes.
👉 For inspiration, see our Mini Cake Amigurumi or Macaron Crochet Pattern — both are fun add-ons to create cute amigurumi sets.
FAQs About the Crochet Bee
What is the easiest crochet bee pattern for beginners?
The mini crochet bee keychain is the simplest version. It uses only basic stitches (magic ring, single crochet, increases, decreases) and works up in a few hours.
How much yarn do I need for a crochet bee?
Less than 30 g of yellow and 30 g of brown/black is enough for the mini bee. If you’re making a crochet bee plush, you’ll need 1–2 skeins of bulky yarn (depending on size).
What size hook should I use?
Use a 2–2.5 mm hook for fine cotton/acrylic yarn, or a 4–5 mm hook for plush chenille yarn.
How do I make my bee stripes look neat?
Use the jogless stripe method when changing colors.
Can I make a bigger or smaller crochet bee?
Absolutely! Switch yarn size and hook size to scale your bee. For example:
Thin yarn + 1.8 mm hook = tiny keychain bee 🐝
Plush yarn + 5 mm hook = giant crochet bee plush 🧸
Is a crochet bee safe for babies?
Yes, but avoid safety eyes (they can be a choking hazard). Instead, embroider the eyes and mouth.
And there you have it — your very own buzzing little friend made with this crochet bee pattern 🐝. Whether you turned it into a tiny crochet bee keychain, a plush companion, or even experimented with fun variations, this project is quick, fun, and perfect for all skill levels.
✨ If you enjoyed making this, don’t forget to share your work on Pinterest, pin this pattern to your crochet board so you can come back to it anytime and inspire others to try it too!
👉 Pin this now and spread the buzz! 🐝📌

