
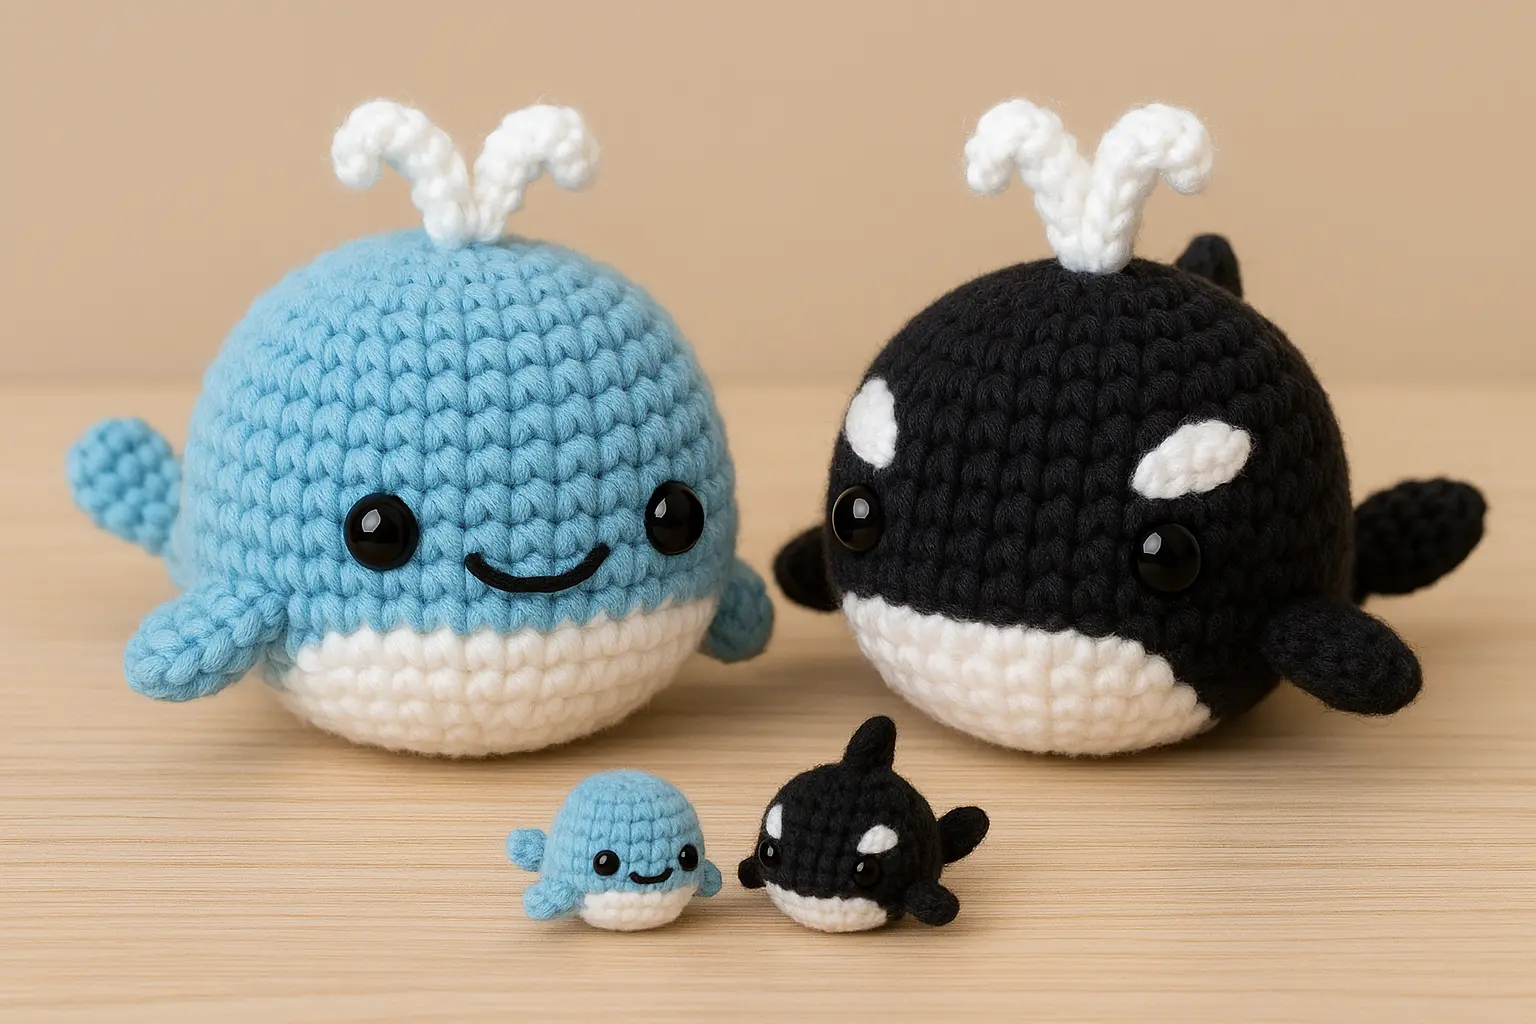
There’s something magical about holding a handmade ocean friend in your hands, especially when it’s stitched with love. I still remember my granddaughter’s eyes lighting up the moment I handed her the first little blue whale I’d crocheted. She named him “Bubbles” before I even finished weaving in the last tail. That one simple project turned into a whole pod: a classic blue whale, a fierce little orca, and even a baby mini version that now hangs from her backpack zipper. This article shares that exact whale crochet pattern, free for you to enjoy.
If you’re new to amigurumi or just looking for a fun ocean-themed project, this crochet whale pattern is as beginner-friendly as it gets. It’s a smooth, no-fuss ride from magic ring to water spout, and I’ve added all the details, plus two adorable variants: a killer whale crochet pattern and a mini whale crochet pattern. So grab your hook, your favorite yarn, and a pinch of sea-loving spirit. Let’s bring your own Bubbles to life!
Jump to section
Easy Whale Crochet Pattern Tutorial for Beginners
Whether you’re a total beginner or already hooked on amigurumi, this section walks you through how to create the classic whale body using this easy whale crochet pattern entirely free and designed to be simple but rewarding.
Useful Links
Body & Belly Instructions (Main Whale Crochet Pattern Free)
Start with the main color of your whale blue is classic, but feel free to pick lavender, grey, or even pink! You’ll use simple increases and decreases to form the rounded body. Then switch to white yarn to crochet the belly, which gives the whale its adorable, cartoonish contrast.
🧶 Materials Needed
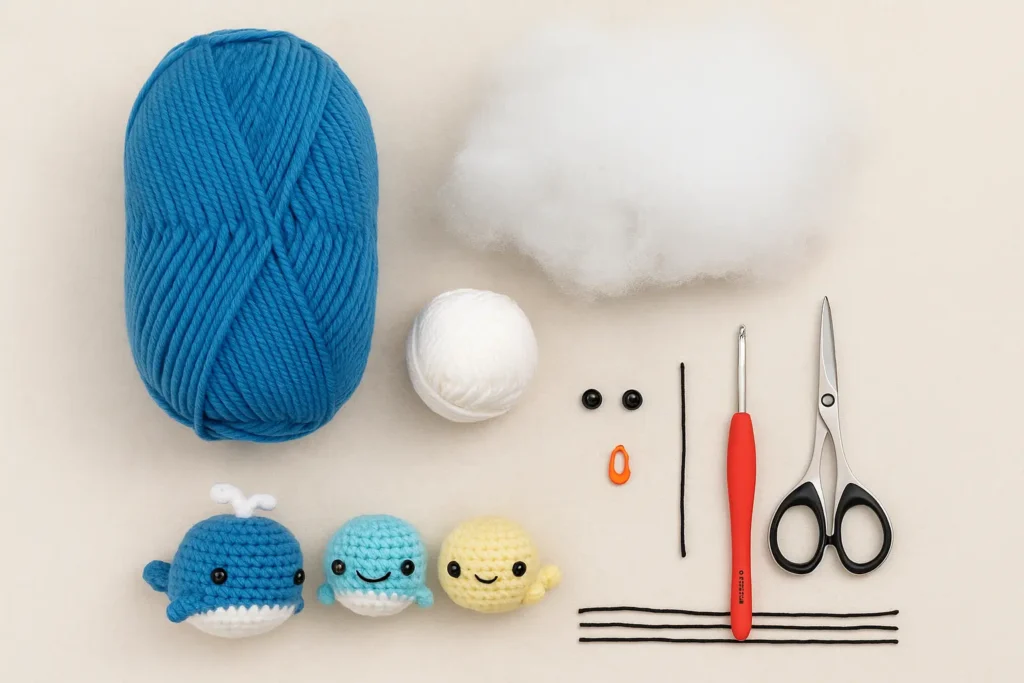
- Worsted weight yarn (blue or any color of your choice)
- White yarn for belly and water spout
- 8 mm safety eyes
- Fiberfill stuffing
- 3.5 mm crochet hook
- Yarn needle, scissors, stitch marker
- Black embroidery thread or yarn (for the smile)
Abbreviations:
- MR: magic ring
- sc: single crochet
- inc: increase (2 sc in one stitch)
- dec: decrease (single crochet 2 together)
- sl st: slip stitch
- ch: chain
Body (with Belly):
Rnd 1: 6 sc in MR. [6]
Rnd 2: Inc ×6. [12]
Rnd 3: (Sc, inc) ×6. [18]
Rnd 4: (2 sc, inc) ×6. [24]
Rnd 5: (3 sc, inc) ×6. [30]
Rnd 6: (4 sc, inc) ×6. [36]
Rnd 7: (5 sc, inc) ×6. [42]
Rnd 8–10: Sc around. [42]
Rnd 11: (5 sc, dec) ×6. [36]

Insert the safety eyes between Rounds 7 and 8, leaving approximately 9–10 stitches between them.

Change to white yarn.

Rnd 12: BLO sc around. [36]
Rnd 13: (4 sc, dec) ×6. [30]
Rnd 14: (3 sc, dec) ×6. [24]
Rnd 15: (2 sc, dec) ×6. [18]

Stuff the body firmly and shape it into a smooth, rounded whale.

Rnd 16: (Sc, dec) ×6. [12]
Rnd 17: Dec ×6. [6]

FO, close the remaining opening and hide the yarn tail.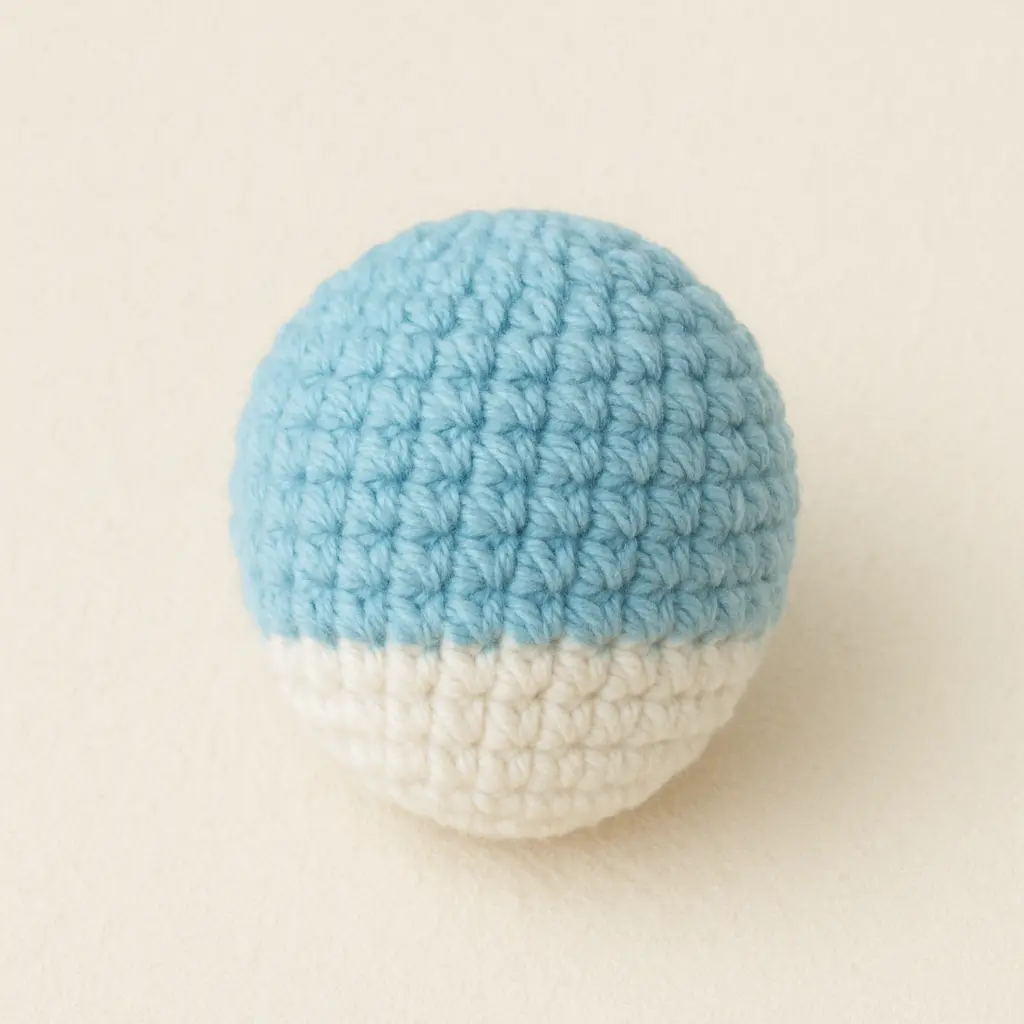
For another beginner-friendly animal like this, you might also enjoy this free crochet Labubu pattern — one of the community favorites for expressive mini plushies!
Tail & Side Fins (Whale Crochet Pattern Details)
Your whale wouldn’t be complete without its iconic tail fins and side flippers! These are worked separately, flattened, and then sewn onto the body.
Tail

Make two identical tail-lobe pieces.

Tail Lobe – Make Two

Rnd 1: 6 sc in MR. [6]
Rnd 2: (Sc, inc) ×3. [9]
Rnd 3: Sc around. [9]
Rnd 4: (2 sc, inc) ×3. [12]
Rnd 5: Sc around. [12]
Rnd 6: (2 sc, dec) ×3. [9]
Rnd 7: (Sc, dec) ×3. [6]

Do not stuff the tail lobes. Flatten them gently.

FO after completing the first lobe. Do not fasten off after completing the second lobe.

Join the Tail Lobes

Position the two tail lobes side by side.

Rnd 8: Join the two lobes and work around both openings. [12]
Rnd 9: Sc around. [12]
Rnd 10: (Sc, inc) ×6. [18]
Rnd 11: Sc around. [18]
Rnd 12: (2 sc, inc) ×6. [24]
Rnd 13: 14 sc, 6 hdc, 4 sc. [24]

FO, leaving a long yarn tail for sewing.

Lightly stuff only the joined base of the tail. Keep the two lobes flat.

Sew the tail to the center back of the whale, approximately across Body Rounds 10–12. Position it so the two lobes point upward and slightly outward.
Side Fins (Make 2):
With blue yarn:
Rnd 1: 6 sc in MR. [6]
Rnd 2: (Sc, inc) ×3. [9]
Rnd 3: (2 sc, inc) ×3. [12]
Rnd 4: Sc around. [12]
Rnd 5: (2 sc, dec) ×3. [9]
Rnd 6: (Sc, dec) ×3. [6]
FO, leaving a long yarn tail for sewing.
The fins do not need to be stuffed. Flatten each fin and sew them symmetrically to the sides of the body around Rounds 10–12.
Finishing Tip: Use a yarn needle to sew carefully and securely, especially if this will be gifted to a child!
If you love this whale crochet pattern, don’t miss the cuddly amigurumi bunny free pattern it’s perfect for springtime and baby gifts.
Coming up next: we’ll dive into how to adapt this same pattern into a stunning killer whale crochet pattern, complete with black-and-white stripes and orca-style fins.
Killer Whale Crochet Pattern (Orca Version)
Now let’s turn your friendly little whale into a majestic orca! The killer whale version is just as simple as the base whale crochet pattern, with a few key color and placement tweaks that completely transform the look. You’ll use bold black and white yarn to mimic the signature orca markings, and adjust the placement of a few pieces, but the stitches remain exactly the same. That’s the beauty of amigurumi: one base, endless possibilities!
My grandson calls this version “Captain Chomp,” and insists it guards the bathtub during every bubble bath.
Adapting Colors & Body Stripes for an Orca Look
The most important change for this killer whale crochet pattern is the yarn color. You’ll need black yarn for the body, white yarn for the belly and spots, and optionally a small amount of grey for contrast if you want a more realistic look.
Materials for Orca Whale:
- Black yarn for the body, tail and fins
- White yarn for the belly, eye patches and water spout
- Grey yarn for optional decorative details
- 3.5 mm crochet hook, or the same hook used for the original whale
- Safety eyes
- Fiberfill stuffing
- Yarn needle
- Stitch marker
- Scissors
Use the same hook size throughout the project. Using a larger hook for the fins or tail may create visible gaps and make the pieces look out of proportion.
Orca Body Colors
Follow the smaller 17-round body pattern exactly as written.
Work Rounds 1–11 in black yarn.
Simple Belly Option
For the easiest version, change completely to white yarn at Round 12:
- Rounds 1–11: Black
- Rounds 12–17: White
This creates a clear two-color body with a black upper section and a white lower section.
Contoured Orca Belly Option
For a belly shape closer to the orca in the reference image, add black stitches at both sides during only the first three belly rounds: Rounds 12–14.
The remaining belly rounds, Rounds 15–17, are worked completely in white.
| Round | Black side | White center | Black side |
|---|---|---|---|
| Rnd 12 [36] | 9 sts | 18 sts | 9 sts |
| Rnd 13 [30] | 8 sts | 14 sts | 8 sts |
| Rnd 14 [24] | 6 sts | 12 sts | 6 sts |
Continue following the original decrease instructions while changing colors according to the stitch distribution above:
Rnd 12: BLO sc around, working 9 stitches in black, 18 stitches in white and 9 stitches in black. [36]
Rnd 13: Follow (4 sc, dec) ×6, working the first 8 completed stitches in black, the following 14 stitches in white and the final 8 stitches in black. [30]
Rnd 14: Follow (3 sc, dec) ×6, working the first 6 completed stitches in black, the following 12 stitches in white and the final 6 stitches in black. [24]
Continue entirely in white:
Rnd 15: (2 sc, dec) ×6. [18]
Rnd 16: (Sc, dec) ×6. [12]
Rnd 17: Dec ×6. [6]
Count each completed decrease as one stitch when following the color placement. Work the complete decrease in one color rather than changing yarn halfway through it.
Change colors during the final yarn-over of the stitch before the new color. Keep the white section centered underneath the body so the black stitches remain visible along both sides. Adjust the starting position slightly when necessary to keep the belly symmetrical.
📌 Orca Eye Spots:
After adding the safety eyes between R7 and R8, stitch a small white oval just behind each eye using white yarn. These mimic the dramatic white spots on real orcas and give your amigurumi whale some fierce personality.
You can also embroider a little eyebrow or angry arc above each eye using grey or black thread if you want an extra expressive touch, just like we did on our angry duck keychain!
Orca Tail and Side Fins
Crochet the tail and both side fins using black yarn. Follow the same tail and fin patterns used for the base whale.
Do not enlarge these pieces or change hook sizes. The adapted tail and fins are already proportioned to match the smaller 17-round body.
Sew the side fins around Body Rounds 9–11, placing them slightly behind and below the eyes. Angle the tips toward the back.
Sew the tail securely to the center back of the body around Rounds 10–12.
Optional Dorsal Fin Pattern:
Rnd 1: 4 sc in MR. [4]
Rnd 2: (Sc, inc) ×2. [6]
Rnd 3: (2 sc, inc) ×2. [8]
Rnd 4: (3 sc, inc) ×2. [10]
Rnd 5: Sc around. [10]
FO, leaving a long yarn tail for sewing.

Do not stuff the dorsal fin. Flatten the opening and sew it vertically along the center top of the body, approximately across Rounds 9–11. Make sure it stands upright and points slightly toward the back.
Water Spout: Make Two
Use white yarn.
Rnd 1: 4 sc in MR. [4]
Rnd 2: Inc ×4. [8]
Rnd 3–4: Sc around. [8]
Rnd 5: (2 sc, dec) ×2. [6]
Rnd 6: Sc around. [6]
Rnd 7: (Sc, dec) ×2. [4]
FO, leaving a long yarn tail for sewing. Add a very small amount of stuffing to give each piece a soft, rounded teardrop shape, but do not overstuff.
More Free Amigurumi Patterns You’ll Love
Place the two pieces side by side with their narrow ends together. Angle the rounded tips outward, sew the bases together, and attach the spout securely to the center top of the whale’s head.
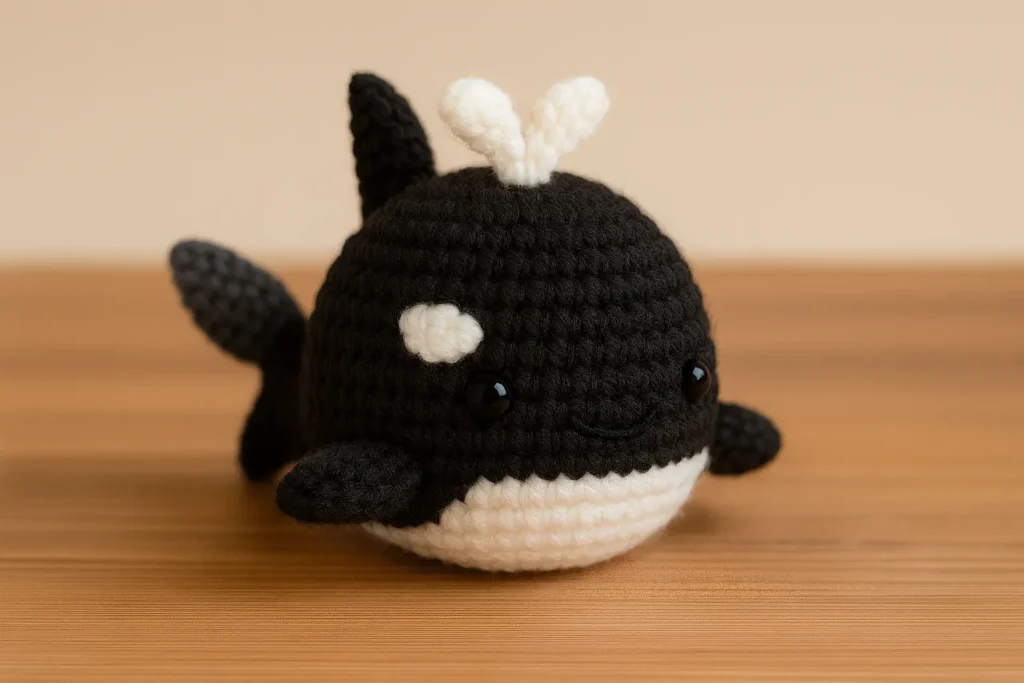
This finishes off your orca whale crochet pattern. Now you’ve got a bold, sea-worthy orca that’s both playful and fierce. It makes a standout gift for kids who love marine life or animal-inspired toys.
In the next part, we’ll shrink things down and show you how to turn this design into a mini whale crochet pattern perfect for keychains, zipper pulls, or quick craft fair makes.
Mini Whale Crochet Pattern – Tiny Adorable Version
Sometimes the tiniest stitches bring the biggest smiles. This mini whale crochet pattern was born out of leftover yarn and a last-minute birthday favor idea. I needed something quick but adorable, and this pocket-sized version delivered! Whether you’re crocheting for markets, school gifts, or just want a cute keychain companion, this scaled-down whale works up in under an hour.
If you’ve already made the full-sized version from Part 1, you’ll find this version super familiar, just with a few tweaks in yarn, hook, and round count. But don’t let the size fool you, it’s every bit as cute and satisfying to finish.
Scaling Down the Pattern & Hook/Yarn Choices
To create the mini whale crochet pattern, all you need to do is adjust your materials. The pattern remains the same, but you’ll work fewer rounds and use a finer hook and yarn combo. If you’re unsure about yarn types, the Craft Yarn Council’s yarn weight system is a helpful guide to match your yarn size to hook type.
Mini Whale Materials:
- DK weight cotton yarn (like YarnArt Jeans or Alize Cotton Gold)
- 2.5 mm crochet hook
- 6 mm safety eyes
- Fiberfill stuffing
- Tapestry needle, stitch marker, scissors
- Optional: Keychain ring
Adjustments to Pattern:
Body (Mini Version)
Begin with blue yarn. Work in continuous rounds and stuff as you go.

Rnd 1: 6 sc in MR. [6]
Rnd 2: Inc ×6. [12]
Rnd 3: (Sc, inc) ×6. [18]
Rnd 4: (2 sc, inc) ×6. [24]
Rnd 5: (3 sc, inc) ×6. [30]
Rnd 6–7: Sc around. [30]
Rnd 8: (3 sc, dec) ×6. [24]

Insert the safety eyes between Rounds 6 and 7, leaving approximately 6–7 stitches between them.

Change to white yarn.

Rnd 9: BLO sc around. [24]
Rnd 10: (2 sc, dec) ×6. [18]
Rnd 11: (Sc, dec) ×6. [12]

Stuff the body firmly, adding small amounts of fiberfill at a time. Shape it into a smooth, rounded oval.

Rnd 12: Dec ×6. [6]

FO, close the remaining opening and hide the yarn tail.
Tail + Side Fins:
Mini Tail

Use blue yarn.

Tail Lobes — Make Two

Rnd 1: 4 sc in MR. [4]
Rnd 2: Inc ×4. [8]
Rnd 3: Sc around. [8]
Rnd 4: (2 sc, dec) ×2. [6]

Do not stuff. Flatten each tail lobe gently.

FO after completing the first lobe. Do not fasten off after completing the second lobe.

Join the Tail Lobes

Place the two lobes next to each other.

Rnd 5: Join the first lobe and work around the openings of both pieces. [12]
Rnd 6: Sc around. [12]

FO, leaving a long yarn tail for sewing.

Do not stuff the tail. Flatten the joined section and sew any small gap between the two lobes closed.

Sew the tail to the center back of the whale around Body Rounds 7–9. Position the lobes so they point upward and slightly outward.

Mini Side Fins — Make Two

Use blue yarn.

Rnd 1: 4 sc in MR. [4]
Rnd 2: (Sc, inc) ×2. [6]
Rnd 3: (2 sc, inc) ×2. [8]
Rnd 4: Sc around. [8]
Rnd 5: (2 sc, dec) ×2. [6]

FO, leaving a long yarn tail for sewing.

Do not stuff the fins. Flatten each fin and sew through both layers to close the opening.

Sew the fins symmetrically to the sides of the body around Rounds 7–8, slightly behind and below the eyes. Angle the tips gently toward the back.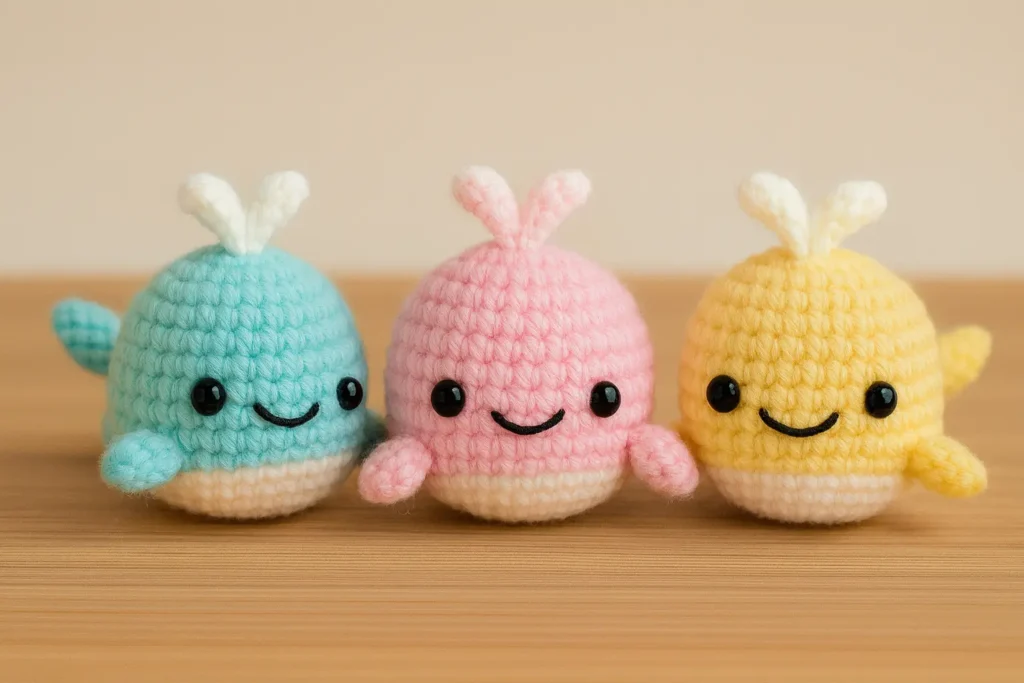
You can even attach a small chain loop at the top of the whale’s head to turn it into a cute keyring or zipper charm — I’ve made dozens for teachers and friends this way!
For another adorable mini project, check out the mini owl keychain amigurumi pattern it’s just as small and twice as wise!
Quick Assembly & Finishing Touches on Mini Version
Because the mini whale is worked tightly and quickly, finishing is easy:
- Inserting safety eyes before the final decrease placement is key to cuteness.
- Stuff lightly so it holds its shape but doesn’t bulge.
- Use the smallest yarn tails possible for sewing fins so the proportions stay neat.
📌 Finishing Tip: After sewing on all pieces, roll the whale gently between your palms to shape it. This makes a big difference in how polished the final plush looks.
Looking for more beginner-friendly quick projects like this mini whale crochet pattern? Try the easy amigurumi Molly octopus it’s no-sew and perfect for last-minute gifts.
Next up, we’ll troubleshoot common crochet whale issues and explore more fun pattern variations, such as fuzzy yarns, self-striping looks, and jumbo pillow-size whales!
Tips, Variations & Troubleshooting for Your Whale Crochet Pattern
By now, you’ve likely got one (or a whole pod!) of adorable whales sitting beside you maybe even an orca or mini version too. But what if you want to tweak the design a little? Or maybe your whale turned out a bit…lopsided? Don’t worry. This part dives into easy ways to modify your whale crochet pattern, troubleshoot common snags, and make each project feel uniquely yours.
I’ve learned most of these tips the hard way, like realizing too late that I’d stuffed one whale’s face unevenly and gave him a permanent side-eye expression. So here’s everything I wish I knew when I started crocheting these sea cuties using this exact whale crochet pattern.
Variations in Size, Yarn & Hook Tension
A great crochet whale pattern can be adapted endlessly with just small changes in material and technique. Here’s how to play around:
🧵 Try Plush Yarn for Chunky Whales:
Switch to a plush yarn like Himalaya Dolphin Baby or Premier Parfait Chunky and a 5.5–6.0 mm hook to make a cuddly, jumbo version of your whale. You may need to reduce your stitch count slightly to prevent the shape from warping, but the end result is ultra huggable. This version of the whale crochet pattern works especially well for nursery decor or snuggle buddies.
🎨 Use Variegated or Gradient Yarn:
Want a watercolor-style finish? Use self-striping or gradient yarns to add natural-looking ocean tones to your whale crochet pattern without having to switch colors manually.
🧶 Adjust Hook Size for Tightness:
If your whale is turning out too holey or too stiff, it’s probably a tension issue. Go down a hook size for tighter stitches (especially for mini whales) or up a size if it feels too dense. This small tweak can transform your final piece especially when working through this free whale crochet pattern step-by-step.
🪡 Bonus Tip: You can easily turn this pattern into a small crochet ornament by using thread yarn and a 1.25 mm hook, perfect for holiday or nursery decor.
Troubleshooting Common Crochet Issues
Here’s how to solve the most common bumps in the sea when following your whale crochet pattern:
❌ Issue 1: Whale Looks Uneven or Lumpy
🧵 Fix: Stuff slowly and shape as you go — don’t just cram filling at the end. Use your fingers or a chopstick to press stuffing evenly toward the tail.
❌ Issue 2: Eyes Too Far Apart or Off Center
🧵 Fix: Always count your rounds carefully (usually R8–R9) and use stitch markers before inserting safety eyes. If you’re unsure, use pins to test placement first.
❌ Issue 3: Fins Not Symmetrical
🧵 Fix: Make sure you’re counting stitches after flattening your fin. If one is bigger, redo the last row or trim yarn carefully to keep the shape clean before attaching.
❌ Issue 4: Water Spout Falls Over
🧵 Fix: Stiffen it by brushing a thin layer of fabric glue or diluted Mod Podge over the chains. Let dry flat before sewing to the top.
💡 Did you know? You can also embroider closed eyes, blush, or even heart cheeks for a personalized touch.
One last tip? Always trust the process. The first time you try a whale crochet pattern, it may feel like a tangle of yarn and mystery rounds, but the second time? It becomes muscle memory. And the third time? You’ll be adjusting fins, scaling sizes, and creating an entire family of whales that are uniquely yours.
FAQs About Whale Crochet Patterns
What is the best yarn weight for a whale crochet pattern free project?
Worsted weight yarn (like medium 4) is ideal for most whale crochet patterns. It gives structure without being too bulky, making it beginner-friendly. For smaller whales or keychains, DK cotton yarn works great.
How do I adjust this crochet whale free pattern to make a mini whale?
Simply switch to a finer yarn (like DK or sport weight) and a smaller hook (2.5 mm). Reduce the number of rounds in the body to keep the shape compact. Check out our full guide in Part 3 of this mini whale crochet pattern for a step-by-step.
Can I turn this whale crochet pattern into a killer whale (orca)?
Absolutely! To transform the base whale crochet pattern into an orca, use black yarn for the body and white yarn for the belly and eye spots. You can also add a vertical dorsal fin for that classic orca look — check Part 2 for the full killer whale crochet pattern.
How do I attach safety eyes and the water spout properly?
Place safety eyes between R8 and R9 before closing the body. For the water spout, sew the chains between the eyes using a yarn needle and secure with tight stitches from the inside. This method works across all variations of the whale crochet pattern.
Your New Favorite Ocean Amigurumi Friend
Whether you made the full-size whale, the fierce orca, or the pocket-sized mini, this whale crochet pattern is one of those cozy projects that brings pure joy both to stitch and to gift. The simple shaping, the expressive fins, and that cheeky little spout on top… it all comes together into a handmade sea friend that’s soft, sweet, and full of personality.
So don’t stop at one! Try different colors, yarn textures, or even jumbo sizes for pillows. Your whale pod is just getting started.
💬 Loved this pattern? Try the Loaf Cat Crochet Pattern Free next it’s quick, quirky, and just as beginner-friendly.
🧵 Happy stitching, ocean friend! And don’t forget to tag @TopAmigurumi on Pinterest when you share your finished whales!
📌 Don’t forget to pin this whale crochet pattern free to your board for later!
Whether you’re making the mini whale, the orca whale crochet pattern, or the classic version, it’s always nice to have it handy when inspiration strikes.

1 comment
Me fascinan tus amigurumis y tus explicaciones son excelentes gracias por compartir