


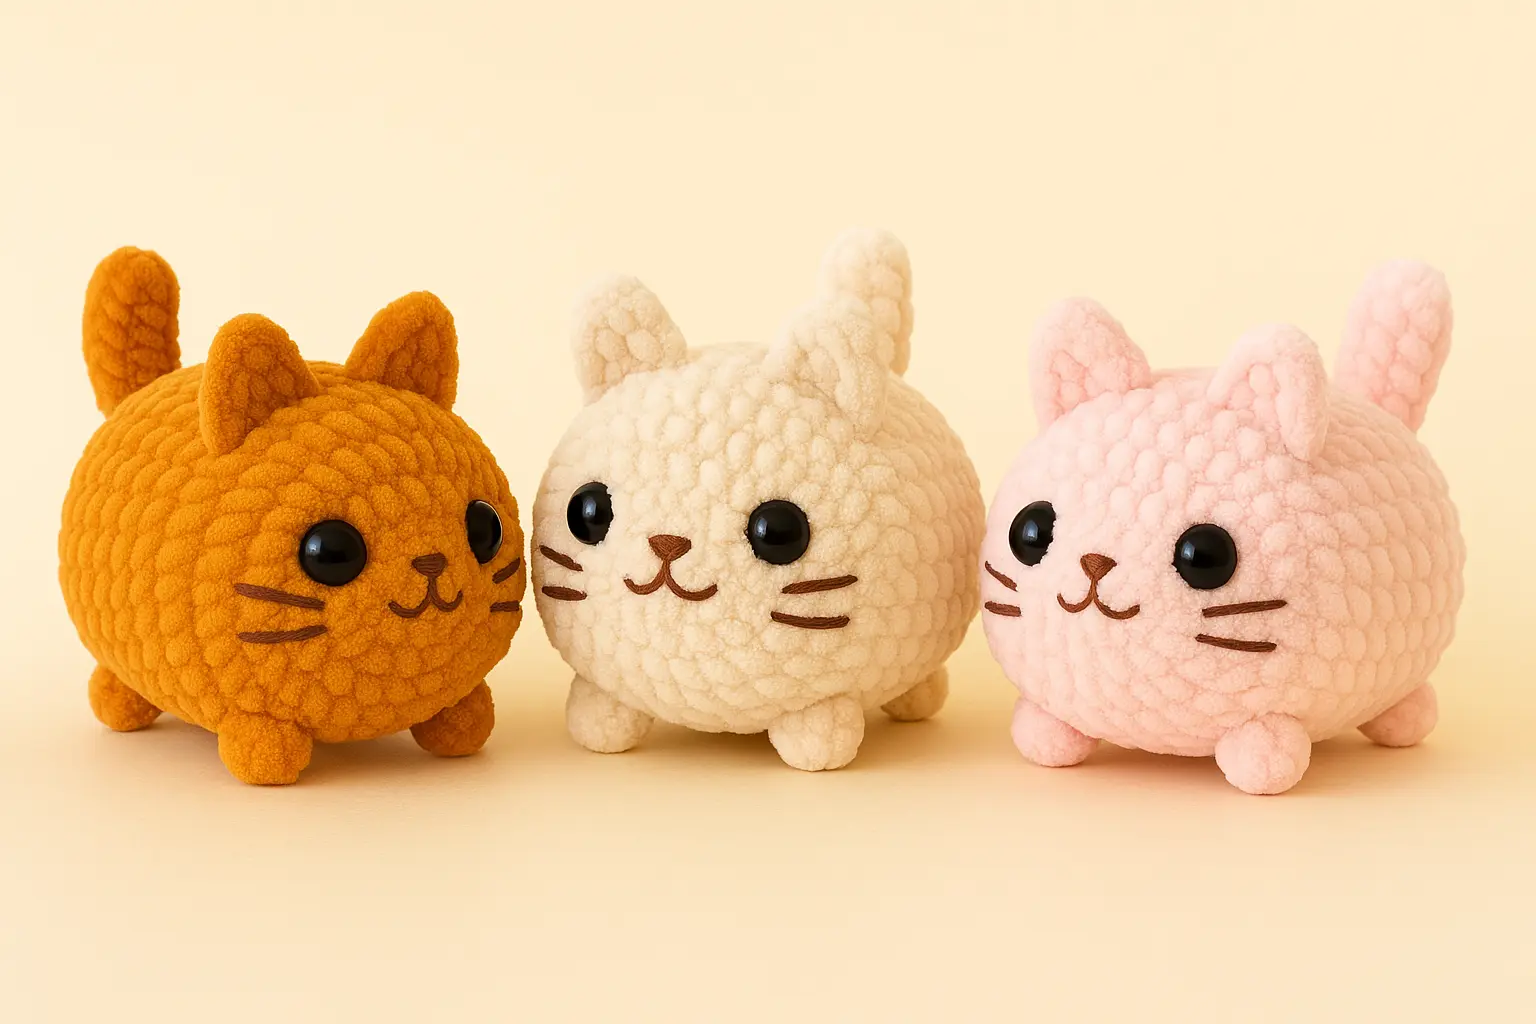
There’s just something about a cat curled up in a perfect loaf shape that makes you melt inside. I still remember the moment I finished stitching my first loaf cat crochet pattern. It sat on my windowsill for weeks, looking too snug and smug to move, and honestly, it still does. The best part? This chunky little feline was fast, fun, and full of character.
Whether you’re here because you spotted it on Pinterest or stumbled across a Ravelry loaf cat crochet pattern group chat (you’re not alone!), you’re in for a real treat. In today’s pattern, I’m going to show you how to crochet your own loaf cat plushie step by step, using soft plush yarn, simple stitches, and cozy colors.
This loaf cat crochet pattern is especially perfect for gifting, relaxing weekend projects, or decorating a cozy reading nook. I’ll walk you through the body, feet, ears, tail, and embroidery, so your mini loaf kitty turns out just right. Let’s jump in, yarn in hand, heart full!
Jump To a Section
Why I Fell in Love with the Loaf Cat Crochet Pattern
The first time I saw a “cat loaf” wasn’t in a pattern book, it was my neighbor’s actual cat, sitting on their porch like a perfectly baked bun. Paws tucked in, tail hidden, eyes half-closed like it ruled the world. According to PetMD, cats loaf like this when they feel completely safe and relaxed, and that’s exactly the vibe I wanted to crochet. So I grabbed my Premier Parfait Chunky in burnt orange, reached for my 6.0 mm hook, and got to work.
What followed was one of the most relaxing projects I’ve ever done. No complex shaping, no endless sewing. Just a squishy little loaf that made my grandkids giggle and my Instagram blow up. The body comes together quickly, and the face embroidery gives it so much personality. It’s the kind of pattern that feels cozy from start to finish, a true yarn hug.
If you’ve already tried softies like my Amigurumi labubu keychain or the silly Amigurumi Duck Pattern Free, this loaf cat will feel like the next natural step.
What Makes This Pattern Beginner-Friendly and Irresistibly Cute
This loaf cat crochet pattern free of charge is designed with simplicity in mind. It uses continuous rounds, single crochet stitches, and basic shaping. You won’t need to deal with complicated limbs or tricky joints. The only sewing involved is attaching the feet, ears, and tail, and I’ve included my personal placement tips below to help you get it just right.
Plus, plush yarn hides a multitude of sins. If your stitch count goes off by one, no one will ever notice. The final size is about 10–12 cm tall, and you can easily downsize it to make a mini loaf cat crochet pattern version by using DK yarn and a 3.0 mm hook. More on that in the next Part!
Want to gift it? Add a tiny ribbon or embroider a heart. Need a simple weekend project? This one fits the bill without overwhelming your hook hand.
Next up, let’s walk through the Step-by-Step Pattern. Grab your orange yarn and let’s get crocheting.
How to Crochet Your Loaf Cat (Step-by-Step Pattern)
Follow this simple step-by-step loaf cat crochet pattern to bring your plushie to life.
🧶 How to Crochet a Loaf Cat Step-by-Step
This contains the following 7 steps (and you’ve done them perfectly):
1. Gather Your Materials
2. Crochet the Body
3. Make and Attach the Feet
4. Make and Attach the Ears
5. Make and Attach the Tail
6. Add the Face Embroidery
7. Finish and Flaunt It!
~2.5–3 hours
Gather Your Materials

You’ll need:
– Premier Parfait Chunky yarn (Burnt Orange)
– 6.0 mm crochet hook
– 12 mm black safety eyes
– Brown yarn for embroidery
– Fiberfill stuffing
– Stitch marker, scissors, yarn needle
🧵 Tip: Plush yarns like Parfait Chunky or Himalaya Dolphin Baby are best for that cozy loaf feel.
Crochet the Body
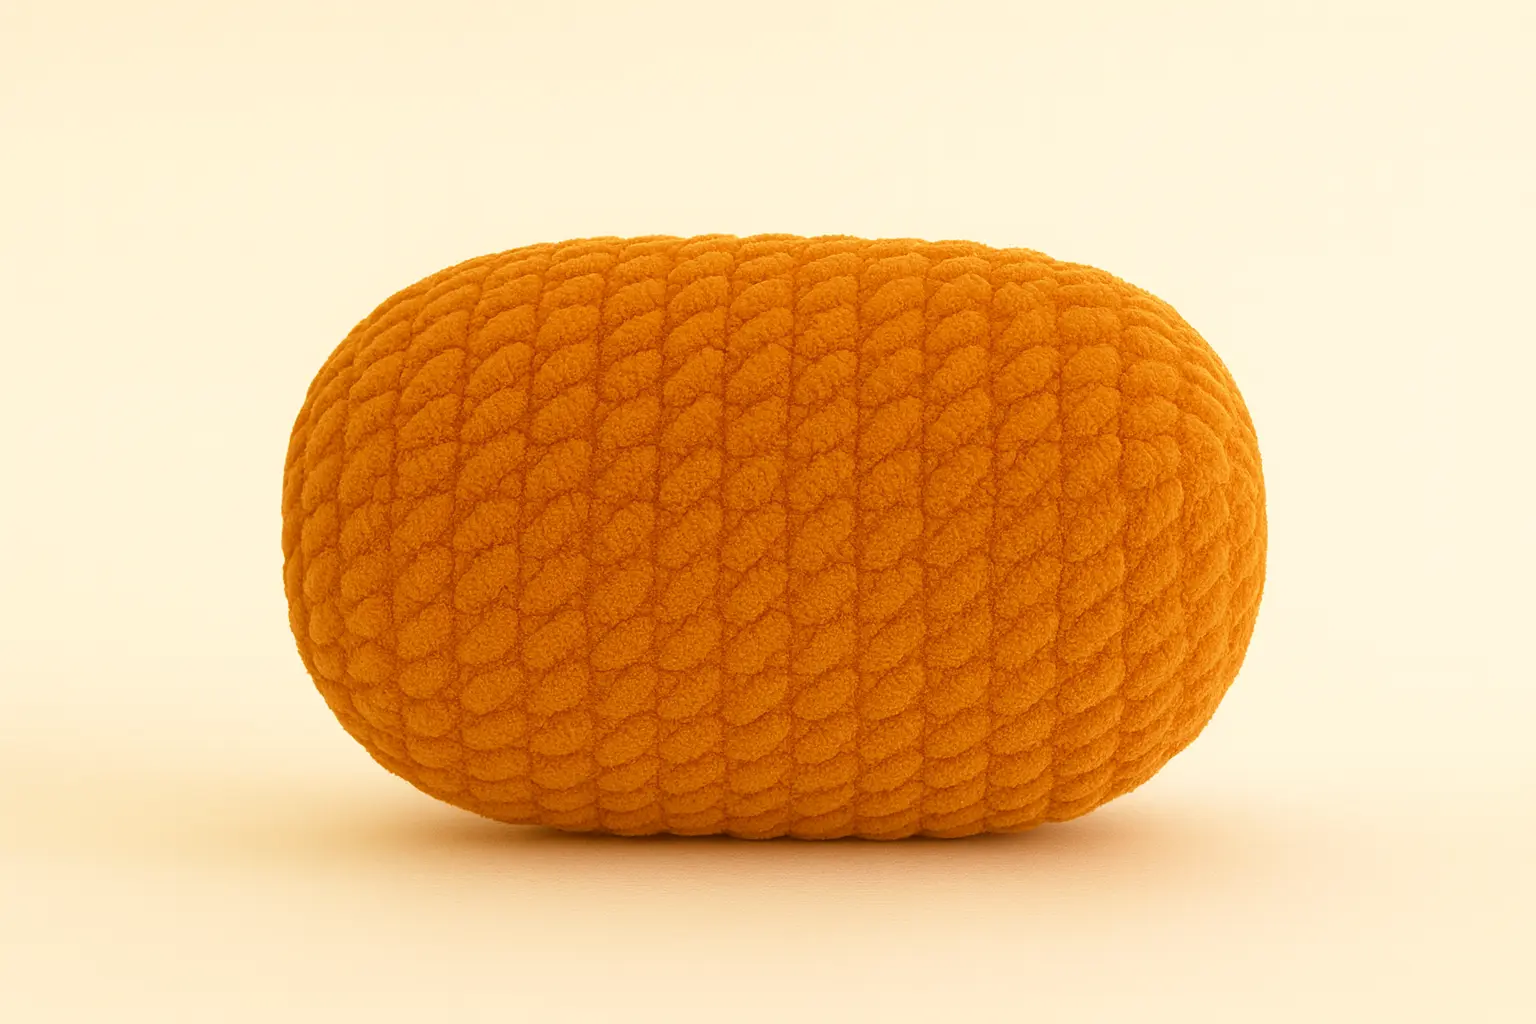
Worked in continuous rounds.
Use orange plush yarn.R1. MR, 6 sc [6]
R2. inc ×6 [12]
R3. (sc, inc) ×6 [18]
R4. (2 sc, inc) ×6 [24]
R5. (3 sc, inc) ×6 [30]
R6–14. sc in each st [30]
R15. (3 sc, dec) ×6 [24]
Insert eyes between R4–5, 7 stitches apart
Embroider nose, mouth, and whiskers
R16. (2 sc, dec) ×6 [18]
R17. (sc, dec) ×6 [12]
Stuff firmly
R18. dec ×6 [6]
Fasten off, weave to close
Make and Attach the Feet
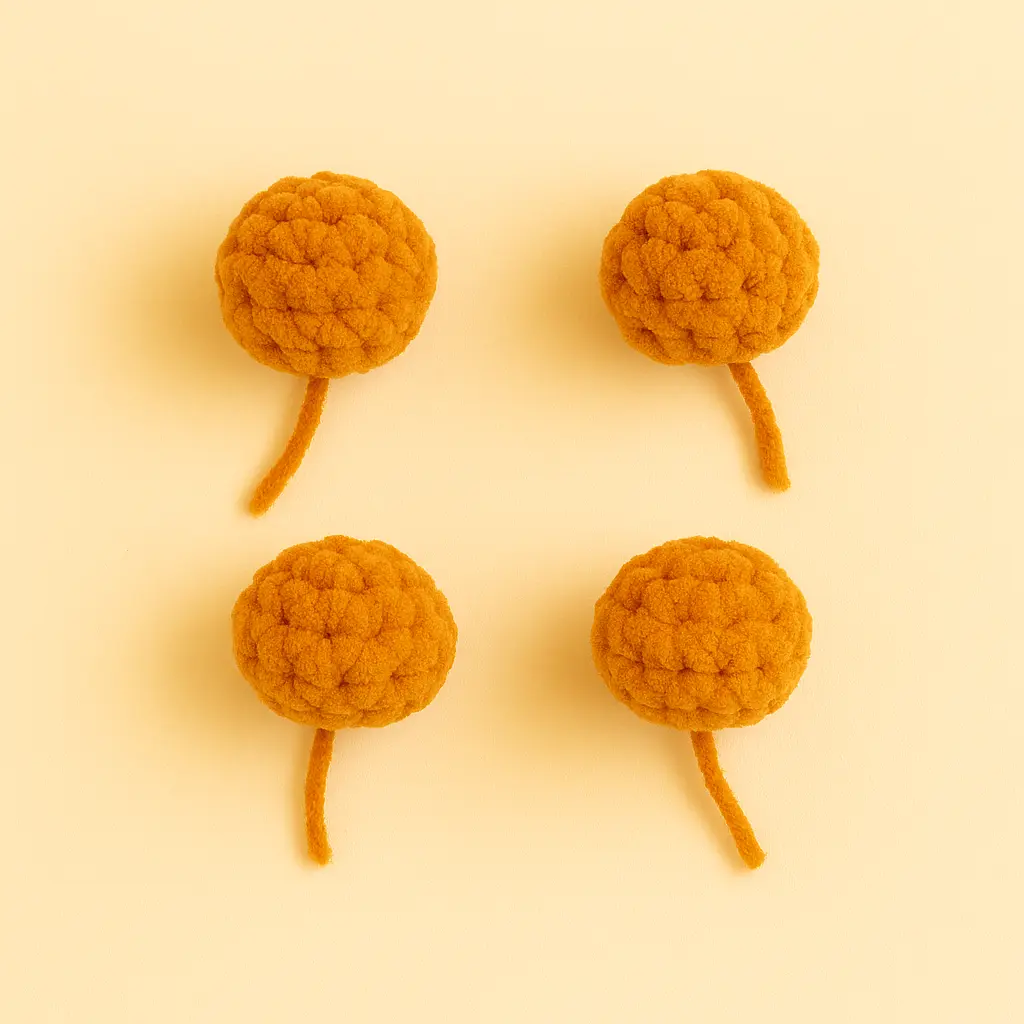
Create 4 feet:
R1. MR, 6 sc [6]
R2. sc around [6]
Fasten off, leave long tail
Sew under each corner of the loaf cat body.
Make and Attach the Ears
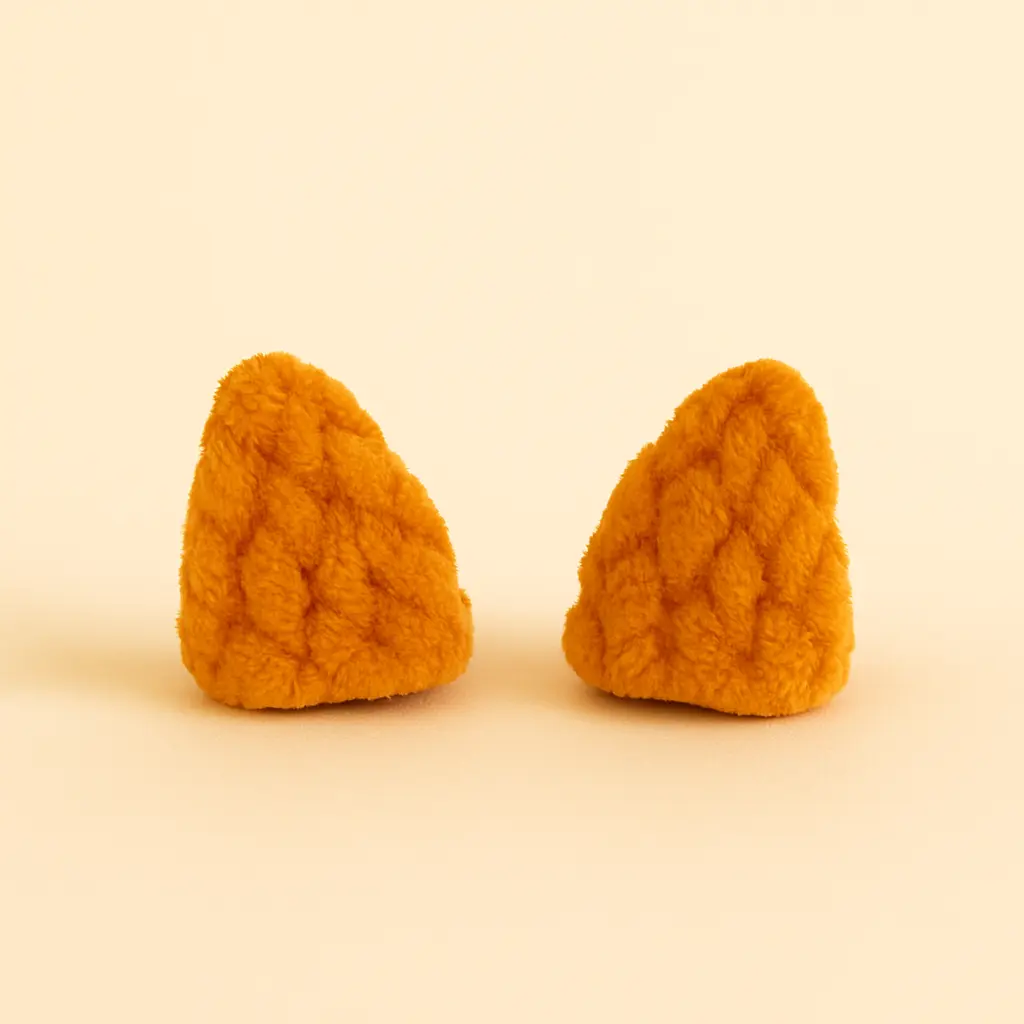
Create 2 ears:
R1. MR, 4 sc [4] R2. (sc, inc) ×2 [6] R3. sc around [6]
Sew them on top of the head, symmetrically.
Make and Attach the Tail
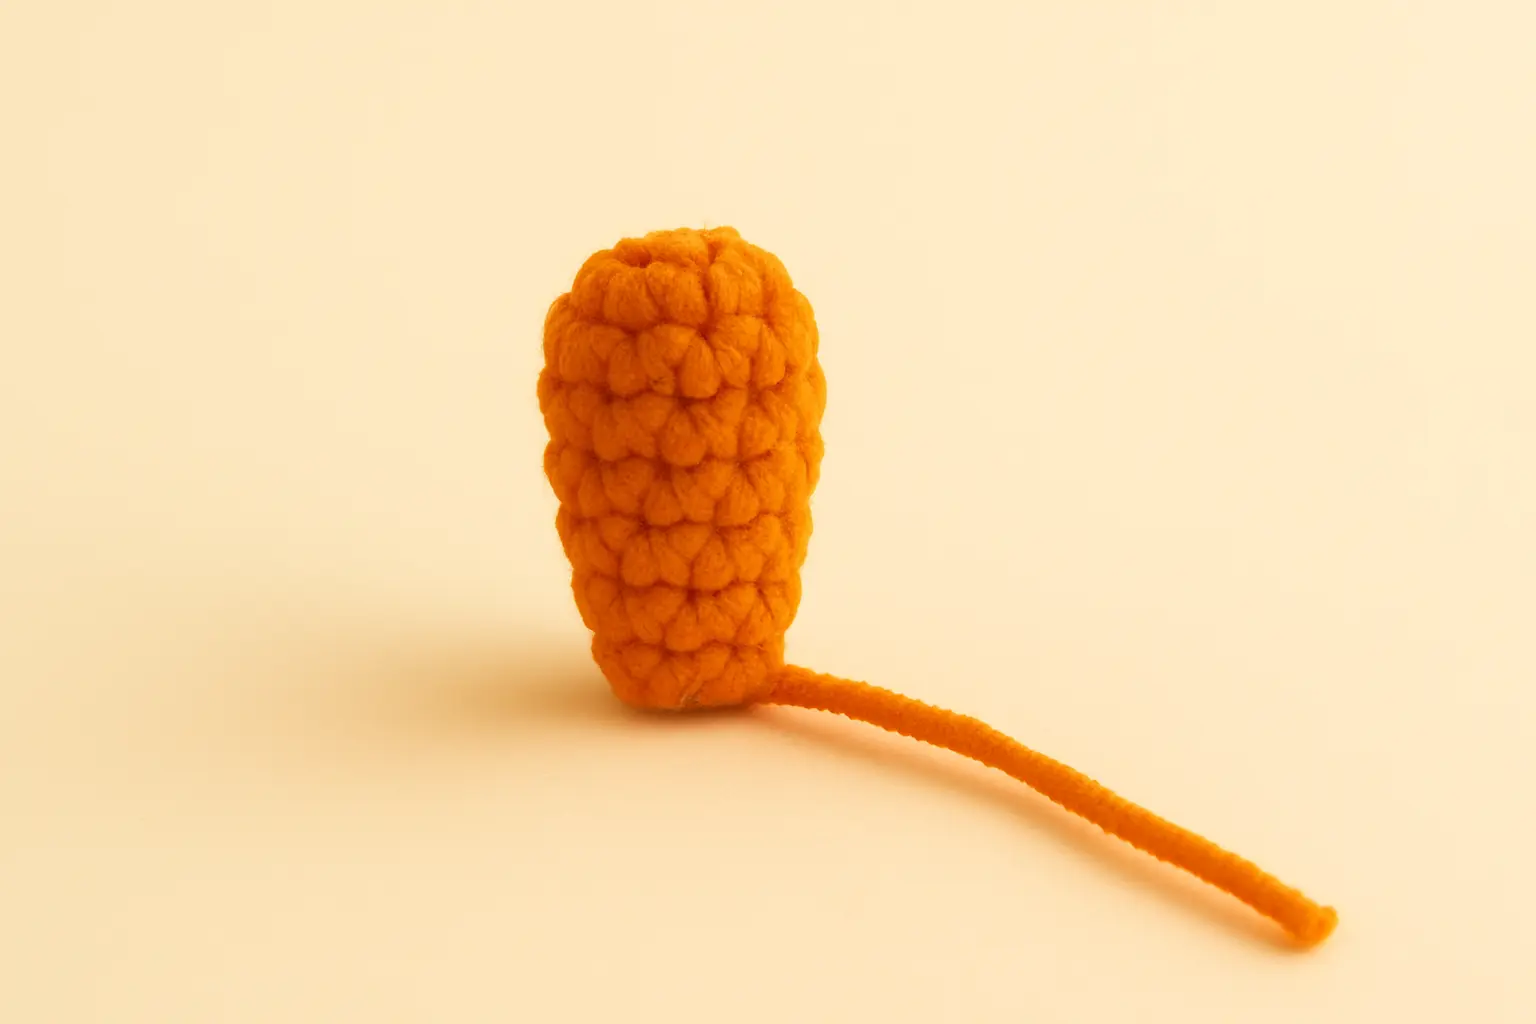
Work in spiral:
R1. MR, 6 sc [6] R2–6. sc around [6] Lightly stuff or leave unstuffed
Sew upright on the back center of the body.
Add the Face Embroidery
– Nose: small brown triangle
– Mouth: curved smile under the nose
– Whiskers: 2 lines on each cheek
– Optional: Add blush with pink yarn or felt
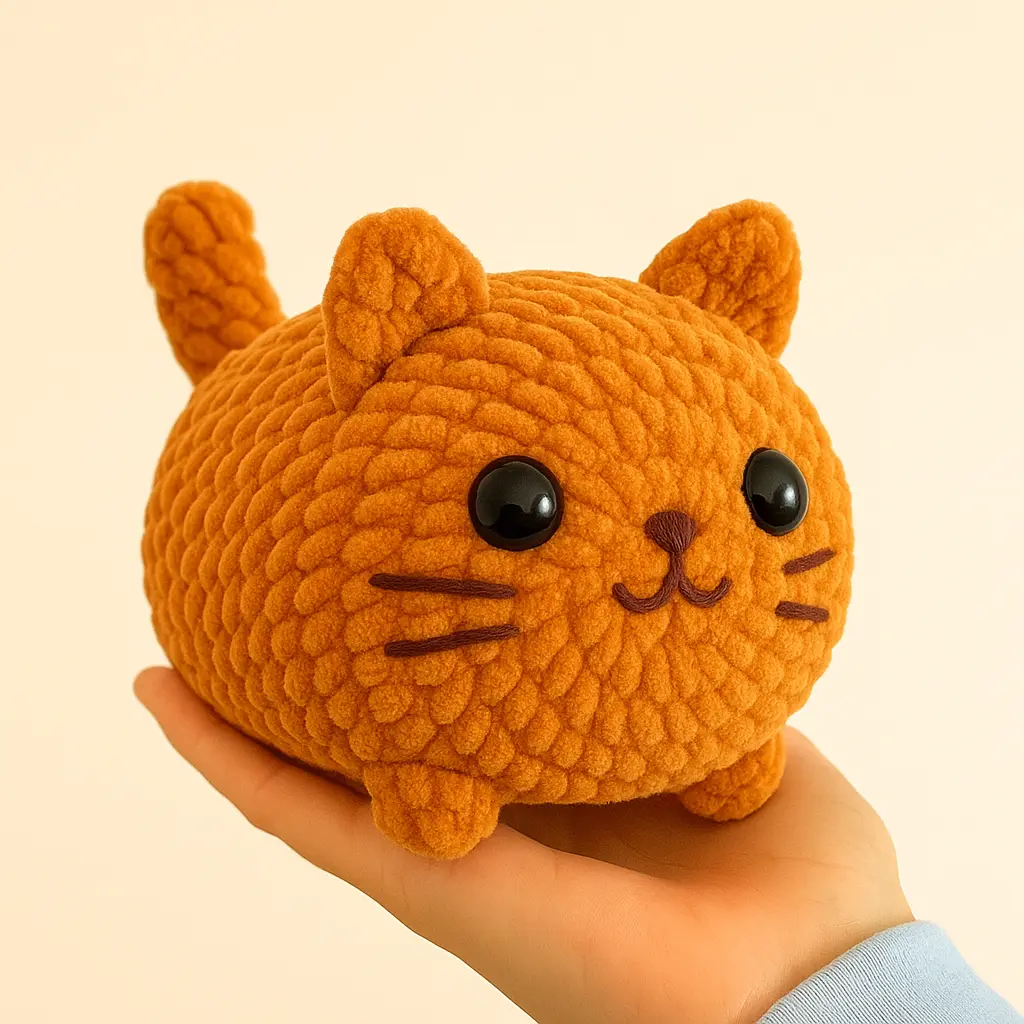
Finish and Flaunt It!
You did it! Your loaf cat crochet plushie is complete. Set it on a shelf, gift it to a friend, or turn it into a keychain if you used the mini loaf cat version.
📸 Pro Tip: Want to be featured? Tag your finished loaf cat on Pinterest or submit it to our gallery at TopAmigurumi.
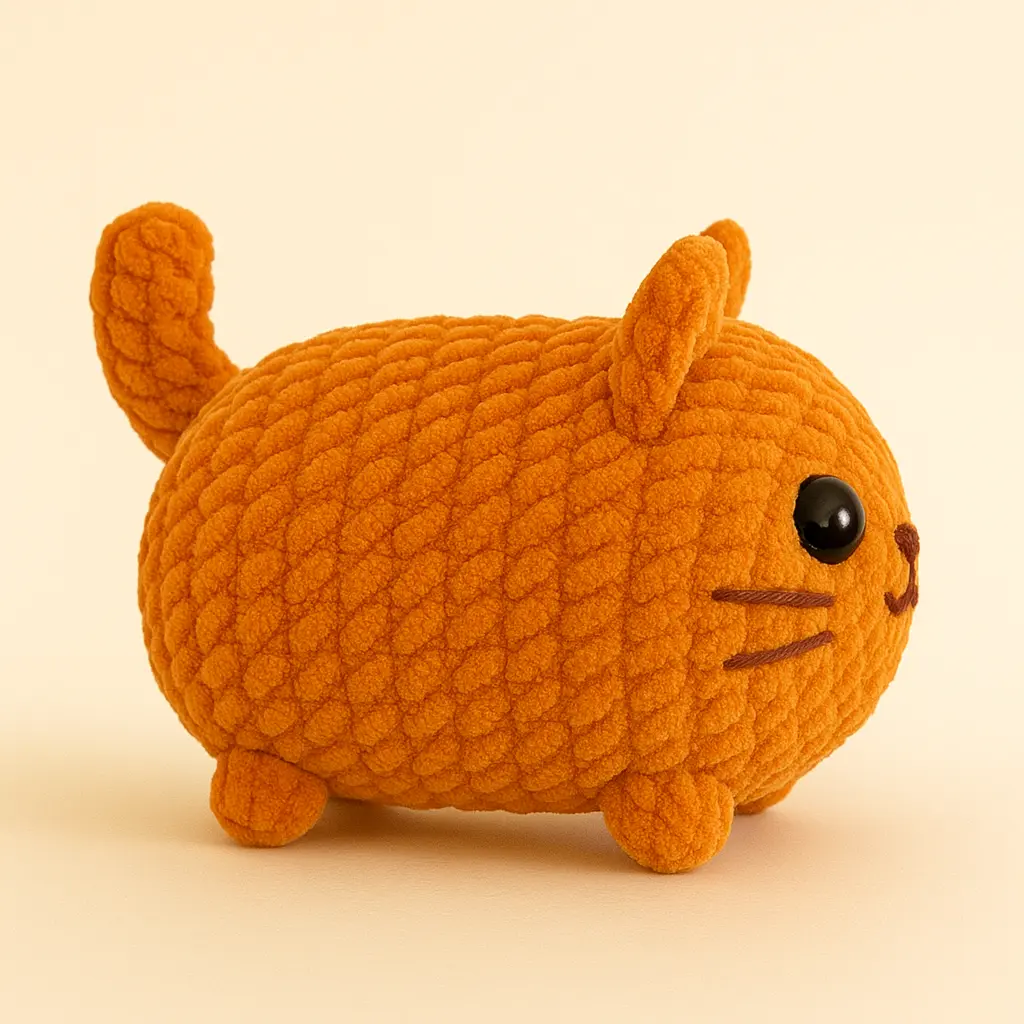
🧶 Assembly Recap
- Sew the 4 feet under the body, aligned with the corners.
- Attach the ears symmetrically on the top of the head.
- Secure the tail at the back center of your loaf cat crochet pattern.
- Embroider the nose, smile, and whiskers. Add blush if desired.
When you’re finished, you’ll have a picture-perfect plushie that proudly represents everything the loaf cat crochet pattern free community loves: charm, softness, and a whole lot of personality.
Next, we’ll dive into how to turn this into a mini loaf cat crochet pattern and make personalized variations!
Mini Loaf Cat Crochet Pattern Mods
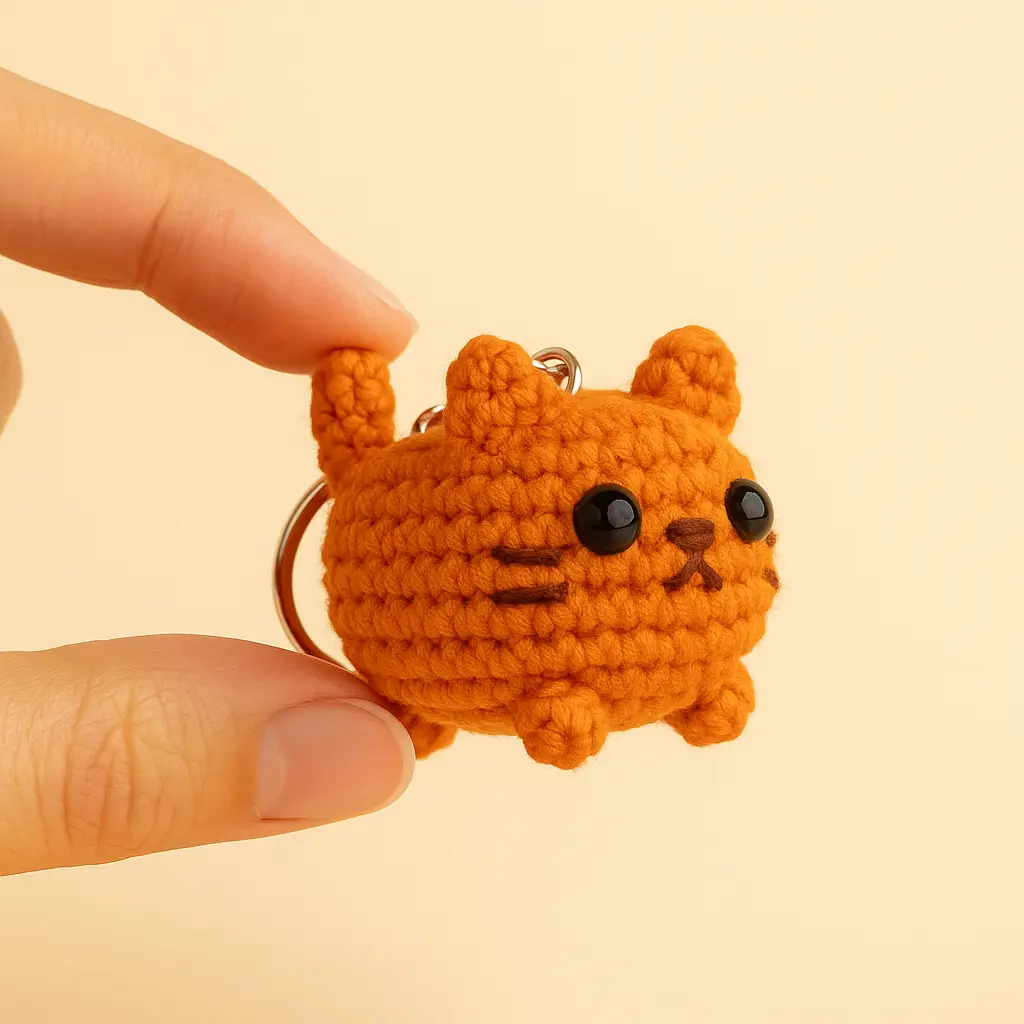
Once you’ve mastered the classic version, it’s time to shrink things down. Creating a mini loaf cat crochet pattern is surprisingly easy and, honestly, kind of addictive. Smaller versions make perfect keychains, ornaments, or little desk mascots.
To make a mini loaf cat, just swap out the plush yarn for DK-weight cotton (like YarnArt Jeans or Alize Cotton Gold) and use a 2.5 mm hook instead of 6.0 mm. The result is about half the size a tiny loaf with all the charm packed into a bite-sized body.
| Version | Yarn Type | Hook Size | Final Size |
| Classic Loaf | Plush (6.0 mm) | 6.0 mm | 10-12 cm |
| Mini Loaf | DK Cotton (2.5 mm) | 2.5 mm | 6-7 cm |
Keep in mind that using finer yarn also makes it easier to embroider detailed expressions. You can play around with sleepy eyes, “grumpy cat” brows, or even tiny fangs if you’re feeling bold. Want to turn your mini into a Halloween-themed loaf? Use black or dark grey yarn, add a felt bat wing, and you’ve got a spooky sidekick!
Ravelry also has several free loaf cat crochet pattern discussions where people share their tweaks, like turning the tail into a string loop or stitching felt paws underneath. I’ve seen someone even make a Siamese version using light cream yarn and chocolate tips for the feet and ears. Adorable!
Creative Variations & Personal Touches
Here’s where you let your imagination run wild. The loaf cat crochet pattern is just a base, what you do with it makes it uniquely yours.
✨ Color Variants
Try matching your own pet’s fur: orange tabby, tuxedo cat, calico, or all-black. Stripes can be easily embroidered using surface slip stitches or chain-stitched embroidery over the body. For a tabby effect, focus on the top of the back and sides.
✨ Face Expressions
With a simple change of the mouth curve, you can make your cat loaf look sleepy, smug, silly, or sweet. Use brown or black yarn for facial features, it contrasts nicely against soft yarn. Want something bolder? Go for bright pink cheeks or glittery felt eyes.
✨ Accessories
Bows, scarves, flower crowns they all work! A tiny ribbon on one ear or a felt bowtie under the chin turns this simple loaf into a gift-worthy plushie. For inspiration, check out how we styled accessories on the Amigurumi Bunny Free Pattern. You’ll see how a simple accent changes the entire feel.
You could also use this pattern to create a whole shelf of loaf cats representing different holidays: red-and-green for Christmas, hearts for Valentine’s Day, or even pastels for Easter. The possibilities are endless, and it’s part of why this cat loaf crochet pattern is becoming such a community favorite.
🎨 Bonus Idea: Mix Textures
Combine a plush yarn for the body with a cotton yarn for the feet and face. This adds contrast and makes the details pop. You can even try a gradient yarn for a dreamy ombré loaf effect!
Whether you go big with a chonky plush or tiny with a mini version, the loaf cat crochet pattern offers a blank canvas you’ll want to recreate over and over again.
Coming up: I’ll answer the most common questions (like face placement and yarn substitutions), then wrap up with tips on gifting and sharing your finished loaf cat with the world.
Common Loaf Cat Crochet Pattern Questions Answered
Where do I place the safety eyes in the loaf cat crochet pattern?
Insert 12 mm safety eyes between rounds 9 and 10, with about 6 stitches between them. This placement gives your cat that classic “loafing” expression — calm and adorable. For a softer look, you can also use embroidered eyes or black felt circles.
What yarn should I use for the loaf cat crochet pattern free version?
Premier Parfait Chunky is a top pick due to its fluffiness and structure. But you can also use chenille yarns like Himalaya Dolphin Baby or velvet yarn for an ultra-soft finish. For a mini loaf cat, go with YarnArt Jeans or any cotton-blend DK yarn.
How big does the finished loaf cat turn out?
Using plush yarn and a 6.0 mm hook, your loaf cat will be about 10–12 cm tall. If you go for the mini loaf cat crochet pattern with DK yarn and a 2.5 mm hook, expect a size around 6–7 cm — perfect for keychains or gifts.
")

")

Can I machine wash the loaf cat plushie?
It’s best to hand wash gently with cold water. Plush yarn can stretch or pill in the machine. Spot clean with a damp cloth, and always remove safety eyes before gifting to young children.
Finishing Touches & Sharing Your Cat
Congratulations, you’ve just completed one of the most relaxing, fun, and rewarding projects out there. Whether it’s your first loaf cat crochet pattern or your tenth, the joy of seeing it come together never gets old.
Before you wrap up, here are a few final tips to give your kitty that polished look:
– Use blush felt or light yarn to add cheek dots for extra charm
– Tuck a tiny heart into the belly seam as a secret gift detail
– Try staging your loaf on a faux wooden tray or next to a coffee mug, it looks great in photos!
Once your cat loaf is done, don’t forget to share it! Tag @TopAmigurumi on Pinterest and Instagram to get featured, or submit your own version to our community gallery.
💛 Final Thoughts
From one yarn-lover to another: thank you for bringing your loaf cat to life. Whether you keep it on your desk, gift it to a friend, or crochet five more just for fun, I hope this pattern brought a little joy into your day. 🧶
📌 Follow me on Pinterest for daily pin-worthy amigurumi ideas, free patterns, and cozy inspiration:
👉 TopAmigurumi on Pinterest
✍️ Read more behind-the-scenes crochet stories and tips on Medium:
👉 Follow TopAmigurumi on Medium
Looking for another silly-softie project? You might enjoy the Amigurumi owl pattern or this Free Crochet Labubu Pattern — both perfect companions to your loaf cat army.
8 comments
Can you make some cute Halloween plushies?
Absolutely! 🎃 We’re adding a handful of cute Halloween plushie patterns this month, stay tuned!
Thank you. My granddaughter loves her soft plushy loaf cat! It was so simple to create, using your easily follow-able pattern.
I can’t wait to try it in mini! Your photos look like the MR starts on the belly… do you have that pattern version available, also?
Thank you so much this made my day! I’m thrilled your granddaughter loves her plushy Loaf Cat. 🤍
You’re right: in the photos the magic ring starts on the belly for a smoother underside. We’re finishing the mini version (with the belly-start option) and will publish it very soon. I’ll update this post with the link as soon as it’s live. Happy crocheting!
Can you find some dragon crochet patterns? My aunt is obsessed with them, but I can’t find any cute ones. The things on this place are just sooooooo cutee.
Awww, thank you so much, that’s the sweetest comment! 🥹💖
I love the idea of doing dragon crochet patterns – your aunt has great taste! 🐉✨
I don’t have a dragon pattern on the blog yet, but it’s officially on my “must-make” list now. I’ll start sketching ideas for a cute little dragon soon.
In the meantime, feel free to bookmark the site or join my newsletter so you don’t miss it when the dragon pattern goes live. Thank you again for being here and for sharing about your aunt – that totally made my day! 🧶💕
Замечательная статья, всего лишь позавчера копался по
схожему теме:)
Thank you very much for such a nice comment! 😊 I’m very happy that the article was useful and on the right topic. If you have questions or ideas for what I should write about next, feel free to tell me 💕