


Hello friends, it’s Martha here from TopAmigurumi!
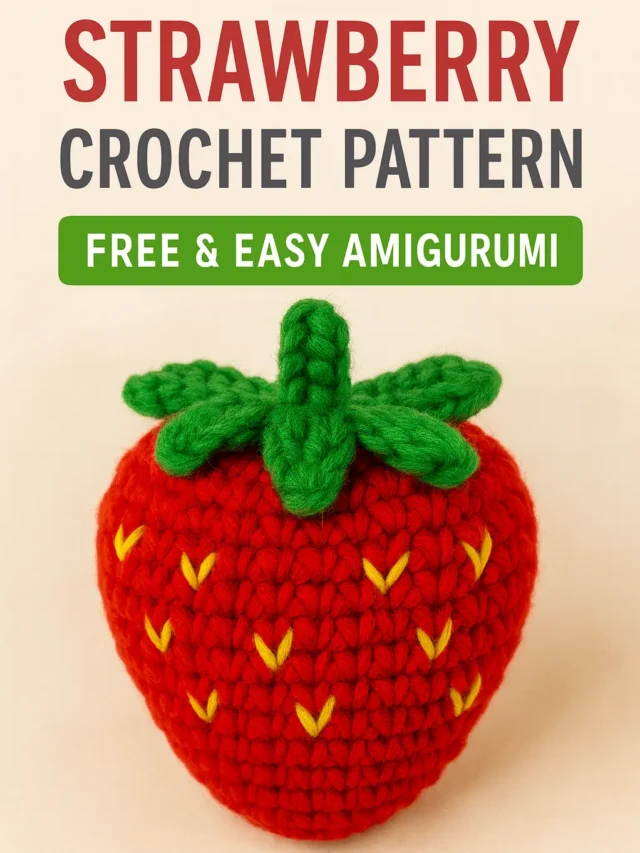
There’s something so cheerful about working on a strawberry crochet pattern. Maybe it’s the bright red yarn, maybe it’s the little green leaves, or maybe it’s because every time I make a strawberry crochet pattern, I imagine it sitting in a little fruit basket alongside other cute amigurumi creations from my craft corner.
I first designed this free strawberry crochet pattern years ago when my granddaughter asked for “a fruit she could hold in one hand.” It became a quick project I return to whenever I want something easy, colorful, and joy-sparking. This tutorial is perfect for beginners. You can make one in under an hour, and once you start, you’ll want to make a whole bowlful.
In this guide, I’ll walk you through every step from choosing the right yarn to sewing the leafy top so you can create a plump, adorable amigurumi strawberry. And if you’re completely new to amigurumi, you might also enjoy my First Amigurumi Step-by-Step Guide to learn the basics before starting your strawberry.
(P.S. Did you know real strawberries aren’t technically berries? You can read more fascinating strawberry facts on Britannica while you crochet.)
Jump To a Section
Materials You’ll Need for Your Strawberry Crochet Pattern
Like every good recipe starts with the right ingredients, every strawberry crochet pattern begins with the right materials. I’ve made this pattern in all sorts of yarns over the years, from silky cottons to fuzzy acrylic blends but for beginners, I recommend starting with something soft, sturdy, and easy to work with.
You’ll need:
- Yarn – Red (for the berry), green (for the leafy top), and optional yellow (for embroidered seeds). I like using worsted weight cotton yarn for a neat, defined finish. If you’re unsure about yarn types, my Yarn Weight, Gauge & Hook Size Guide can help.
- Crochet Hook – Size 3.0 mm or 3.5 mm works beautifully for amigurumi.
- Stuffing – Polyester fiberfill to give your strawberry a plump, squeezable shape.
- Tapestry Needle – For sewing the top and weaving in ends.
- Scissors – A sharp pair for trimming yarn cleanly.
- Stitch Marker – Optional, but so helpful for keeping track of rounds.

💡 Martha’s Tip: If you’ve never tried a magic ring before, it’s worth learning that it gives your strawberry a perfect, gap-free start. I have a step-by-step tutorial on the Magic Ring vs Chain Circle so you can pick your favorite method.
And if you’re curious about why certain yarns work better for amigurumi, you can dive into this comprehensive yarn guide from the Craft Yarn Council it’s an excellent reference I still use today.
Free Strawberry Crochet Pattern – Step-by-Step Guide
Alright, my yarn-loving friends, here comes the heart of this project! This strawberry crochet pattern is quick, easy, and perfect for using up those leftover bits of red and green yarn. I’ll guide you through each step, from the plump red body to the leafy green top. If you’re new to shaping in amigurumi, you might want to peek at my Invisible Decrease Tutorial before you start.
Body (Red Yarn)
R1: Magic Ring (MR), 6 sc (6)
R2: inc × 6 → (12)
R3: (sc, inc) × 6 → (18)
R4: (2 sc, inc) × 6 → (24)
R5–7: sc around (24)
R8: (2 sc, dec) × 6 → (18)
R9: (sc, dec) × 6 → (12)
R10: dec × 6 → (6)
Stuff firmly before closing.
💡 Martha’s Tip: For a super smooth shape, add stuffing gradually as you work too much at once and your strawberry crochet pattern might bulge in odd places.

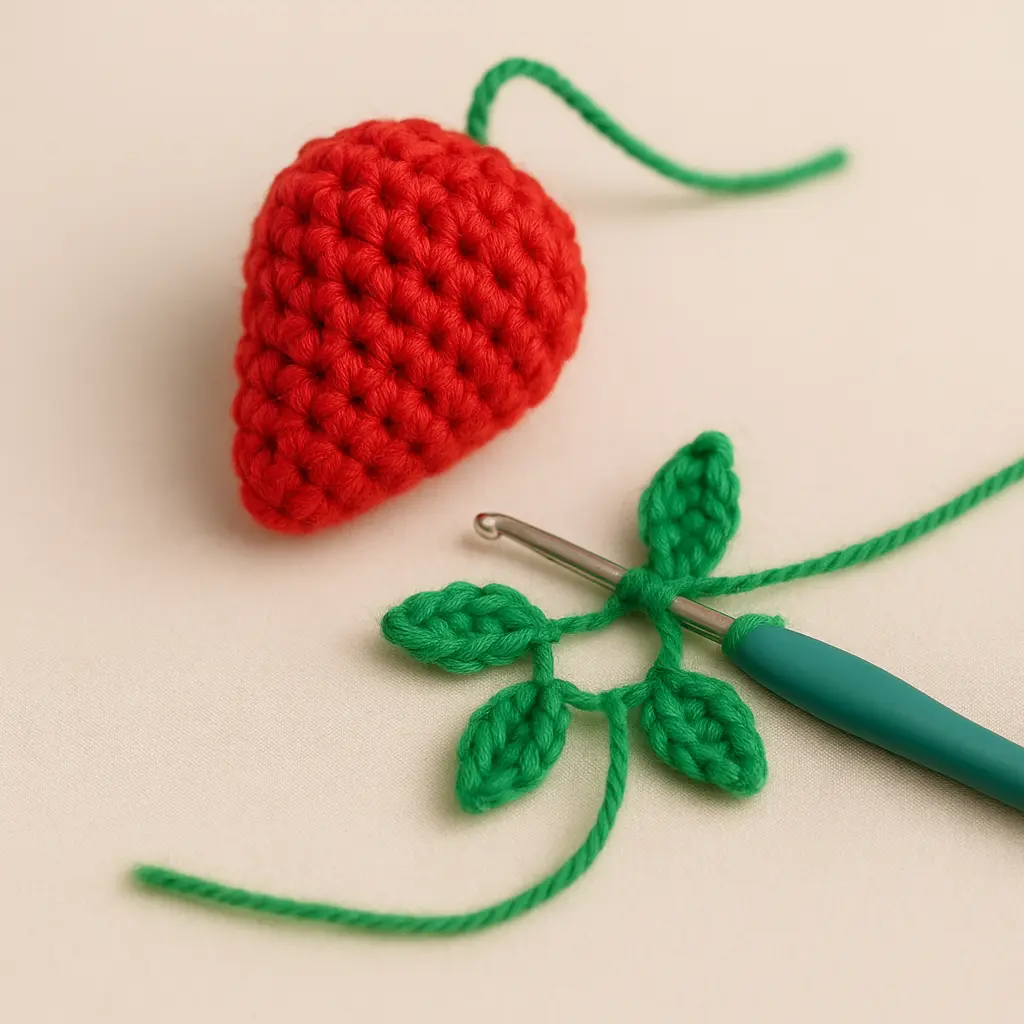
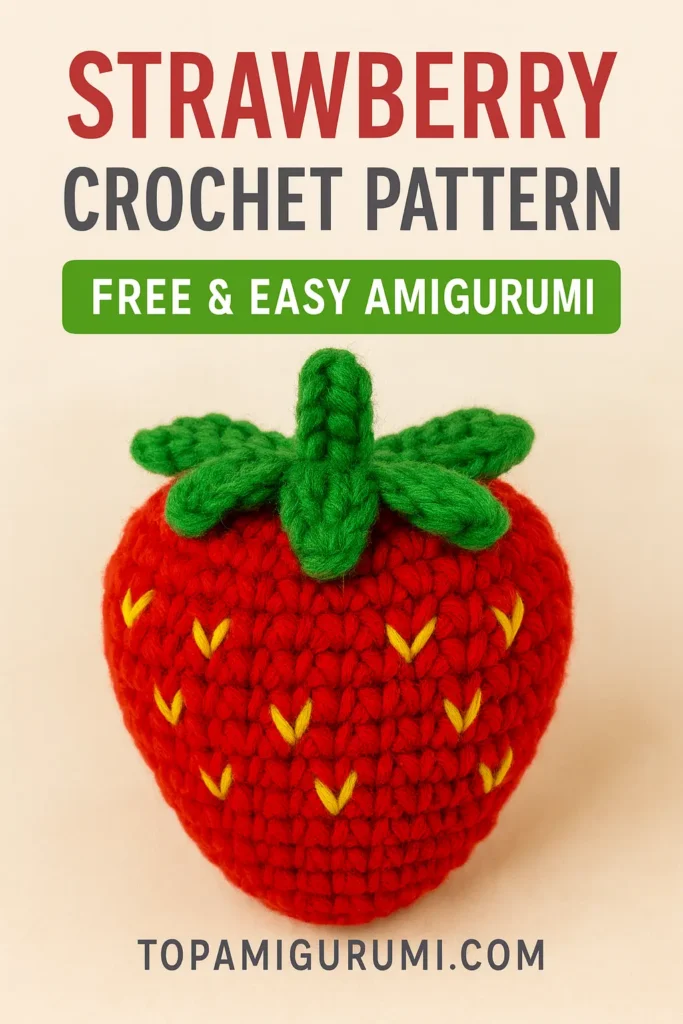
Leaves (Green Yarn)
R1: MR, (ch 3, sl st in 2nd ch, sc in next ch, sl st in MR) × 5 leaves
Pull tight and sew to the top of your strawberry.
If you’ve never done color changes before, my guide on Changing Colors in Amigurumi will walk you through it step-by-step.
Optional Seeds (Yellow Yarn)
Using a tapestry needle, stitch small V-shaped seeds randomly across the strawberry’s body.
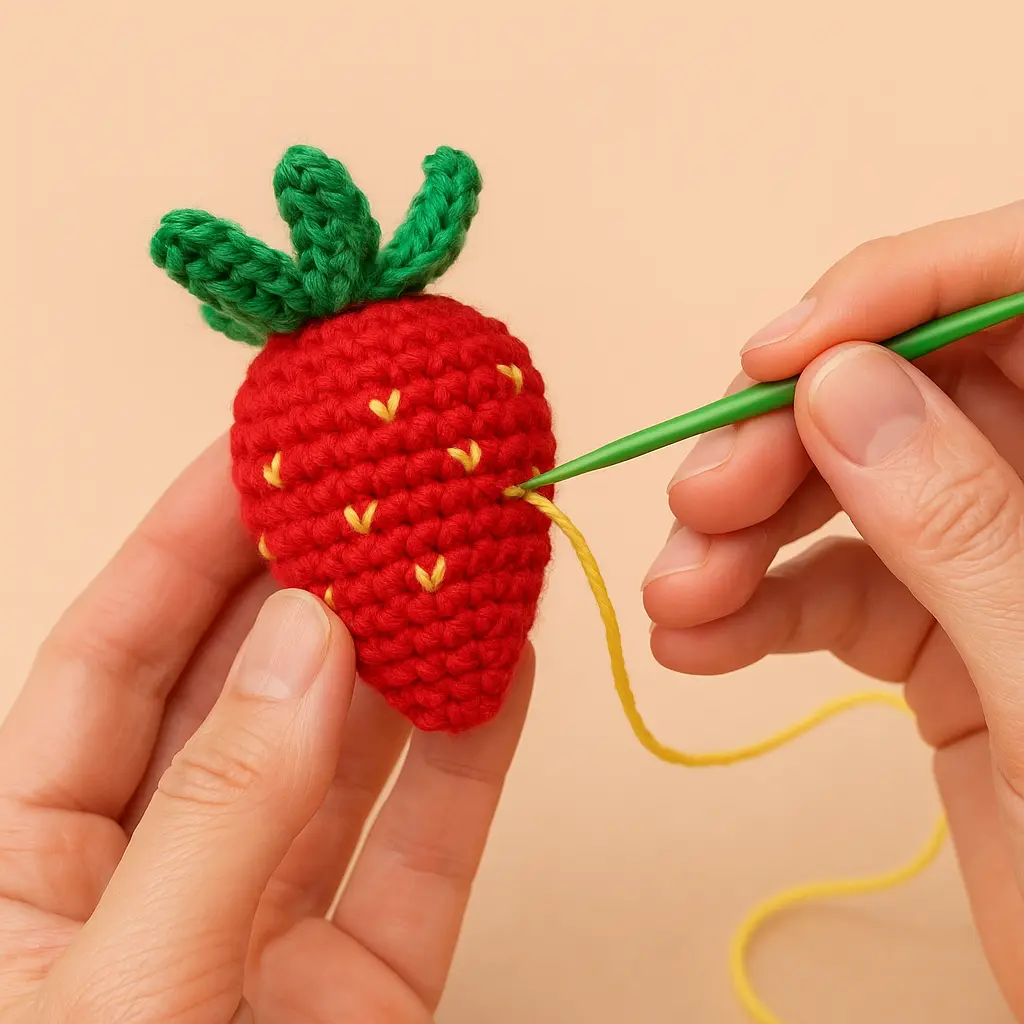
Once you’ve sewn the leaves on and added seeds, your strawberry crochet pattern is complete! This little fruit makes a great bag charm, gift topper, or part of a set with other fruit patterns. You can even pair it with my Crochet Pattern for Candy Corn for a fun seasonal display.
Download the Free Strawberry Crochet Pattern PDF
If you’re like me, you probably enjoy having a printable version you can tuck into your project bag. That’s why I’ve made this strawberry crochet pattern available as a free PDF download.
It’s the same step-by-step guide you see here, just neatly formatted for easy reading. No need to scroll on your phone while your yarn rolls away under the couch!
📥 Download the Free Strawberry Crochet Pattern PDF
If you love working from printed patterns, you might also enjoy my Free Axolotl Crochet Pattern PDF, another adorable project that’s beginner-friendly and perfect for gifting.
Creative Ideas for Your Strawberry Crochet Pattern
One of the reasons I adore this strawberry crochet pattern is how versatile it is. Here are a few ways you can use it beyond just a cute desk decoration:
- Strawberry Keychain – Attach a metal keyring for a fruity little charm.
- Bag Decoration – Clip it to a tote for a pop of color.
- Gift Topper – Tie it onto a wrapped gift for a handmade touch.
- Play Kitchen Food – Perfect for kids’ pretend play sets.
- Strawberry Garland – Make several and string them together for party décor.
If you love turning small crochet projects into functional items, my Labubu Crochet Pattern Free Keychain Tutorial is another fun way to use amigurumi in everyday life.
And if you’re feeling adventurous, try mixing this strawberry with other fruit designs a bowl of crocheted fruit makes a gorgeous and whimsical display. You can even explore the Realistic Snake Crochet Pattern Free for a more challenging and life-like project
Tips for Beginners Making This Strawberry Crochet Pattern
If you’re new to amigurumi, this strawberry crochet pattern is a wonderful first project. Still, a few tips can make your stitching smoother and your berry extra cute:
- Choose the Right Yarn – Cotton yarn holds its shape beautifully and gives a neat finish. My Loaf Cat Crochet Pattern also uses cotton for a similar polished look.
- Keep Even Tension – Uneven tension can make your strawberry lopsided. Practice a few rounds before starting the real thing.
- Stuff Gradually – Add fiberfill a little at a time so your strawberry crochet pattern doesn’t bulge.
- Learn the Magic Ring – This creates a tight, gap-free start. My Magic Ring vs Chain Circle tutorial explains both methods.
- Don’t Rush – Even if this project takes less than an hour, slow stitching will make your strawberry neater and more durable.
If you want to avoid common amigurumi mistakes, my Top 10 Amigurumi Mistakes to Avoid can save you time (and yarn).
FAQ – Strawberry Crochet Pattern
Here are some of the most popular questions crocheters ask complete with friendly, helpful answers from Martha’s cozy craft corner:
How long does this strawberry crochet pattern take to make?
For most beginners using worsted weight yarn and a 3.0 mm hook, this pattern takes approximately 45–60 minutes. If you’ve got more amigurumi experience, you can whip one up in under 30 minutes!
How big is the finished strawberry crochet pattern?
Your strawberry will measure around 5 cm (2 inches) tall. If you’d like to make a larger version, simply use chunky yarn and a bigger hook—just remember to adjust your stuffing to suit!
Can I change the size of the strawberry crochet pattern?
Absolutely! Use finer yarn and a smaller hook for a tiny version, or chunky yarn and a larger hook for a plush-sized strawberry. Swapping yarn and hook sizes lets you customize the finished size to your liking.
What does ‘magic ring’ mean in this strawberry crochet pattern?
A magic ring (also called a magic loop) starts your amigurumi with a tight, seamless circle—no gaps at the center—just like a neat little heart-shaped seed. It’s a beginner-friendly technique that gives a polished finish.
Do I need a stitch marker for this strawberry crochet pattern?
While not absolutely necessary, a stitch marker makes your life much easier—especially when you’re counting rounds or locating decreases. It keeps your rounds tidy and your strawberries perfectly shaped.
Can I sell the strawberries made from this pattern?
Yes, you’re welcome to sell your finished strawberries—so long as you credit TopAmigurumi.com as the designer. It’s such a joy to see your creations bring smiles to others!
Your Strawberry Crochet Pattern is Complete!
And there you have it your very own strawberry crochet pattern brought to life with just a bit of yarn, a hook, and some patience. Isn’t it amazing how something so small can bring such a big smile?
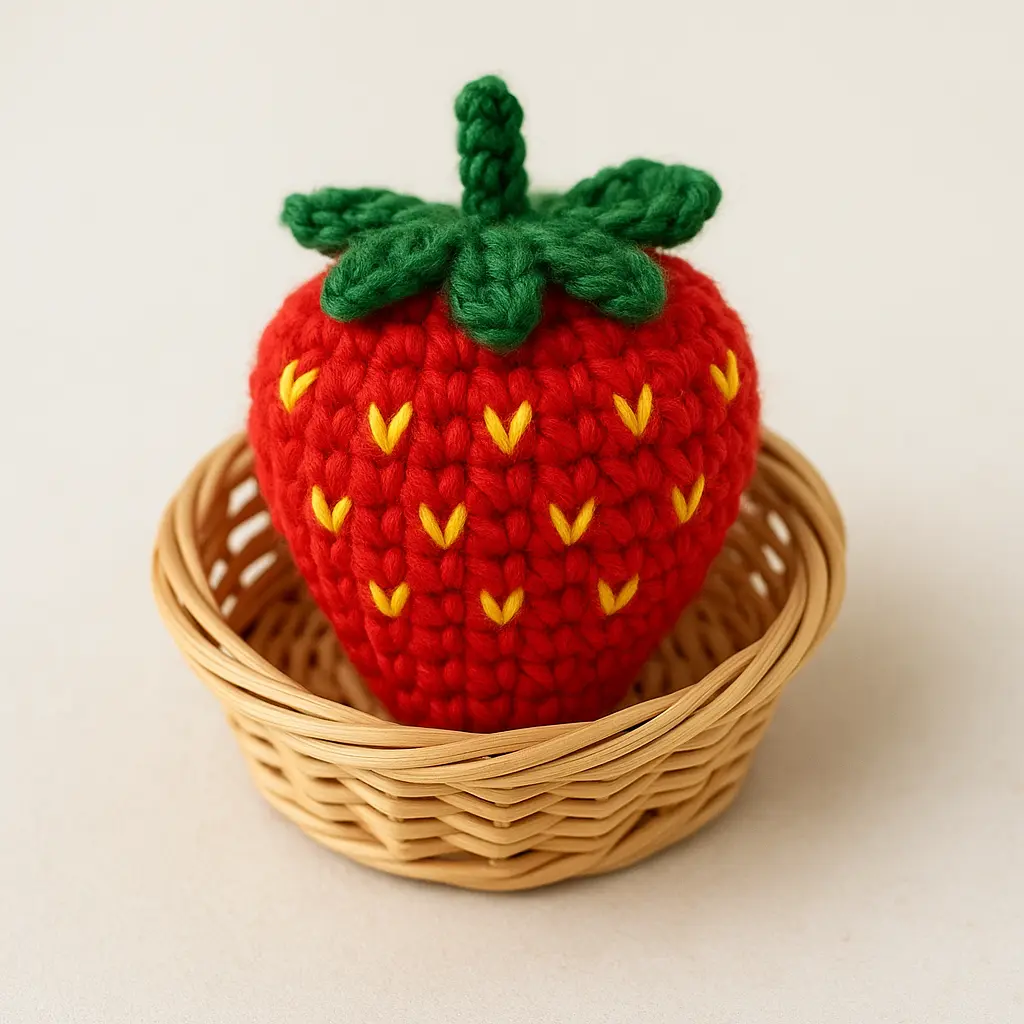
I hope this pattern fills your craft basket (and maybe even your fruit bowl) with adorable little berries. Whether you make one as a keychain, a gift topper, or as part of a crochet fruit collection, this strawberry crochet pattern is a project you’ll come back to again and again.
If you enjoyed this, I think you’ll also love:
- 🐙 Amigurumi Molly the Octopus – Free Pattern
- 🦆 Amigurumi Duck Pattern Free Keychain
- 🐳 Free Whale Crochet Pattern
📌 Don’t forget to save this strawberry crochet pattern on Pinterest so you can make another one later!
And remember every stitch you make is a little piece of your story. From my cozy craft corner to yours…
Warm hugs & happy stitching,
Martha 💛
Founder of TopAmigurumi.com