
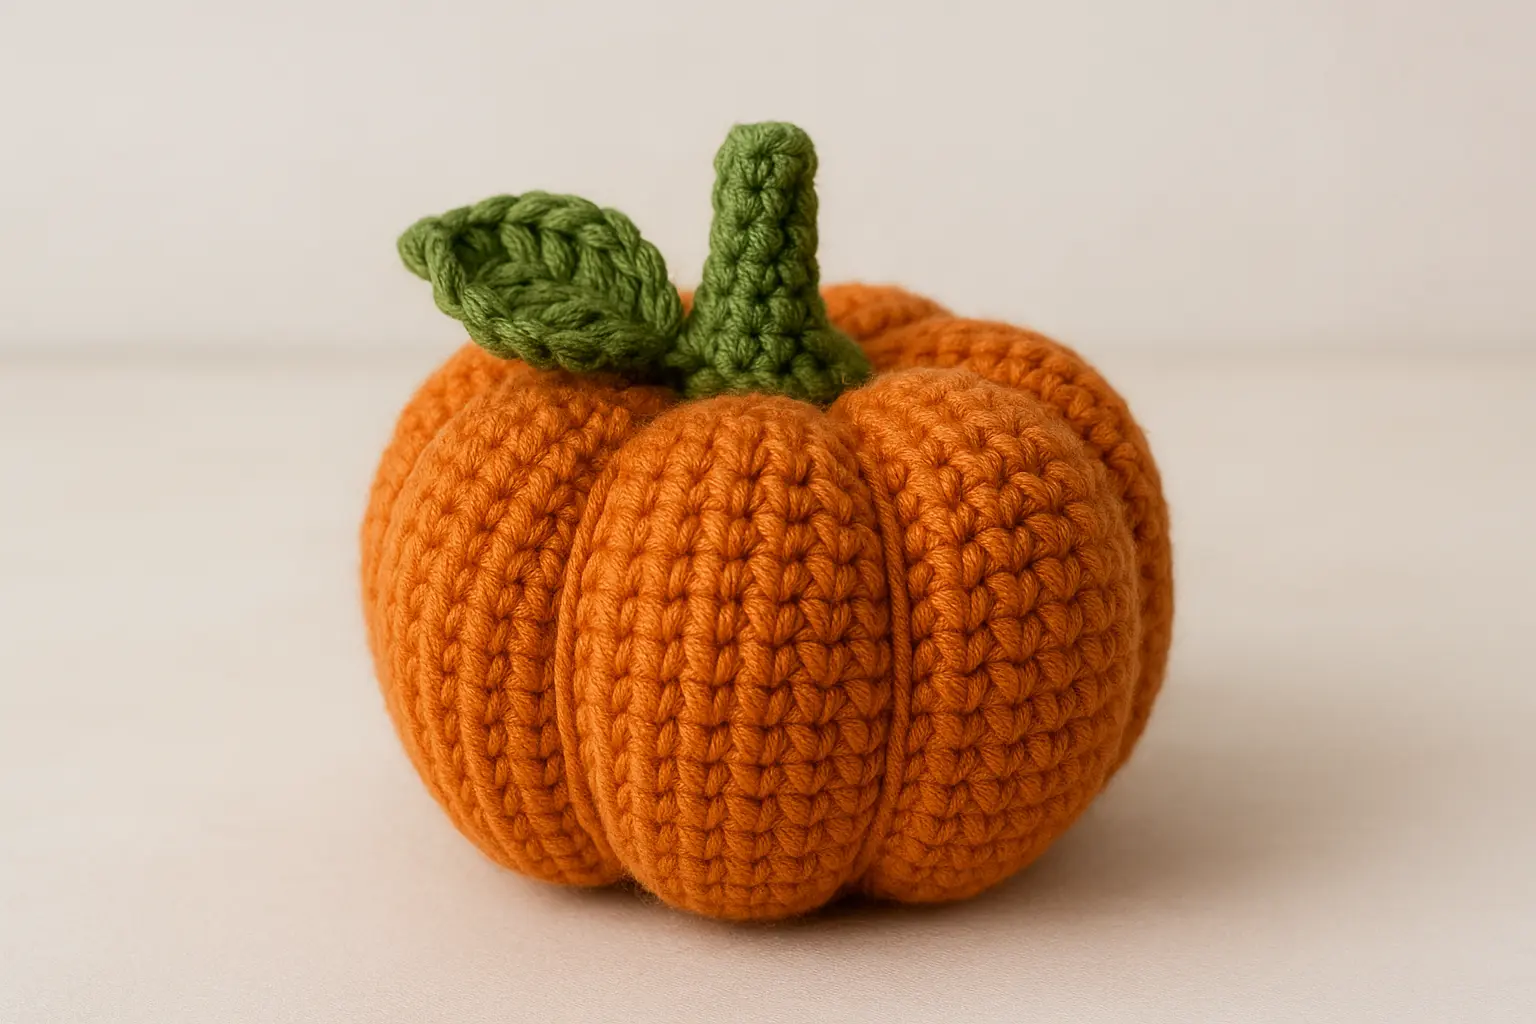
Looking for an easy seasonal crochet project? This free crochet pumpkin pattern includes 7 fun variations you can use for Halloween décor, fall displays, gifts, or small handmade decorations.
The pattern includes different pumpkin sizes, shaping options, leaves, stems, and simple finishing ideas so you can customize each pumpkin to match your style. Most versions use basic amigurumi stitches and are suitable for confident beginners.
Use classic orange yarn for a traditional Halloween look, or try cream, green, rust, brown, or pastel shades for a softer autumn collection.
These crochet pumpkins are perfect for Halloween decorations, Thanksgiving décor, table displays, garlands, keychains, or a handmade fall centerpiece.
New to amigurumi? Start with the First Amigurumi Step-by-Step Guide before beginning.
Jump to section
Materials & Gauge (quick table)
| Item | Recommended | Notes |
|---|---|---|
| Yarn | Worsted (#4) cotton/acrylic for standard; Bulky (#5) for large | Consistent texture makes rib shaping pop See the Craft Yarn Council overview of yarn weights for reference |
| Hook | 3.5–4.0 mm (worsted); 6.0 mm (bulky) | Tight amigurumi tension; adjust to remove gaps |
| Stuffing | Polyester fiberfill | Firmly packed for round shape |
| Notions | Yarn needle, stitch marker, scissors | Optional: cinnamon stick/wood dowel for stem |
| Gauge | “Fit-to-finish” (tight SC fabric) | Exact gauge not critical; see size guide below |
| Stitches | MR (or CH circle), sc, inc, dec, BLO | Review Invisible Decrease if you like seamless shaping |
| Helpful refs | US vs UK Terms Chart, How to Read a Pattern | Keep these open in a new tab |
Tip: If you’re brand-new, tighten your MR tail firmly or use the chain-circle start to avoid early-round gaps.
Size Guide (mini • medium • large)
Use this quick chart to pick your size and materials. Times assume steady beginner speed with tight amigurumi tension.
| Size | Yarn Weight & Amount | Hook | Even Rounds* | Finished Size (H × Ø) | Stuffing (approx.) | Typical Time |
|---|---|---|---|---|---|---|
| Mini | Worsted (#4), ~15–20 g | 3.5–4.0 mm | 3 | ~6–7 cm × 7–8 cm | 6–8 g | 25–35 min |
| Medium | Worsted (#4), ~35–40 g | 3.5–4.0 mm | 6 | ~9–10 cm × 10–11 cm | 18–22 g | 45–60 min |
| Large | Bulky (#5), ~60–70 g | 6.0 mm | 8 (or +2 if you want extra height) | ~13–15 cm × 14–16 cm | 40–55 g | 60–80 min |
* Even rounds = single crochet rounds worked straight (no increases/decreases) between your increase and decrease sections. More even rounds = taller pumpkin.
Sizing notes
- Tight fabric matters more than exact gauge. If you see gaps, drop your hook size.
- For a perfectly plump look, overstuff slightly before the final decrease round.
- Want extra-deep ribs? Add 1–2 more even rounds and do an extra shaping wrap later.
Abbreviations — US Crochet Terms
- MR = magic ring
- ch = chain
- sc = single crochet
- hdc = half double crochet
- dc = double crochet
- tr = treble crochet
- inc = increase, 2 sc in the same stitch
- dec = invisible decrease
- sl st = slip stitch
- st(s) = stitch(es)
- BLO = back loop only
- FLO = front loop only
- FO = fasten off
Pattern note: Work in continuous rounds unless a variation specifically says otherwise. Place a stitch marker in the first stitch of each round and check the stitch count before moving to the next shaping round.
Pattern A : Pumpkin (Magic Ring start)
Use this free crochet pumpkin pattern if you like starting with a Magic Ring (MR).
Abbreviations: MR = magic ring, sc = single crochet, inc = 2 sc in same st, dec = invisible decrease (or standard dec), st(s) = stitch(es).
Work in a spiral; use a stitch marker for the first stitch of each round.
Base & Body
- R1: MR, 6 sc into ring → 6
- R2: inc around → 12
- R3: (sc, inc) ×6 → 18
- R4: (2 sc, inc) ×6 → 24
- R5: (3 sc, inc) ×6 → 30
- R6: (4 sc, inc) ×6 → 36
Now work even rounds (no increases) to set the height.
Mini: 3 rounds • Medium: 6 rounds • Large: 8 rounds
- R7–R9 (Mini) / R7–R12 (Medium) / R7–R14 (Large): sc around → 36
Shaping & Close
- After your last even round above, start decreases:
- Next round: (4 sc, dec) ×6 → 30
- Next round: (3 sc, dec) ×6 → 24
- Next round: (2 sc, dec) ×6 → 18 — Stuff firmly (push filling to edges)
- Next round: (sc, dec) ×6 → 12
- Final round: dec ×6 → 6
- Fasten off leaving a long tail (≈40–60 cm) for rib shaping. Close the hole neatly.
Rib Shaping (pumpkin grooves)
- Thread the long tail on a yarn needle.
- Insert needle from top center to bottom center and back up, cinching gently to create one groove.
- Repeat 6–8 wraps spaced evenly around the pumpkin. Do not overtighten (avoid puckering).
- Secure the tail with a small knot hidden under the stem area.
Stem (quick yarn stem)
- Option A (fast): Attach brown/green yarn at top center; R1: pick up 6 sc around the hole; R2–R3: sc around; R4: sl st, fasten off; tug tail slightly to plant the stem.
- Option B (wood/cinnamon): Dab a bit of hot glue on a short stick; press in while glue sets.
- Option C (stitch-built): Ch 5, sl st back; sew the cord upright as a stem.
Leaf & Tendril (add-ons)
- Leaf (tiny): ch 7; in 2nd ch from hook work sc, hdc, dc, tr, dc, hdc, sc along both sides of the chain to form a mirrored leaf; fasten off.
- Tendril: ch 20; 2 sc in each ch back to start → it spirals naturally; sew beside stem.
Size tuning (at a glance)
- Mini: stop even rounds at R9; continue the decrease sequence as written.
- Medium: stop even rounds at R12.
- Large: increase height by stopping even rounds at R14; if you want extra plumpness, add +2 more even rounds before decreasing.
Finishing
- Roll the pumpkin between your palms to smooth lumps.
- Hide all ends under the stem.
- Add safety eyes/face only if you’re making a kawaii version (optional).
Pattern B : Pumpkin (Chain-circle start no MR)
This free crochet pumpkin pattern also includes a chain-circle start if you don’t like the MR.
Abbreviations: ch = chain, sc = single crochet, inc = 2 sc in same st, dec = invisible decrease (or standard), st(s) = stitch(es).
Work in a spiral; place a marker in the first st of each round.
Base & Body
- Setup: ch 2.
- R1: 6 sc in 2nd ch from hook → 6
- R2: inc around → 12
- R3: (sc, inc) ×6 → 18
- R4: (2 sc, inc) ×6 → 24
- R5: (3 sc, inc) ×6 → 30
- R6: (4 sc, inc) ×6 → 36
Work even rounds (no increases) to set height:
Mini: 3 rounds • Medium: 6 rounds • Large: 8 rounds
- R7–R9 (Mini) / R7–R12 (Medium) / R7–R14 (Large): sc around → 36
Shaping & Close
- Next round: (4 sc, dec) ×6 → 30
- Next round: (3 sc, dec) ×6 → 24
- Next round: (2 sc, dec) ×6 → 18 — Stuff firmly
- Next round: (sc, dec) ×6 → 12
- Final round: dec ×6 → 6
Fasten off with a long tail (≈40–60 cm). Close the hole cleanly.
Rib Shaping (grooves)
- With the tail on a yarn needle, go from top center → bottom center → back to top, snug the wrap to form one groove.
- Repeat 6–8 times evenly around, tightening gently each pass.
- Secure the tail under the stem area.
Stem Options
- Yarn stem: join brown/green at top; R1: 6 sc; R2–R3: sc; R4: sl st, fasten off.
- Cinnamon/wood: glue a short stick into the top.
- Cord stem: ch 5, sl st back; sew upright.
Leaf & Tendril (quick)
- Leaf: ch 7; in 2nd ch from hook work sc, hdc, dc, tr, dc, hdc, sc along both sides; fasten off.
- Tendril: ch 20; 2 sc in each ch back; attach beside stem.
Size tuning
- Mini: stop even rounds at R9.
- Medium: stop at R12.
- Large: stop at R14 (add +2 even rounds if you want extra height).
Troubleshooting (chain-circle specific)
- See a tiny center hole? After R1, pull the starting tail firmly, then weave across the first round once to seal.
- If your first round twists, restart and ensure all 6 sc sit in the same 2nd chain.
7 Easy Crochet Pumpkin Variations
Once you know the basic pumpkin construction, you can easily change the size, yarn, texture, and finishing details to create a whole fall or Halloween collection.
1. Mini Pumpkin Keychain
For a small pumpkin:
- R1: 6 sc in MR. [6]
- R2: inc ×6. [12]
- R3: (sc, inc) ×6. [18]
- R4: (2 sc, inc) ×6. [24]
- R5–R7: sc around. [24]
- R8: (2 sc, dec) ×6. [18]
- R9: (sc, dec) ×6. [12]
Stuff lightly.
- R10: dec ×6. [6]
FO with a long tail, close the opening, and make 6 evenly spaced rib wraps.
Add a small crochet stem and sew a reinforced yarn loop through several stitches at the top before attaching the keychain hardware.
2. Classic Medium Pumpkin
Use the main 36-stitch pumpkin pattern and work 6 plain rounds before beginning the decreases.
This size works well for:
- shelf décor
- table displays
- fall centerpieces
- Halloween arrangements
Finish with 6–8 rib wraps, depending on how deeply you want the pumpkin sections defined.
3. Large Crochet Pumpkin
For a fuller pumpkin, increase to 48 stitches.
- R1: 8 sc in MR. [8]
- R2: inc ×8. [16]
- R3: (sc, inc) ×8. [24]
- R4: (2 sc, inc) ×8. [32]
- R5: (3 sc, inc) ×8. [40]
- R6: (4 sc, inc) ×8. [48]
- Next 8–10 rounds: sc around. [48]
- Next: (4 sc, dec) ×8. [40]
- Next: (3 sc, dec) ×8. [32]
- Next: (2 sc, dec) ×8. [24]
- Next: (sc, dec) ×8. [16]
Stuff firmly.
More Free Amigurumi Patterns You’ll Love
- Final: dec ×8. [8]
FO with a long tail and close the opening. Make approximately 8 evenly spaced rib wraps.
For a larger, softer pumpkin, use bulky yarn and an appropriately sized hook.
4. Ribbed / Knit-Look Pumpkin
For more visible texture, work the plain body rounds in BLO instead of through both loops.
Keep all increase and decrease rounds worked through both loops.
The unused front loops create subtle horizontal texture, while the shaping wraps create the traditional vertical pumpkin ribs.
Add one extra plain round if you want a slightly taller pumpkin.
5. Velvet or Chenille Pumpkin
Use plush or chenille yarn for a soft, squishy version.
Because thick yarn naturally produces a larger pumpkin:
- keep your stitches firm
- avoid overstuffing
- use fewer shaping wraps if the fabric is already very thick
- tighten the closing rounds carefully to avoid gaps
A velvet pumpkin works especially well for fall shelf décor and handmade gifts.
6. Kawaii Pumpkin
Turn the basic pumpkin into a cute amigurumi character.
After shaping the ribs:
- embroider two small black eyes
- add a tiny stitched smile
- add optional pink blush beneath the eyes
- attach a small leaf beside the stem
Place the facial details between two rib sections so the face stays centered.
For items intended for young children, use embroidered features instead of safety eyes.
7. Halloween Pumpkin
Give the basic pumpkin a stronger spooky-season look with Halloween colors and details.
Try:
- classic orange with a black or dark brown stem
- black pumpkin with an orange leaf
- purple pumpkin with a green stem
- cream pumpkin with black embroidered facial features
- orange and black pumpkins grouped together in different sizes
For a complete Halloween display, pair your pumpkin with the Pumpkin Witch Crochet Pattern, Crochet Ghost Pattern, or Black Cat Crochet Pattern.
Assembly & Finishing
Finish your free crochet pumpkin pattern project neatly:
1. Stuff the Pumpkin
Stuff the pumpkin gradually with small pieces of fiberfill.
Aim for a body that is firm enough to hold its shape but still slightly soft. Overstuffing can make the pumpkin too round and make the rib shaping harder.
2. Close the Opening
After the final decrease round, thread the yarn tail through the remaining stitches and pull gently to close.
Secure the yarn firmly, but do not cut it yet if you plan to use the same strand for shaping the ribs.
3. Shape the Pumpkin Ribs
Thread the long yarn tail onto a yarn needle.
Pass the needle through the center of the pumpkin from top to bottom, then wrap the yarn around the outside and pass it through the center again.
Repeat this process evenly around the pumpkin to create 6–8 rib sections.
Pull each wrap gently and gradually. Avoid tightening one rib much more than the others.
4. Attach the Stem
Sew the crochet stem securely to the top center of the pumpkin.
If you are adding a leaf or tendril, position them beside the stem before sewing so the arrangement looks balanced.
5. Add Optional Details
Add any facial embroidery, leaves, tendrils, color accents, or keychain hardware after the pumpkin has been shaped.
For a keychain, reinforce the hanging loop through several stitches at the top rather than attaching the hardware to a single crochet loop.
6. Finish
Weave in all remaining yarn tails.
Gently reshape the pumpkin with your hands and adjust the ribs until they are evenly spaced.
Troubleshooting (quick fixes)
Common issues with a free crochet pumpkin pattern, solved fast:
- Center hole won’t close: Pull the tail firmly; if needed, weave across R1 once.
- Visible gaps: Drop hook size or tighten tension; add one extra even round for structure.
- Flat top/bottom: Pack more filling just before the last two decrease rounds; add one extra rib wrap to compress the middle.
- Lumpy sides: Break up big stuffing clumps; massage the shape after closing.
- Stem wobble: For yarn stems, stitch through the core 2–3 times; for sticks, use a dab of hot glue and let it set fully.
More Free Halloween Crochet Patterns 🎃
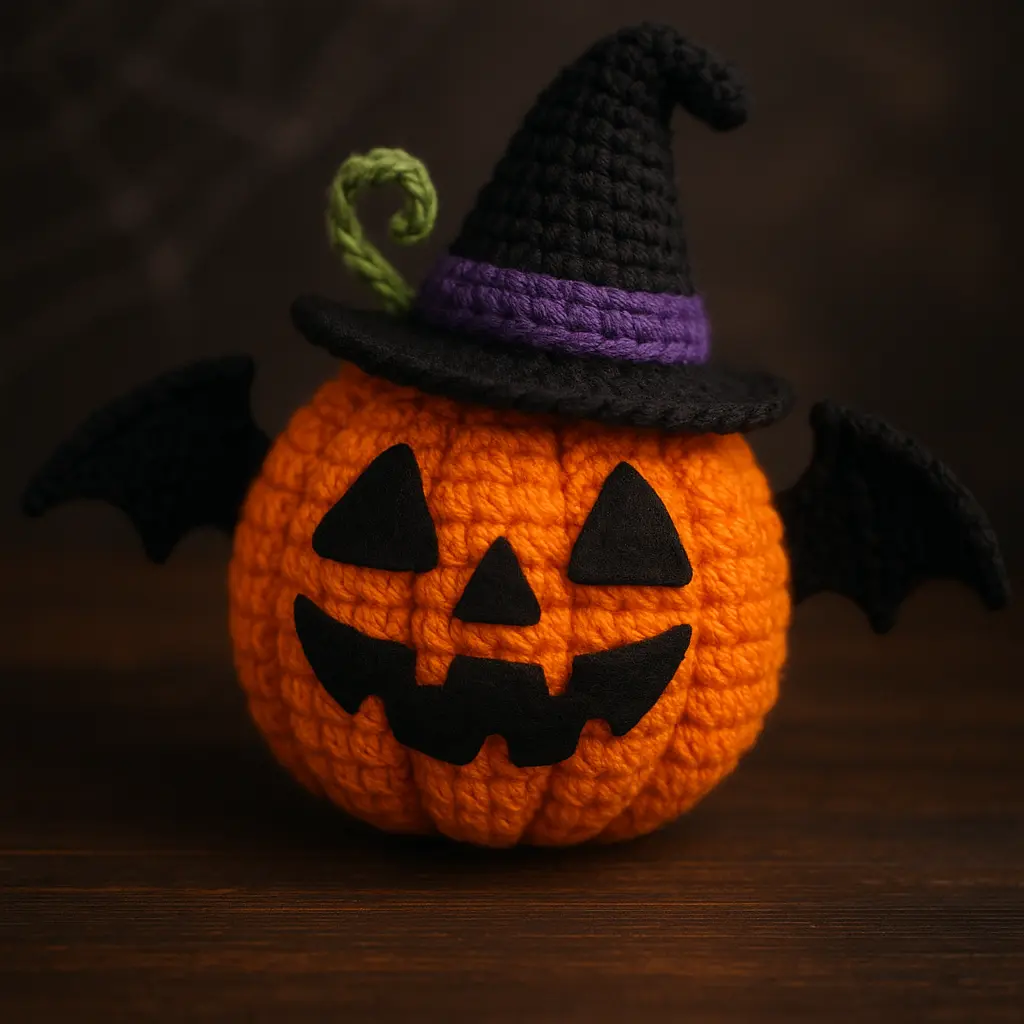
If you enjoyed this crochet pumpkin, continue your Halloween amigurumi collection with:
- Pumpkin Witch Crochet Pattern — a cute witchy pumpkin amigurumi.
- Crochet Ghost Pattern — 4 spooky-cute ghost variations.
- Grim Reaper Crochet Pattern — a hooded Reaper with a crochet scythe.
- Black Cat Crochet Pattern for Halloween — a classic spooky-season companion.
- Candy Corn Crochet Pattern — a quick colorful Halloween project.
- Mini Bear Pumpkin Toast Crochet Pattern — a sweeter seasonal make.
Styling tip: Arrange one large pumpkin behind two minis, then tuck a leaf and tendril on the front mini for depth. Photograph on a neutral surface with soft side light for Pinterest-ready shots.
FAQ about Free Crochet Pumpkin Pattern
How can I make this Free Crochet Pumpkin Pattern if I don’t like the magic ring?
Use the chain-circle start: ch 2, work 6 sc into the 2nd ch from hook, then follow the same increase path. Tighten the tail and weave once across Round 1 to seal the center.
What yarn and hook should I pick for a big, plush pumpkin?
Bulky (#5) yarn with a 6.0 mm hook is the fastest route. Stop increases at 48 sts, add 8–10 even rounds for height, then decrease and shape with 8 rib wraps.
How do I attach the leaf and tendril neatly?
Sew the leaf slightly off-center at the stem base, then tack the tendril’s inner end under the stem. For clean joins on small parts, see this guide: Attach Amigurumi Limbs Evenly.
My sides look lumpy. What did I do wrong?
Usually it’s stuffing distribution. Break up clumps into small tufts, overstuff just before the last two decrease rounds, then massage the sides and tighten rib wraps evenly.
Can I turn this Free Crochet Pumpkin Pattern into a quick gift set?
Yes—make one large pumpkin plus two minis, add one leaf and a single tendril per mini, and finish with a simple yarn stem. Neutral colors photograph beautifully for gift tags or listing photos.
Happy Fall & Halloween Crocheting!
This free crochet pumpkin pattern is easy to customize in different sizes, yarns, colors, and textures. Make one pumpkin for a quick seasonal project or crochet a whole collection for Halloween and fall décor.
Try classic orange, soft cream, rustic green, or spooky black and purple, then finish each pumpkin with your favorite stem, leaf, or tendril.
Pair your pumpkins with a crochet ghost, black cat, Grim Reaper, or Pumpkin Witch for a complete handmade Halloween display.
