


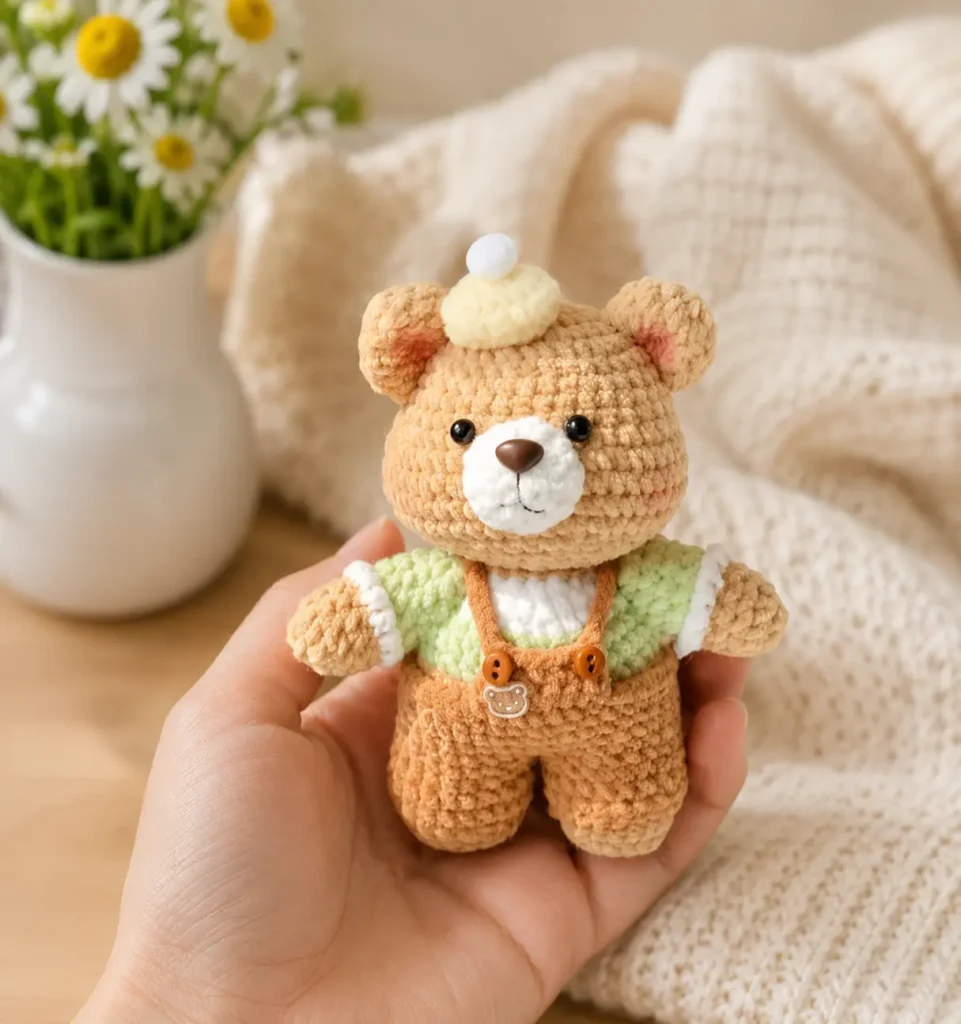
This Cute Baby Bear Crochet Pattern is a sweet little amigurumi project with soft bear colors, tiny orange overalls, light green sleeves, a white shirt, and a small yellow hat with a pom-pom. The final look is gentle, playful, and perfect for anyone who loves tiny handmade bears.
This baby bear is worked in small parts, then assembled at the end. You will crochet the head, body, arms, ears, muzzle, tail, overalls, straps, and hat separately. If you are still learning the basics of amigurumi, you may want to start with the First Amigurumi Step-by-Step Guide before beginning this project.
The outfit makes this pattern extra charming. The orange overalls are made separately and placed over the body, so the bear looks dressed and finished. If you enjoy dressed-up bear patterns, you may also like the Little Bear with Cherry Bib Crochet Pattern or the cozy Bear Crochet Pattern Free: Ruffled Collar Teddy.
Quick Answer
To make this cute baby bear, crochet the head, legs and body, arms, ears, muzzle, tail, orange overalls, straps, and yellow hat separately. Stuff the head and body firmly, sew the face details carefully, dress the bear in the overalls, then attach the tiny hat and pom-pom for the final baby-bear look.
Jump to Section
Pattern Notes
- This pattern uses US crochet terms.
- Work most pieces in continuous rounds unless the pattern says otherwise. Use a stitch marker to mark the first stitch of each round.
- Stuff the head and body firmly, but do not overstuff the arms, ears, or tail. The arms should stay soft and easy to sew to the sides of the body.
- The orange overalls are made separately. Try them on the bear before sewing the straps in place. This makes it easier to adjust the strap length and bib position.
For a neat amigurumi finish, use an invisible decrease when shaping the head, body, and small pieces. You can follow this helpful guide for the invisible decrease crochet technique if you need a refresher.
Skill Level
Easy to intermediate.
This pattern is beginner-friendly if you already know how to make a magic ring, single crochet, increase, decrease, and sew amigurumi parts together.
Finished Size
The finished size depends on your yarn, hook, and tension.
Using sport-weight or DK yarn with a 2.0 mm–2.5 mm hook will create a small baby bear. Using plush yarn and a larger hook will make a bigger, softer version.
For yarn and hook size guidance, you can check the Craft Yarn Council yarn weight system.
Materials
- Beige or light brown yarn for the head, ears, hands, legs, and tail
- White yarn for the shirt, cuffs, and muzzle
- Orange yarn for the overalls
- Light green yarn for the sleeves and shoulder area
- Yellow yarn for the small hat
- Small white pom-pom or white yarn for making a pom-pom
- Black safety eyes
- Brown or black embroidery thread for the nose and mouth
- Pink blush or pink yarn for cheeks and inner ears
- Fiberfill stuffing
- Yarn needle
- Stitch marker
- Scissors
- Crochet hook suitable for your yarn, usually 2.0 mm–2.5 mm
Safety note: If you are making this bear for a baby or very young child, embroider the eyes instead of using safety eyes.
Abbreviations
- MR = magic ring
- sc = single crochet
- inc = increase, 2 sc in the same stitch
- dec = decrease
- ch = chain
- sl st = slip stitch
- BLO = back loop only
- FO = fasten off
If you are new to pattern reading, the How to Read an Amigurumi Pattern guide explains abbreviations, round counts, and repeat instructions in a simple way.
Cute Baby Bear Crochet Pattern
Head
Use beige or light brown yarn.
- R1: 8 sc in MR. [8]
- R2: inc ×8. [16]
- R3: (sc, inc) ×8. [24]
- R4: (2 sc, inc) ×8. [32]
- R5: (4 sc, inc) ×2, 5 sc, inc, (4 sc, inc) ×2, 5 sc, inc. [38]
- R6–R9: sc around. [38]
- R10: 9 sc, inc ×6, 8 sc, inc ×6, 9 sc. [50]
- R11–R14: sc around. [50]
- R15: 9 sc, dec ×6, 8 sc, dec ×6, 9 sc. [38]
- R16: [(3 sc, dec) ×3, 2 sc, dec] ×2. [30]
- R17: (3 sc, dec) ×6. [24]
- R18: (sc, dec, sc) ×6. [18]
Stuff the head firmly. FO and leave a long tail for sewing.
Legs and Body
Start with beige or light brown yarn.
Leg 1
- R1: 8 sc in MR. [8]
- R2: inc ×8. [16]
- R3: sc around. [16]
- R4: 4 sc, dec ×4, 4 sc. [12]
- R5–R8: sc around. [12]
FO for the first leg.
Leg 2
- Make the second leg the same way, but do not cut the yarn after R8.
- Ch 3, then join to the first leg.
Body
- R9: 12 sc around the first leg, 3 sc along one side of the chain, 12 sc around the second leg, 3 sc along the other side of the chain. [30]
- R10: (2 sc, inc, 2 sc) ×6. [36]
- R11–R12: sc around. [36]
- R13: Change to white yarn, work in BLO, sc around. [36]
- R14: 6 sc, dec, 16 sc, dec, 10 sc. [34]
- R15: 4 sc, dec ×2, 14 sc, dec ×2, 8 sc. [30]
- R16: (2 sc, dec, 2 sc) ×5. [25]
- R17: 10 sc, dec, 13 sc. [24]
- R18: (2 sc, dec) ×6. [18]
- R19: sc around. [18]
Stuff the body firmly. FO and leave a long tail for sewing.
The white part creates the shirt under the orange overalls. Make sure the body is stuffed evenly before sewing it to the head.
Arms
Make 2.
Start with beige or light brown yarn.
- R1: 6 sc in MR. [6]
- R2: inc ×6. [12]
- R3–R5: sc around. [12]
- R6: Change to white yarn, work in BLO, sc around. [12]
- R7–R8: sc around with white yarn. [12]
- R9–R10: Change to light green yarn, sc around. [12]
Stuff only the hand part lightly. Do not overstuff.
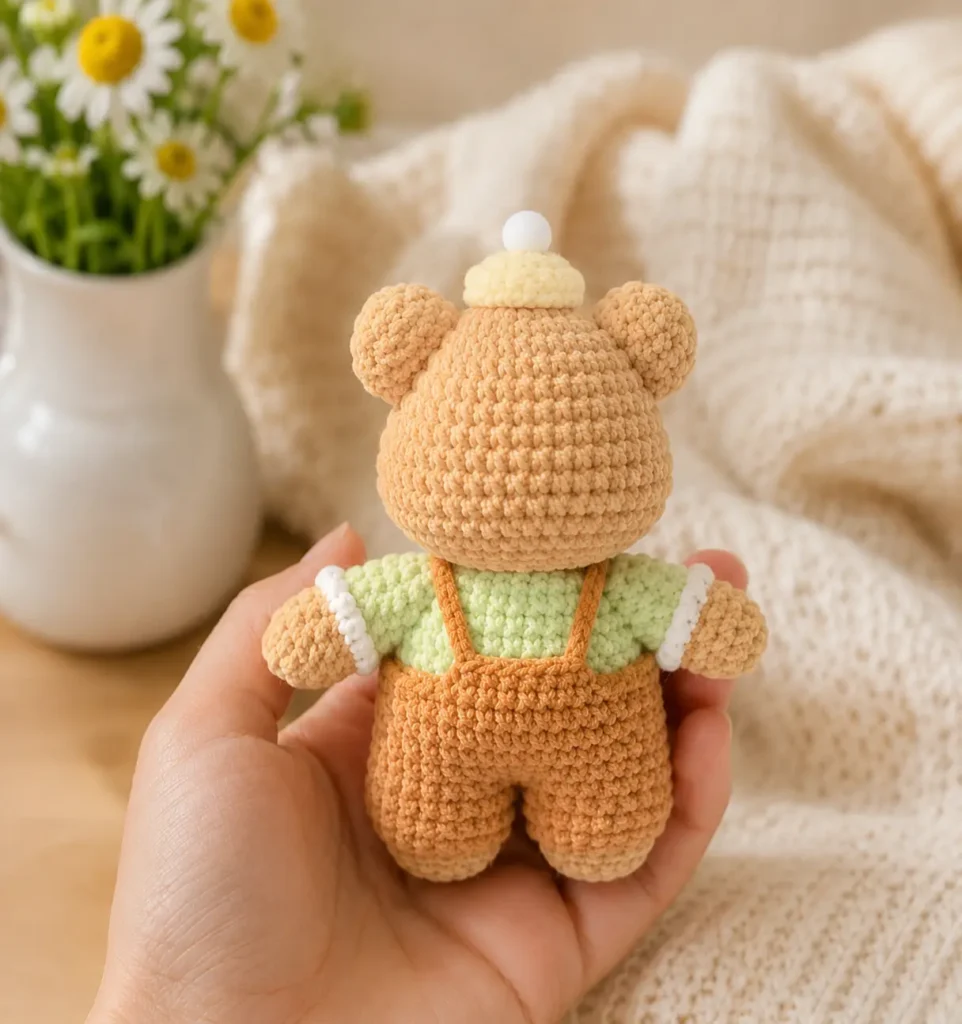
Flatten the opening and sew the arms to both sides of the body.
The beige part is the hand, the white part is the cuff, and the light green part is the sleeve. For a cleaner finish, pin both arms in place before sewing. The guide on how to attach amigurumi limbs evenly can help you place them neatly.
Ears
Make 2.
Use beige or light brown yarn.
- R1: 6 sc in MR. [6]
- R2: inc ×6. [12]
- R3: (sc, inc) ×6. [18]
- R4: sc around. [18]
- R5: (sc, dec) ×6. [12]
Do not stuff.
Flatten the ear and sew it to the side of the head. Add a little pink blush inside each ear.
Muzzle / Nose Piece
Use white yarn.
- R1: 6 sc in MR. [6]
- R2: inc ×6. [12]
- R3: (sc, inc) ×6. [18]
FO and leave a long tail for sewing.
Sew the muzzle to the lower center of the face. Embroider the nose and mouth with brown or black thread.
Tail
Use beige or light brown yarn.
- R1: 6 sc in MR. [6]
- R2: inc ×6. [12]
- R3–R4: sc around. [12]
- R5: dec ×6. [6]
FO and leave a tail for sewing.
Sew the tail to the back of the body after the overalls are in place, or sew it through the back of the overalls if you want it to show clearly.
Orange Overalls
Use orange yarn.
The overalls are made separately and placed over the bear body. Try them on before sewing the straps.
Pant Leg 1
- Ch 21.
- Starting in the 2nd ch from hook, make 20 sc. [20]
- Join carefully to form a small tube.
- R2–R4: sc around. [20]
FO for the first pant leg.
Pant Leg 2
Make the second pant leg the same way, but do not cut the yarn.
Join the Two Pant Legs
- R5: Crochet around both pant legs: 20 sc around the first pant leg, then 20 sc around the second pant leg. [40]
- R6–R9: sc around. [40]
Try the overalls on the bear body before finishing. They should fit around the lower body.
If there is a small gap between the pant legs, close it later with a few hidden stitches.
Front Bib
Choose the center front 10 stitches of the overalls.
More Free Amigurumi Patterns You’ll Love
")


- Row 1: 10 sc, ch 1, turn. [10]
- Row 2: dec, 6 sc, dec, ch 1, turn. [8]
- Row 3: dec, 4 sc, dec. [6]
FO and weave in the end.
The front bib should be short, like a small baby overall bib.
Back Bib
Choose the center back 8 stitches of the overalls.
- Row 1: 8 sc, ch 1, turn. [8]
- Row 2: dec, 4 sc, dec. [6]
FO and weave in the end.
The back bib should be smaller than the front bib.
Straps
Make 2 straps with orange yarn.
Option 1 — Simple Chain Straps
- Ch 12–16, depending on your bear size.
- Sew one end of each strap to the top of the front bib. Sew the other end of each strap to the top of the back bib.
Option 2 — Stronger Crochet Straps
- Ch 12–16.
- Starting in the 2nd ch from hook, sc across.
- FO and sew in place.
- Add 2 small buttons on the front straps if desired.
Small Yellow Hat
Use yellow yarn.
- R1: 8 sc in MR. [8]
- R2: inc ×8. [16]
- R3: (sc, inc) ×8. [24]
- R4: sc around. [24]
- R5: (sc, dec) ×8. [16]
FO and leave a long tail for sewing.
Make or attach a small white pom-pom to the top of the hat. Sew the hat slightly to one side on the bear’s head.
If you enjoy tiny accessories, you may also like the outfit style in the Little Zodiac Sheep Crochet Pattern, which also uses small clothing details to give the toy more personality.
Face Details
- Attach the safety eyes above the muzzle.
- Sew the white muzzle to the lower center of the face.
- Embroider a small oval nose and a short mouth line.
- Add pink blush to both cheeks.
- Add a little blush inside the ears.
- Take your time with the face. The position of the eyes, muzzle, and blush changes the whole expression of the bear. For a soft baby-bear look, place the muzzle low on the face and keep the eyes close to the top of the muzzle.
Assembly
- Sew the head to the body.
- Sew the ears to both sides of the head.
- Sew the muzzle to the front of the face.
- Attach or embroider the eyes.
- Embroider the nose and mouth.
- Sew the arms to the sides of the body.
- Put the orange overalls on the bear.
- Secure the overalls with a few hidden stitches if needed.
- Sew the straps from the front bib to the back bib.
- Sew the tail to the back of the body.
- Sew the small yellow hat to the top of the head.
- Attach the white pom-pom to the hat.
- Add blush to the cheeks and ears.
Your cute baby bear is finished.
Helpful Tips
- Use a stitch marker at the beginning of each round so you do not lose your place.
- Stuff the head firmly, especially around the cheeks, so the face keeps its rounded shape.
- Do not overstuff the arms. Light stuffing makes them easier to sew flat against the body.
- Try the overalls on the bear before sewing the straps. This helps you adjust the strap length.
- If the overalls feel too tight, use a slightly larger hook for the orange yarn.
- If the overalls feel too loose, sew a few hidden stitches at the back and sides to keep them in place.
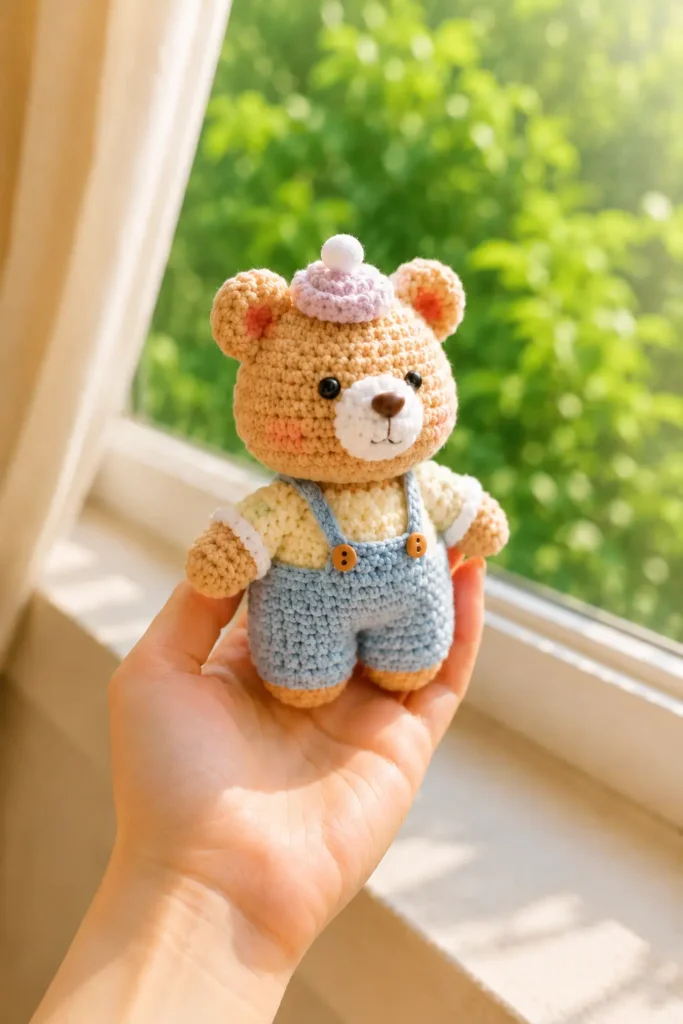
For a different bear style, you can make the same body and change the outfit colors. A strawberry-red outfit would look lovely with inspiration from the Strawberry Bear Baby Crochet Pattern.
Color Variation Ideas
- You can easily customize this cute baby bear crochet pattern with different colors.
- Try cream yarn for the bear and pastel blue overalls for a soft baby-boy style.
- Use beige yarn with pink overalls for a sweet nursery-style bear.
- Make the hat in red, blue, or mint green instead of yellow.
- Use embroidered eyes for a baby-safe version.
- Add a tiny bow instead of the hat for a different look.
You can also make a cozy food-inspired version by using warm toast colors, similar to the cute theme of the Mini Bear Pumpkin Toast Crochet Pattern.
Common Mistakes to Avoid
- Do not sew the muzzle too high. A lower muzzle gives the bear a softer baby expression.
- Do not place the ears too close together. Pin them first and check the face from the front before sewing.
- Do not make the straps too short. The overalls should sit comfortably over the shoulders.
- Do not overstuff the body before trying on the overalls. If the body is too firm, the clothes may become tight.
- Do not skip the hidden stitches if the overalls move too much. A few small stitches can keep everything neat.
FAQ
Is this cute baby bear crochet pattern beginner-friendly?
Yes, it is beginner-friendly if you already know basic amigurumi stitches such as single crochet, increase, decrease, and magic ring. The overalls add a little extra work, but they are simple and made separately.
Can I make this baby bear with plush yarn?
Yes, you can use plush yarn, but the finished bear will be larger. Use a hook size suitable for your yarn and make sure the overalls still fit around the body.
Can I make the overalls removable?
Yes, but you should avoid sewing the overalls directly to the body. Instead, make the straps slightly longer and use tiny buttons or snaps. For a cleaner display toy, hidden stitches are easier.
Can I embroider the eyes instead of using safety eyes?
Yes. Embroidered eyes are a better option if the bear is intended for a baby or young child.
What yarn color is best for the bear?
Beige, light brown, cream, or caramel yarn works beautifully for the bear. For the outfit, orange overalls with light green sleeves create a bright and playful look.
This Cute Baby Bear Crochet Pattern is a lovely project if you enjoy small amigurumi animals with clothing details. The rounded head, soft muzzle, tiny overalls, green sleeves, and yellow hat all work together to create a sweet baby bear full of personality.
You can keep the colors close to the original model or create your own version with pastel yarns, embroidered details, or a different hat color. Once finished, this baby bear makes a cute handmade gift, shelf decoration, or soft little friend for your amigurumi collection.