
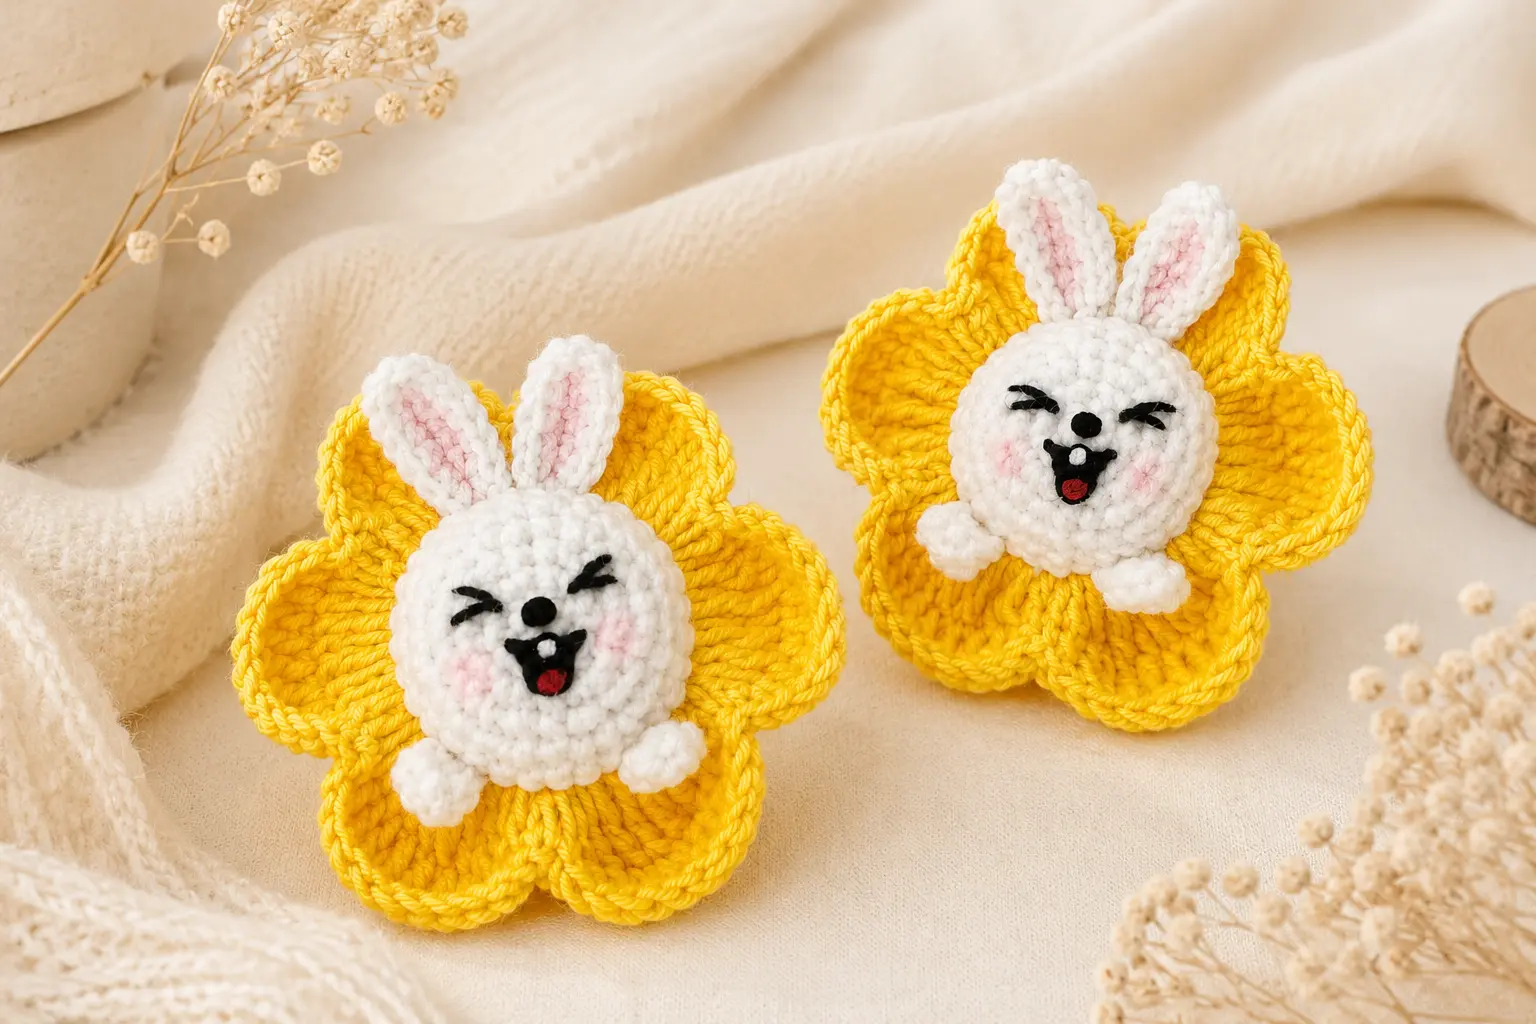
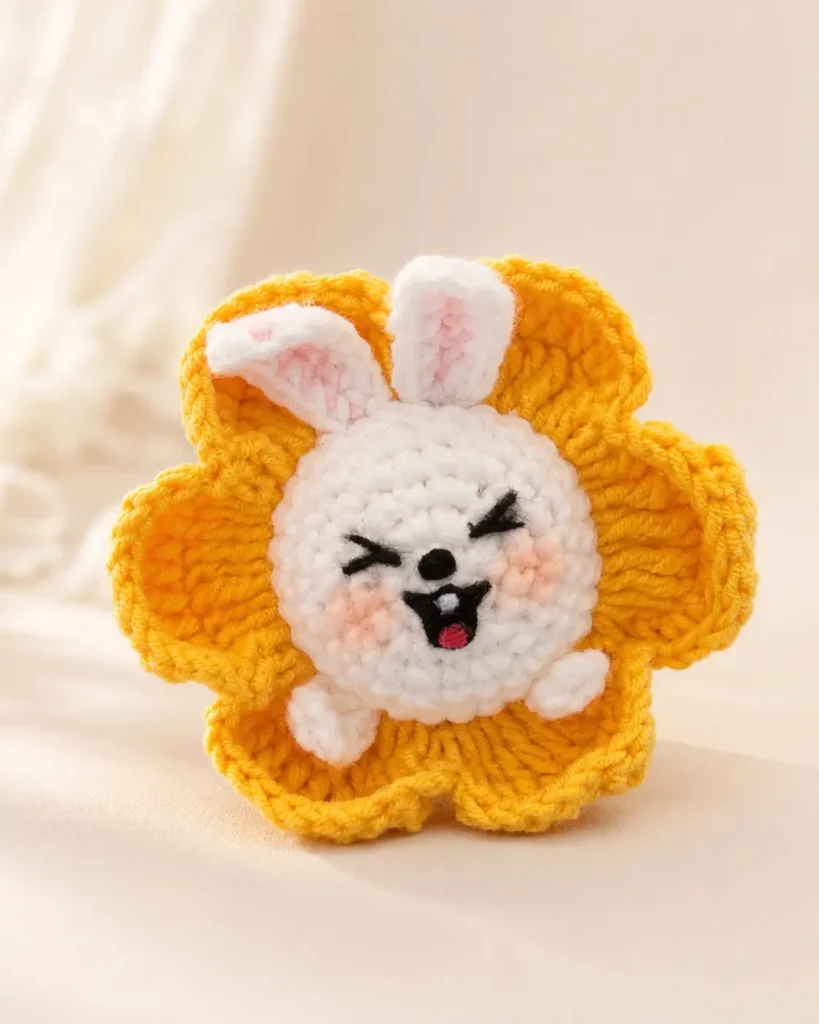
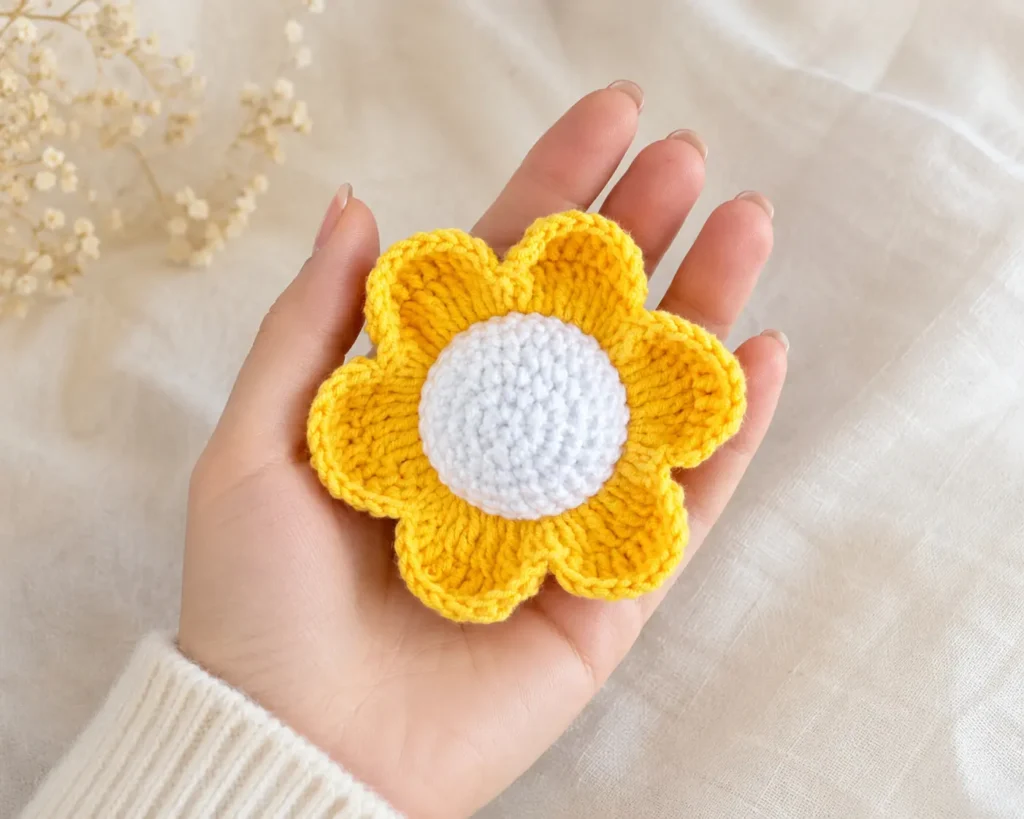
This Bunny in a Flower Crochet Pattern combines two cheerful springtime favorites in one adorable amigurumi design. A soft, round white bunny sits in the center of six large yellow petals, creating a finished piece that looks like a happy bunny peeking out of a flower.
The bunny’s body is worked as one simple rounded piece. The flower is then crocheted directly into the unused front loops around the body, so you do not need to sew six individual petals in place. Small ears, front paws, embroidered eyes, rosy cheeks, and an optional felt mouth complete its playful expression.
This flower bunny makes a lovely spring decoration, Easter gift, nursery ornament, or handmade desk companion. For another classic rabbit project, you may also enjoy our free amigurumi bunny pattern.
Crochet terminology: US terms
Skill level: Confident beginner to intermediate
Construction: Continuous rounds, rows, and joined petal rounds
Finished size: Varies depending on the yarn weight, hook size, and tension used
Jump to section
Pattern Notes
- Work the bunny body in continuous spiral rounds unless instructed otherwise.
- Do not join rounds or turn while making the body.
- Place a stitch marker in the first stitch of every round.
- Move the marker upward after completing each round.
- Numbers in square brackets show the stitch count at the end of the round or row.
- Stuff the body firmly, but avoid overstuffing it.
- Use invisible decreases to produce a smoother surface. Our Invisible Decrease Crochet Tutorial explains the technique in detail.
- Round 9 is worked in BLO. This leaves the front loops of Round 8 available for the yellow flower.
- The flower uses all 30 unused front loops.
- Each flower petal uses five consecutive front loops.
- The beginning and ending ch-2 sections of each petal do not count as tall stitches.
- Pin the facial features and sewn pieces in place before attaching them permanently.
- The facial expression is created with embroidery thread and small felt pieces.
- When making this project for a baby or young child, embroider all facial details instead of attaching glued felt pieces.
Quick Answer
The Bunny in a Flower Crochet Pattern begins with a round white amigurumi body. Round 9 is crocheted through the back loops only, leaving the front loops of Round 8 unused. Six yellow flower petals are then worked directly into those 30 available front loops, with five loops used for each petal.
The ears and paws are crocheted separately and sewn to the body. The closed eyes and nose are embroidered, while the open mouth can be created with felt or embroidery.
Materials
- White yarn for the bunny
- Yellow yarn for the flower
- Pink yarn for the inner ears
- Black embroidery thread for the eyes and nose
- Black felt for the mouth, optional
- White felt for the teeth, optional
- Pink or red felt for the tongue, optional
- Pink blush or pink embroidery thread for the cheeks
- Fiberfill stuffing
- Crochet hook suitable for your yarn
- Fine crochet hook for the thread nose, optional
- Yarn needle
- Embroidery needle
- Stitch marker
- Scissors
- Sewing pins
- Fabric glue, optional
You may use cotton, acrylic, or a cotton-blend yarn. The most important consideration is choosing a hook that produces firm stitches without large spaces between them.
Because hook sizes can vary between yarn types and manufacturers, consult our Yarn Weight, Gauge, and Hook Size Guide when choosing your materials.
Abbreviations
- MR – magic ring
- ch – chain
- sc – single crochet
- dc – double crochet
- tr – treble crochet
- inc – 2 sc in the same stitch
- dec – invisible single crochet decrease
- dc inc – 2 dc in the same stitch
- tr inc – 2 tr in the same stitch
- sl st – slip stitch
- BLO – back loop only
- FLO – front loop only
- st/sts – stitch/stitches
- FO – fasten off
This pattern follows US crochet terminology. You can also consult the Craft Yarn Council’s official crochet abbreviations for a standardized US terminology reference.
The flower uses several tall stitches. Review our tutorials on how to double crochet and how to treble crochet when needed.
Bunny in a Flower Crochet Pattern
Bunny Body
Use white yarn.
- Rnd 1: 6 sc in MR. [6]
- Rnd 2: Inc ×6. [12]
- Rnd 3: (Sc, inc) ×6. [18]
- Rnd 4: (Sc, inc, sc) ×6. [24]
- Rnd 5: (3 sc, inc) ×6. [30]
- Rnd 6–8: Sc around. [30]
- Rnd 9: BLO sc around. [30]
- This leaves the front loops of Round 8 available for attaching the flower.
- Rnd 10: Sc around. [30]
- Rnd 11: (3 sc, dec) ×6. [24]
- Rnd 12: (Sc, dec, sc) ×6. [18]
- Begin stuffing the body.
- Rnd 13: (Sc, dec) ×6. [12]
- Add more stuffing and shape the body into a firm, rounded form.
- Rnd 14: BLO dec ×6. [6]
- FO, leaving a yarn tail
Thread the tail through the front loops of the remaining six stitches. Pull tightly to close the opening, secure the yarn, and weave in the end.
Roll and shape the finished body gently between your hands to distribute the stuffing.
Yellow Flower
Use yellow yarn.
The flower is attached directly to the unused front loops of Round 8. There should be 30 available loops around the bunny.
Hold the bunny so the closed end is facing away from you. Locate the line of unused front loops and join the yellow yarn to any one of them.
The flower is completed in two rounds:
- The first round creates the six main petals.
- The second round adds height and definition around each petal.
First Flower Round
Each petal uses five consecutive front loops and contains 10 tall stitches:
- 2 dc
- 6 tr
- 2 dc
The ch-2 sections at the beginning and end of each petal are shaping chains and are not included in the 10-stitch count.
Petal 1
In the first unused front loop:
- Ch 2.
- Make 2 dc in the same loop.
In each of the next three front loops:
- Make 2 tr in each loop.
You will have made six treble crochet stitches across these three loops.
In the next front loop:
- Make 2 dc.
- Ch 2.
Petal 1 is complete. It has used five front loops.
Petals 2–6
Repeat the following instructions five times:
- Sl st in the next unused front loop.
- Ch 2.
- Make 2 dc in the same loop.
- Make 2 tr in each of the next three front loops.
- Make 2 dc in the next front loop.
- Ch 2.
After completing the sixth petal, sl st at the base of the first petal to close the round.
Count the petals before continuing. You should have:
- 6 petals
- 5 body loops used for each petal
- 10 tall stitches in each petal
Do not fasten off.
Second Flower Round
The second round is worked across the 10 tall stitches of each petal.
The slip stitches used to move between petals are for positioning and are not included in the stitch count.
Edging the First Petal
Make approximately 2 sl sts along the ch-2 edge of the first petal until the hook is positioned beside its first tall stitch.
Work across the 10 tall stitches as follows:
- Ch 2.
- Dc in each of the first 2 dc stitches.
- Tr in each of the next 6 tr stitches.
- Dc in each of the final 2 dc stitches.
- Ch 2.
- Sl st into the ch-2 space at the opposite side of the same petal.
The first petal edging is complete.
Edging Petals 2–6
Sl st carefully along the base until you reach the beginning edge of the next petal.
Repeat the following across that petal:
- Ch 2.
- Dc in the next 2 stitches.
- Tr in the next 6 stitches.
- Dc in the final 2 stitches.
- Ch 2.
- Sl st into the ch-2 space at the opposite side of the petal.
Repeat the same edging around all six petals.
After edging the final petal, sl st securely at the base. FO and weave the yarn tail into the back of the flower.
Gently stretch and shape each petal with your fingers. Arrange the six petals at equal distances around the bunny.
More Free Amigurumi Patterns You’ll Love
If the petals curl inward, lightly dampen and shape them. Allow the flower to dry flat before adding the remaining pieces.
Bunny Ears
Make 2.
Each ear consists of a narrow pink center surrounded by a white outer edging.
Inner Ear
Use pink yarn.
Row 1
Ch 6.
Starting in the second chain from the hook and working into the back bumps of the chains, sc in each of the next 5 chains.
[5]
FO.
Gently pull and straighten the yarn tails to help shape the pink strip. It should form a narrow center rather than a wide rectangle.
White Outer Ear Edging
Join white yarn at the lower end of the pink strip.
Work evenly around the strip as follows:
- Make 4 sc evenly along the first long side.
- Make an inc near the upper end.
- Make 3 sc around the tip.
- Make 4 sc evenly down the opposite long side.
FO, leaving a long tail for sewing.
Because the white edging is worked around the sides of a narrow crocheted strip rather than into clearly defined row-end stitches, the exact placement may vary slightly with tension. Space the stitches evenly and add an extra sc only when needed to prevent the ear from puckering.
Shape the ear into a narrow, slightly pointed oval.
Repeat for the second ear.
Front Paws
Make 2.
Use white yarn.
Row 1
Ch 5.
Starting in the third chain from the hook, dc in each of the remaining 3 chains.
[3]
FO, leaving a long tail for sewing.
The two skipped chains form the turning chain and help create a rounded end at the top of the paw.
Gently shape each paw before sewing.
Facial Features
Before embroidering, mark the proposed eye and nose positions with pins or short pieces of contrasting yarn. Check the face from the front and both sides.
Eyes
Use black embroidery thread.
Create two curved, closed eyes.
For each eye:
- Make the upper curve with one strand of black embroidery thread.
- Make the lower section slightly thicker with two strands.
- Add one or two short eyelashes at the outer corner, if desired.
- Secure all thread ends inside the body.
Position both eyes before embroidering either one permanently. This makes it easier to keep their height, width, and angle symmetrical.
Nose
Use black embroidery thread.
For a tiny thread nose:
- Form a very small thread ring or loop.
- Make ch 1 with a fine crochet hook.
- Pull the loop tightly closed.
- Shape it into a tiny round or oval nose.
- Secure it beneath and between the eyes.
For an easier alternative, embroider a tiny oval directly onto the bunny using several closely placed satin stitches.
Avoid making the nose too large because the mouth and teeth will be positioned immediately beneath it.
Mouth
Cut the following pieces:
- One small open-mouth shape from black felt
- One tiny tongue from pink or red felt
- Two tiny rectangular or rounded teeth from white felt
Place the black mouth shape beneath the nose. Position the tongue inside the lower part of the mouth and place the two white teeth along its upper edge.
Once you are satisfied with the placement, attach the pieces with small sewing stitches or a minimal amount of fabric glue.
Allow the glue to dry completely before handling the bunny.
For a felt-free version, embroider the mouth with black, white, and pink thread.
Cheeks
Apply a very small amount of pink blush beneath each eye.
Build the color gradually rather than applying a dark spot immediately. A cotton swab or small makeup brush can help create a soft finish.
Alternatively, embroider three or four short pink stitches on each cheek.
Embroidered cheeks are the better choice when the bunny will be washed frequently.
Assembly
Take time to pin every piece before sewing. Small differences in ear and paw placement can change the bunny’s expression considerably.
Our guide on attaching amigurumi limbs evenly includes additional tips for symmetrical placement and secure sewing.
1. Attach the Ears
Position the ears close together at the top of the bunny.
Angle them slightly outward while keeping the lower ends close enough to create the appearance of a centered pair.
Pin both ears in place and view the bunny from the front. Adjust them until:
- Both ears are approximately the same height.
- The pink centers face forward.
- The ears sit evenly above the eyes.
- Neither ear leans too far forward or backward.
Using the white yarn tails, sew the lower edges of the ears securely to the bunny.
Weave the yarn tails into the body.
2. Attach the Paws
Position the paws on the lower front of the bunny.
Angle them slightly outward so they appear to rest naturally over the lower body. Leave enough space between the paws for the mouth to remain visually centered above them.
Pin both paws before sewing.
Use the yarn tails to sew along the lower and side edges. Leave the rounded upper ends slightly raised when you want the paws to appear more dimensional.
3. Complete the Face
Add the eyes, nose, mouth, tongue, teeth, and cheeks.
Work from the largest features to the smallest:
- Mark and embroider the eyes.
- Add the nose.
- Position the black mouth.
- Add the tongue and teeth.
- Finish with the cheeks and eyelashes.
Check the face after each step. It is easier to reposition a loose felt piece than to remove one after the glue has dried.
4. Arrange the Flower
Spread the six yellow petals evenly around the bunny.
Check that:
- The bunny sits in the center.
- Each petal points outward.
- The spaces between the petals are similar.
- No petal is folded underneath the body.
- The second flower round is visible along every petal.
Use your fingers to round the outer edges and adjust the height of the treble crochet sections.
5. Finish the Bunny
Weave in all remaining yarn and embroidery tails.
Trim loose fibers carefully and reshape the body one final time.
When felt pieces were used, check that every edge is securely attached before displaying or handling the finished bunny.
How the Flower Construction Works
The flower may look complicated at first, but its construction follows a simple numerical structure.
Round 8 of the body contains 30 stitches. Round 9 is worked in BLO, which leaves 30 front loops available.
The flower has six petals:
30 front loops ÷ 6 petals = 5 front loops per petal
Each petal is distributed across those five loops:
- First loop: 2 dc
- Second loop: 2 tr
- Third loop: 2 tr
- Fourth loop: 2 tr
- Fifth loop: 2 dc
That produces:
2 dc + 6 tr + 2 dc = 10 tall stitches per petal
Keeping track of the five-loop repeat is the easiest way to avoid producing too many or too few petals.
Helpful Pattern Tips
Count the Front Loops Before Starting
Before joining the yellow yarn, count the unused front loops around the body. There should be exactly 30.
Place a temporary marker after every fifth loop. The markers divide the round into six equal petal sections and can be removed as each petal is completed.
Do Not Skip Loops Between Petals
The slip stitch at the beginning of Petals 2–6 is worked into the first loop of the new five-loop section. It does not require an additional unused loop.
Every available front loop should be used by the end of the sixth petal.
Keep the Petal Chains Loose
The ch-2 sections create flexible sides at the beginning and end of each petal. Crocheting these chains too tightly may cause the petals to curl or pull inward.
Use Consistent Treble Crochet Tension
Treble crochet stitches form the highest central portion of each petal. Keep them similar in height so the flower has an even outline.
Stuff Before the Opening Becomes Too Small
Begin stuffing after Round 12. Waiting until after the final decrease round can make it difficult to distribute the fiberfill evenly.
Avoid Overstuffing
Too much stuffing can stretch the stitches and distort the unused front loops where the flower is attached. The bunny should feel firm while remaining smoothly rounded.
Test the Face With Temporary Pieces
Cut temporary eye and mouth shapes from paper before using felt. Move them around until you find an expression that matches the design.
Optional Keychain Version
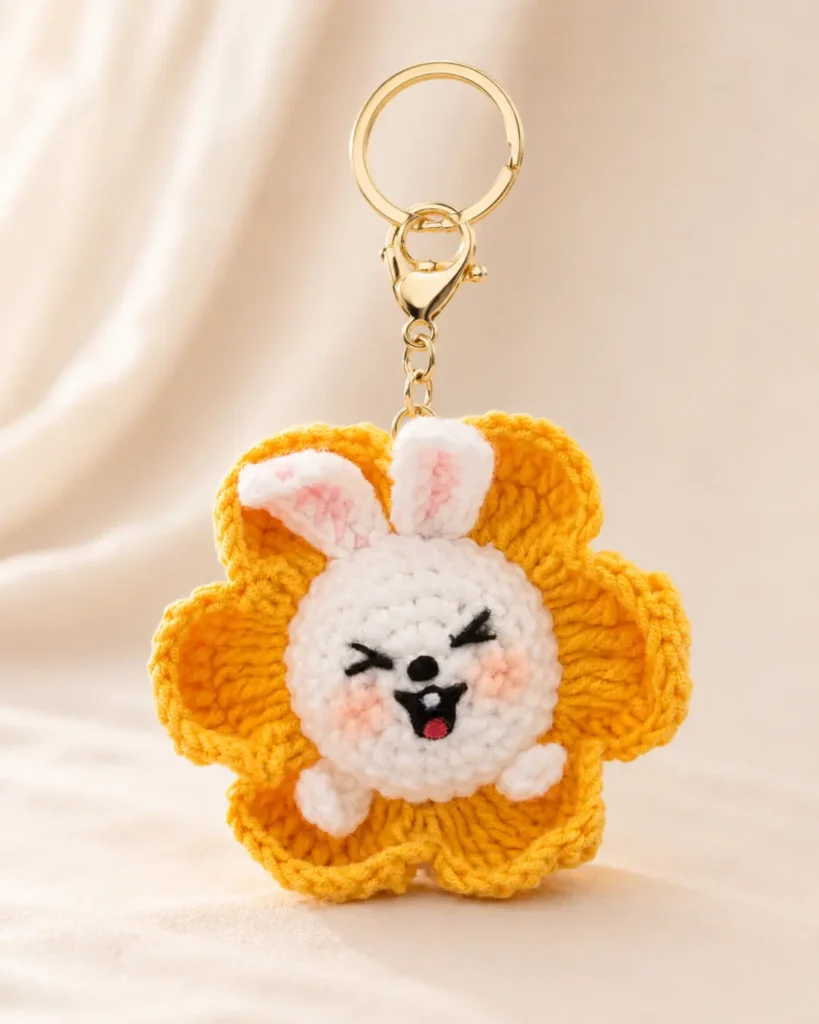
This pattern can be made smaller by using lightweight yarn or crochet thread with a matching small hook.
To turn the finished bunny into a keychain:
- Crochet the pattern with firm tension.
- Embroider the facial features instead of using glued felt.
- Insert a reinforced yarn loop between the ears.
- Pass a jump ring through the loop.
- Connect the jump ring to a keychain clasp.
- Pull firmly on the attachment before use.
Do not attach the metal keychain hardware directly through a single crochet stitch, as frequent pulling may stretch or damage it.
Color Variations
The classic version uses a white bunny, yellow petals, and pink inner ears, but the colors are easy to customize.
Pastel Spring Bunny
Use:
- Cream bunny
- Pale pink petals
- Light peach inner ears
- Soft pink cheeks
Daisy Bunny
Use:
- White bunny
- White petals
- Yellow flower edging
- Pink inner ears
Sunflower Bunny
Use:
- Light brown bunny
- Golden-yellow petals
- Dark brown inner ears
- Warm peach cheeks
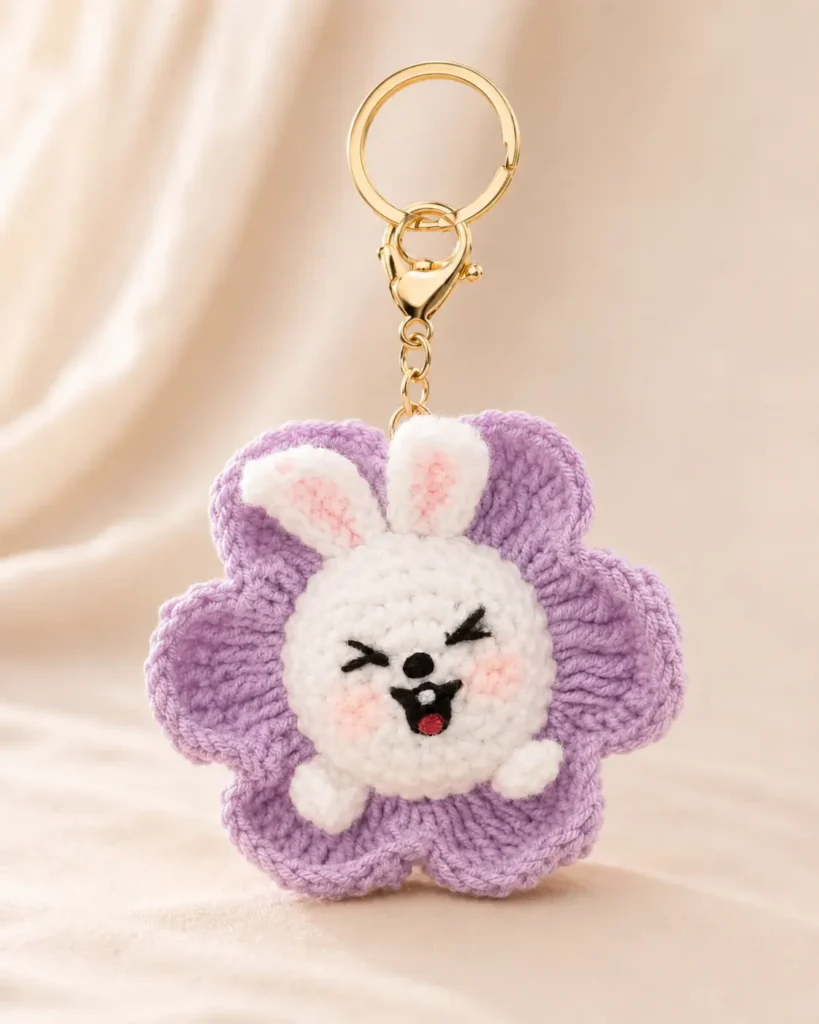
Lavender Flower Bunny
Use:
- White or pale gray bunny
- Lavender petals
- Pink or lilac inner ears
- Purple embroidered accents
Easter Bunny
Use:
- Pastel blue, pink, or mint bunny
- White or pale yellow petals
- Contrasting inner ears
- Embroidered facial details
For another bunny design with colorful accessories, try the Mini Bunny with Carrot Bag Crochet Pattern.
Child-Safety Notes
This bunny contains small decorative pieces when felt teeth, a felt tongue, or glued facial features are used.
For a toy intended for a baby or child younger than three:
- Embroider the eyes.
- Embroider the nose and mouth.
- Embroider the teeth and tongue.
- Avoid glued felt.
- Do not add buttons, beads, safety eyes, keychain hardware, or other detachable pieces.
- Secure every yarn end inside the body.
- Inspect the seams regularly.
The finished item should be considered a decorative piece when small glued components are included.
Frequently Asked Questions
Why is Round 9 worked in BLO?
Working Round 9 through the back loops leaves the front loops of Round 8 unused. These loops create a neat, evenly spaced attachment line for the yellow flower.
How many loops does each flower petal use?
Each petal uses five consecutive front loops. Six petals use all 30 available loops.
How many stitches are in each petal?
ach first-round petal contains 10 tall stitches:
2 dc
6 tr
2 dc
The beginning and ending ch-2 sections are not counted as tall stitches.
Do the chains count as stitches?
No. The ch-2 sections at the beginning and end of each petal are used for shaping and positioning. Do not count them as part of the 10 tall stitches.
Why did I make only five petals?
The most common cause is accidentally using six loops for one or more petals. Mark every fifth loop before beginning the flower to divide the round into six equal sections.
Why did I make more than six petals?
You may have started a new petal without completing the full five-loop repeat. Count the loops used by each petal carefully.
This Bunny in a Flower Crochet Pattern turns a simple round amigurumi body into a bright spring character with a clever flower construction. By working the petals directly into the unused front loops, the flower remains centered and evenly arranged without requiring six separate sewn pieces.
The combination of a white bunny, sunny yellow petals, pink ears, curved eyes, and tiny teeth gives the finished project a cheerful personality. You can keep the classic colors or create pastel, daisy, sunflower, lavender, and Easter variations.
Once the final yarn tails have been hidden, gently shape the bunny and spread the six petals around it. The completed piece should feature a firm, rounded white bunny sitting neatly in the center of a large six-petal flower.
