


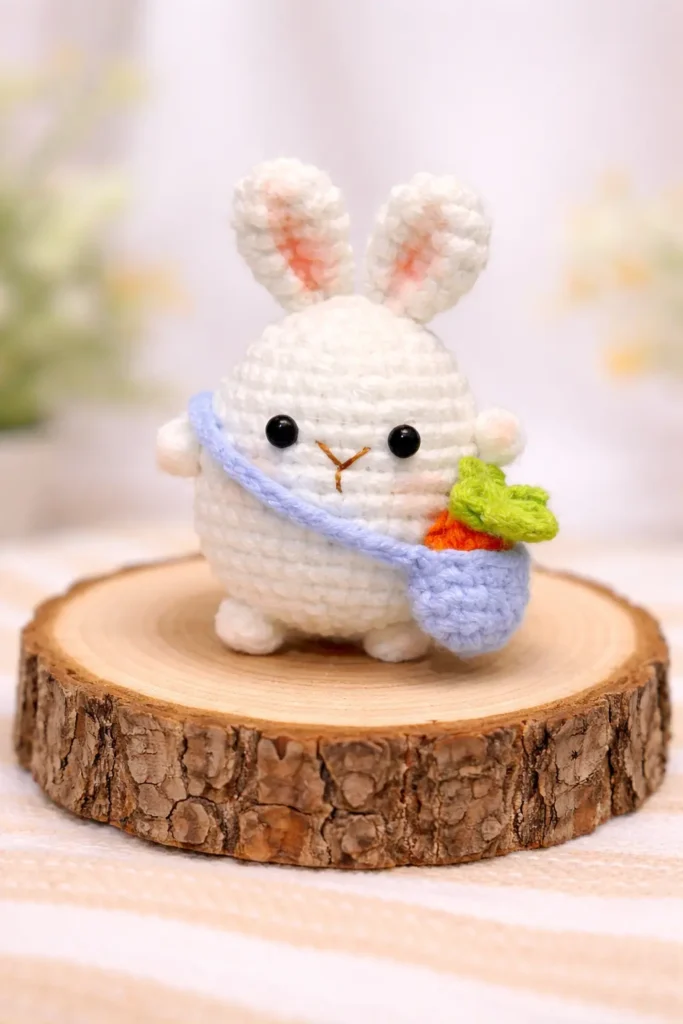
If you love tiny handmade toys with sweet little accessories, this mini bunny with carrot bag crochet pattern is going to steal your heart. This design is soft, simple, and extra charming thanks to the diagonal mini bag and the tiny carrot tucked inside. It is the kind of small amigurumi project that looks adorable as a shelf decoration, a cute desk buddy, or even a thoughtful handmade gift.
What makes this bunny especially fun is that it feels like a full little character. The rounded body, tiny limbs, upright ears, and miniature carrot bag all work together to give it a playful springtime look. If you are still learning the basics, you may also enjoy my first amigurumi step-by-step guide before starting this project.
Jump to section
Why You’ll Love This Mini Bunny
There are so many reasons to fall in love with this little project:
- It is small and satisfying to make.
- The carrot bag adds a unique and playful detail.
- The shape is cute without being overly complicated.
- It works beautifully as a spring gift, Easter decoration, or bunny-themed desk charm.
- The pattern uses simple shaping and easy assembly.
If you already enjoy making bunny designs, you may also like this lovely amigurumi bunny free pattern for another cute rabbit idea.
Materials and Tools
To make this mini bunny with carrot bag crochet pattern, you will need:
- Hook: 2.0 mm
- Yarn colors:
- White for bunny
- Pink for inner ears
- Light blue for bag and strap
- Orange for carrot
- Green for carrot leaves
- Black safety eyes
- Stuffing
- Yarn needle
- Scissors
If you are unsure how yarn size and hook choice affect your final result, this helpful yarn weight gauge hook size guide can make things much clearer.
Abbreviations
- MR = magic ring
- sc = single crochet
- inc = 2 sc in the same stitch
- dec = single crochet decrease
- ch = chain
- sl st = slip stitch
- hdc = half double crochet
- FO = fasten off
If magic rings still feel tricky, this tutorial on magic ring vs chain circle amigurumi may help you choose the best start for tiny projects like this one.
If you’re ever unsure about U.S. shorthand, the official Craft Yarn Council crochet abbreviations guide is a reliable reference for standard crochet terminology.
Mini Bunny with Carrot Bag Crochet Pattern
1. Body
Rnd 1: 6 sc in MR. (6)
Rnd 2: inc x6. (12)
Rnd 3: (sc, inc) x6. (18)
Rnd 4: (sc, inc, sc) x6. (24)
Rnd 5: sc around. (24)
Rnd 6: (3 sc, inc) x6. (30)
Rnd 7–9: sc around. (30)
Rnd 10: (2 sc, inc, 2 sc) x6. (36)
Rnd 11–14: sc around. (36)
Rnd 15: (2 sc, dec, 2 sc) x6. (30)
Rnd 16: (3 sc, dec) x6. (24)
Rnd 17: (sc, dec, sc) x6. (18)
Start stuffing firmly.
Rnd 18: (sc, dec) x6. (12)
Rnd 19: dec x6. (6)
FO and close the hole.
Place the eyes before closing, roughly centered on the face. Embroider the little nose and mouth with brown yarn.
For neater shaping on the decrease rounds, I recommend using the method shown in this invisible decrease crochet tutorial.
2. Ears ×2
Rnd 1: 6 sc in MR. (6)
Rnd 2: inc x6. (12)
Rnd 3–4: sc around. (12)
Rnd 5: (2 sc, dec) x3. (9)
Rnd 6: sc around. (9)
FO, leaving a tail for sewing.
Flatten lightly and sew to the top of the head. Add the pink inner ear embroidery after sewing or before, depending on your preference.
3. Carrot
Using orange yarn:
Rnd 1: 5 sc in MR. (5)
Rnd 2: sc, inc, sc, inc, sc. (7)
Rnd 3–5: sc around. (7)
Change to green yarn for the top.
Rnd 6: In each stitch, make: ch 4, sl st.
This creates the leafy top.
FO.
If you are new to color swaps in tiny amigurumi pieces, this changing colors in amigurumi guide is worth bookmarking.
4. Arms and Feet ×4 Total
For each tiny limb:
Ch 4
Starting in the 2nd ch from hook:
2 hdc, 1 sc
FO, leaving a tail for sewing.
Make 4 pieces total:
- 2 for arms
- 2 for feet
These tiny limbs are simple, but their placement matters a lot. A small shift can completely change the bunny’s expression and posture.
5. Bag
Using light blue yarn:
Ch 6
Rnd 1: Starting in 2nd ch from hook, sc 4, 3 sc in last ch, work on the other side of the foundation chain: sc 3, inc in last stitch.
This creates a small oval base.
The chart says “total 4 rows”, so continue:
Rnd 2–4: sc around.
FO.
Strap
Ch 34
FO and attach both ends to the bag to form the shoulder strap.
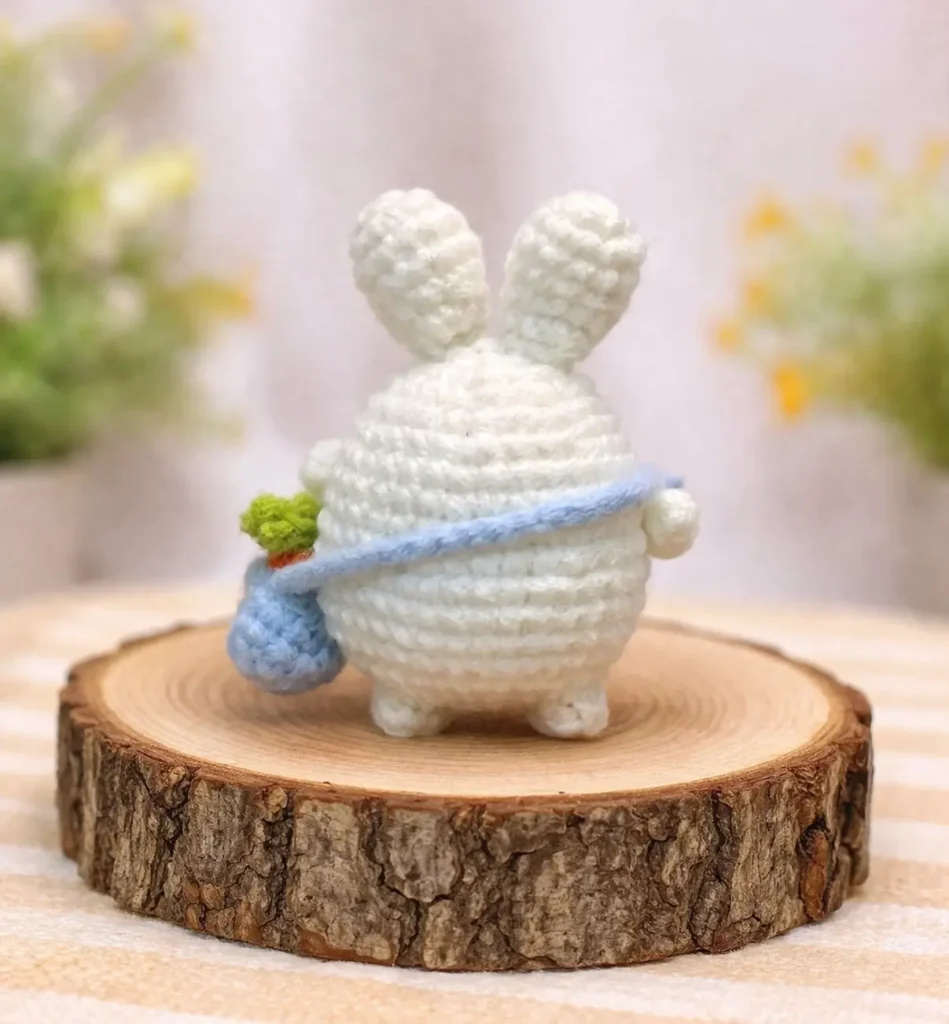
The bag should sit diagonally across the body for the cutest final look. Keep the strap slightly snug so it does not hang too loosely.
More Free Amigurumi Patterns You’ll Love
")


Assembly
Now it is time to bring your bunny to life.
- Sew the ears to the top of the head.
- Sew the arms to the sides.
- Sew the feet near the lower front.
- Attach the bag diagonally across the bunny’s body like in the photo.
- Place the carrot inside the bag and tack it in place with a few stitches.
- Embroider the small brown nose and mouth in the center of the face.
If you want your arms and feet to look balanced from every angle, this guide on how to attach amigurumi limbs evenly can really help.
Helpful Tips for a Cute Final Result
This mini bunny with carrot bag crochet pattern is fairly simple, but a few little details will make the result even better.
Keep the face minimal
Because the bunny is very small, less is more. Tiny black eyes and a delicate embroidered nose-mouth detail will look sweeter than large or heavily embroidered features.
Do not overstuff the body
Stuff the lower body and head firmly enough to keep the shape, but leave a little softness. Overstuffing can stretch the stitches and make the bunny lose its gentle rounded look.
Position the bag before sewing permanently
Try the strap placement a couple of times before attaching it. The cutest effect usually comes from a diagonal line across the front with the bag resting naturally at one side.
Secure the carrot well
A few hidden stitches will keep the carrot in place while still making it look like it is tucked inside the bag.
Pattern Styling Ideas
One of the nicest things about this mini bunny with carrot bag crochet pattern is how easy it is to personalize.
You could try:
- a pastel lavender bag instead of light blue
- a cream bunny instead of bright white
- a tiny blush detail on the cheeks
- a slightly longer strap for a looser crossbody look
- a detachable carrot for extra playfulness
If you enjoy small cute character projects, you might also love the style of this mini bear crochet keychain pattern, which has the same tiny handmade charm.
FAQ
Is this mini bunny pattern written in US terms?
Yes, this pattern is written in US crochet terms.
Can I use a different hook size?
Yes, but your finished bunny will become larger or smaller depending on the yarn and hook combination you choose.
Can I make the bag in another color?
Absolutely. Pastel pink, mint, lavender, or beige would all look lovely on this bunny.
Is the carrot removable?
In the original finish, the carrot is tacked into place with a few stitches. You can leave it loose if you prefer, but sewing it down helps keep the design neat.
Can I turn this into a keychain?
Yes, you can. Just add a keychain loop at the top after assembly, though the final size will depend on your yarn and stuffing.
This mini bunny with carrot bag crochet pattern is one of those tiny projects that instantly feels cheerful. It is sweet, whimsical, and surprisingly full of personality for such a small design. I especially love how the little carrot bag turns a simple bunny into a complete character.
Whether you make it for spring, for Easter, for a child’s gift, or just because you love mini crochet animals, this bunny is a delightful project to keep in your pattern collection. It is also a wonderful way to practice small-part assembly without taking on a huge or complicated amigurumi.
If you enjoyed this pattern, you may also like the softer flat style of the flat bunny applique crochet pattern, which makes a lovely companion project for bunny lovers.