


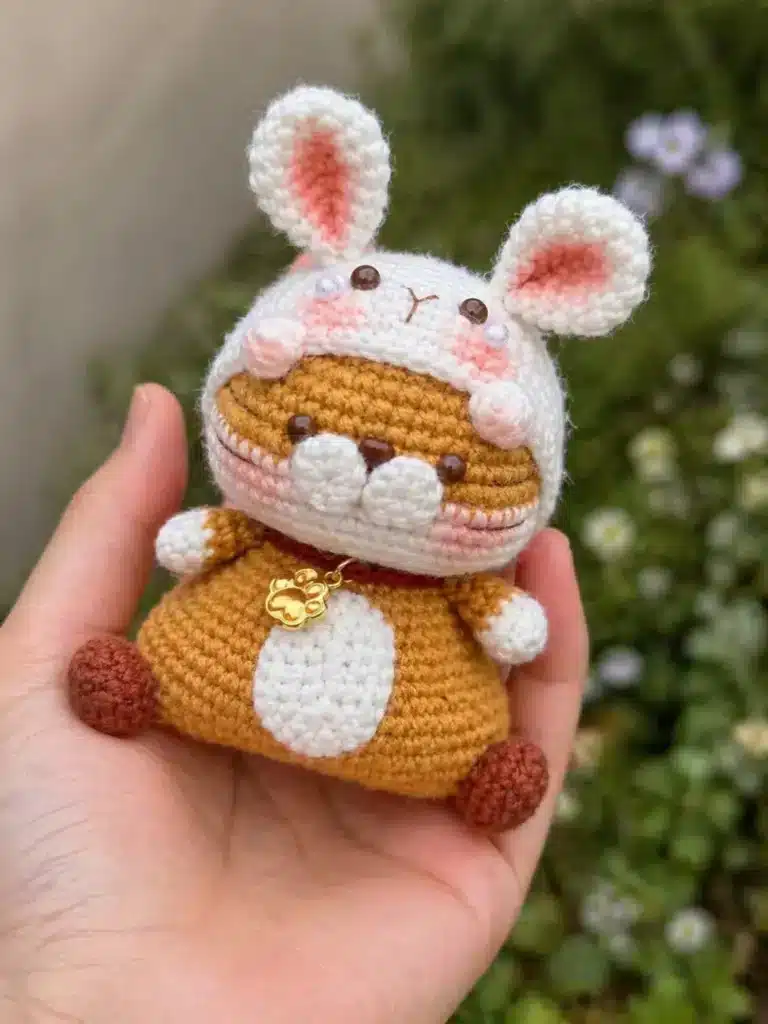
If you love tiny amigurumi characters with a little extra personality, this sitting tiger in bunny hood crochet pattern is such a sweet project to add to your handmade collection. It has a round tiger face, a soft bunny hood, long floppy ears, tiny paws, a white belly patch, and cute embroidered tiger stripes.
This pattern is perfect for a mini desk buddy, a handmade gift, a nursery decoration, or even a bag charm if you use a smaller hook and firm yarn. The bunny hood gives the tiger a playful costume look, making it a fun project for spring, Easter-inspired crochet, or anyone who loves cute animal amigurumi.
If you enjoy animal projects with charming accessories, you may also like my Mini Bunny with Carrot Bag Crochet Pattern because it has the same sweet handmade gift feeling. And if you are still building your amigurumi basics, my First Amigurumi Step-by-Step Guide can help you feel more confident before starting.
Table of Contents
About This Sitting Tiger in Bunny Hood Crochet Pattern
This cute sitting tiger wears a soft bunny hood with long ears, a rounded body, tiny paws, and a sweet white belly patch. It is perfect as a mini amigurumi toy, bag charm, desk decoration, or handmade gift.
The construction is beginner-friendly if you already know how to work in continuous rounds, increase, decrease, sew small pieces, and embroider simple facial details. The bunny hood is made separately and sewn over the tiger head, which makes the final look extra adorable.
For a clean finish, keep your stitches tight and use a hook size that works well with your yarn. You can check the Yarn Weight and Hook Size Guide if you want help choosing a yarn and hook combination. For a reliable external crochet reference, the Craft Yarn Council yarn weight system is also useful when comparing yarn labels.
Skill Level
Intermediate beginner
You should be comfortable with:
- Magic ring
- Single crochet
- Increasing and decreasing
- Working around a foundation chain
- Sewing amigurumi pieces together
- Light embroidery details
If you need a refresher, you can review my How to Single Crochet tutorial before starting.
Finished Size
The final size depends on your yarn and hook. With a 2.0 mm crochet hook and sport-weight yarn, the tiger will be a small amigurumi size, around 9–12 cm tall.
Materials
- Hook size: 2.0 mm crochet hook
- Yarn weight: Sport weight or light DK yarn
- Main tiger color: Golden brown, caramel, or mustard orange
- Bunny hood color: White or cream
- Inner ear / blush color: Soft pink
- Muzzle and belly color: White or cream
- Feet color: Medium brown or dark caramel
- Nose / eyes: Black safety eyes or black embroidery thread
- Fiberfill stuffing
- Yarn needle
- Stitch marker
- Scissors
- Optional: small gold charm or ribbon for decoration
Abbreviations
This pattern uses US crochet terms.
- MR = magic ring
- ch = chain
- sc = single crochet
- inc = increase, 2 sc in the same stitch
- dec = single crochet decrease
- dc = double crochet
- BLO = back loop only
- FO = fasten off
- st / sts = stitch / stitches
For neater shaping, especially on the head and body, I recommend using an invisible decrease. You can follow my Invisible Decrease Crochet Tutorial if you want a cleaner amigurumi finish.
Pattern Notes
- This sitting tiger in bunny hood crochet pattern is written in US crochet terms.
- Work in continuous rounds unless stated otherwise.
- Use a stitch marker to mark the first stitch of each round.
- Stuff the head and body firmly, but do not overstuff the arms, ears, or small details.
- The bunny hood is made separately and sewn over the tiger head.
- The pink inner ear detail can be embroidered, brushed on with yarn, or added with felt.
- Add the tiger stripes after assembly so you can place them evenly.
- If you want more practice with cute animal amigurumi, you may also enjoy the Mini Bear Crochet Keychain Pattern.
Sitting Tiger in Bunny Hood Crochet Pattern
Head
Use golden brown / tiger color yarn.
Rnd 1: 6 sc in MR. [6]
Rnd 2: inc around. [12]
Rnd 3: (sc, inc) x6. [18]
Rnd 4: (2 sc, inc) x6. [24]
Rnd 5: (3 sc, inc) x6. [30]
Rnd 6: (4 sc, inc) x6. [36]
Rnd 7: (5 sc, inc) x6. [42]
Rnd 8: sc around. [42]
Rnd 9: (6 sc, inc) x6. [48]
Rnd 10–12: sc around. [48]
Rnd 13: 11 sc, (sc, inc) x5, 6 sc, (inc, sc) x5, 11 sc. [58]
Rnd 14–17: sc around. [58]
Rnd 18: 11 sc, (sc, dec) x5, 6 sc, (dec, sc) x5, 11 sc. [48]
Rnd 19: (4 sc, dec) x8. [40]
Rnd 20: (3 sc, dec) x8. [32]
Rnd 21: (2 sc, dec) x8. [24]
Stuff the head firmly. FO and leave a long tail for sewing.
Body
Use golden brown / tiger color yarn.
Rnd 1: Ch 17. Starting in the 2nd ch from hook: inc, 14 sc, 3 sc in last ch. Continue on the other side of the chain: 15 sc. [34]
Rnd 2: 2 inc, 14 sc, 3 inc, 14 sc, inc. [40]
Rnd 3: (sc, inc) x2, 14 sc, (sc, inc) x3, 14 sc, sc, inc. [46]
Rnd 4: (inc, 2 sc) x2, 14 sc, (inc, 2 sc) x3, 14 sc, inc, 2 sc. [52]
Rnd 5: sc around. [52]
Rnd 6: 8 sc, (sc, inc) x3, 2 sc, (inc, sc) x3, 30 sc. [58]
Rnd 7: 41 sc, (sc, inc) x6, 5 sc. [64]
Rnd 8: sc around. [64]
Rnd 9: (2 sc, dec) x2, 20 sc, (2 sc, dec) x3, sc, (inc, 2 sc) x6, 3 sc, dec. [64]
Rnd 10: (dec, sc) x5, 2 sc, (dec, sc) x6, 26 sc, dec, sc. [52]
Rnd 11–12: sc around. [52]
Rnd 13: dec x2, 14 sc, dec x3, sc, (dec, 2 sc) x6, sc, dec. [40]
Rnd 14: 20 sc, (sc, dec) x6, 2 sc. [34]
Rnd 15–16: sc around. [34]
Rnd 17: sc, dec, 15 sc, dec, 14 sc. [32]
Rnd 18: (2 sc, dec) x8. [24]
Stuff the body. FO and leave a long tail for sewing.
Arms
Make 2 using golden brown yarn. Use white yarn for the paw tips if desired.
Rnd 1: 6 sc in MR. [6]
Rnd 2: (sc, inc) x3. [9]
Rnd 3–5: sc around. [9]
Rnd 6: (sc, dec) x3. [6]
Stuff very lightly. FO and leave a tail for sewing.
Muzzle Pieces
Make 2 using white or cream yarn.
Rnd 1: Ch 4. Starting in the 2nd ch from hook: inc, sc, 3 sc in last ch. Continue on the other side: 2 sc. [8]
Rnd 2: inc, 3 sc, 3 sc in next st, 2 sc, inc. [12]
Rnd 3: BLO sc around. [12]
Rnd 4: 3 sc, dec x3, 3 sc. [9]
FO and leave a long tail for sewing. Sew both pieces side by side on the lower front of the head.
Nose / Mouth Piece
Use white, cream, or light beige yarn.
Rnd 1: 8 sc in MR. [8]
FO and sew between the two muzzle pieces. Embroider the mouth with black thread.
Bunny Hood
Use white or cream yarn.
Rnd 1: 7 sc in MR. [7]
Rnd 2: inc around. [14]
Rnd 3: (sc, inc) x7. [21]
Rnd 4: (2 sc, inc) x7. [28]
Rnd 5: (3 sc, inc) x7. [35]
Rnd 6: (4 sc, inc) x7. [42]
Rnd 7: (5 sc, inc) x7. [49]
Rnd 8: (6 sc, inc) x7. [56]
Rnd 9–17: sc around. [56]
FO and leave a long tail. Place the hood over the tiger head and sew it neatly in place.
This hood gives the tiger a soft bunny costume look. If you like bunny-inspired crochet projects, the Amigurumi Bunny Free Pattern is another cute project to save for later.
Bunny Hood Ears
Make 2 using white or cream yarn.
Rnd 1: 6 sc in MR. [6]
Rnd 2: inc around. [12]
Rnd 3: (sc, inc) x6. [18]
Rnd 4: (5 sc, inc) x3. [21]
Rnd 5: sc around. [21]
Rnd 6: (5 sc, dec) x3. [18]
Rnd 7: (4 sc, dec) x3. [15]
Rnd 8: (3 sc, dec) x3. [12]
Rnd 9: (2 sc, dec) x3. [9]
Do not stuff. Flatten the ears slightly. Add soft pink detail inside each ear using embroidery, felt, or brushed yarn. Sew both ears to the top of the bunny hood.
Belly Patch
Use white or cream yarn.
Rnd 1: Ch 5. Starting in the 2nd ch from hook: 3 sc, 3 sc in last ch. Continue on the other side: 2 sc, inc. [10]
Rnd 2: inc, 2 sc, inc x3, 2 sc, inc x2. [16]
Rnd 3: (sc, inc), 2 sc, (sc, inc) x3, 2 sc, (sc, inc) x2. [22]
FO and leave a tail for sewing. Sew the belly patch to the front of the body.
Feet and Tail Bobbles
Use medium brown yarn.
Make 2 feet and 1 tail if desired.
Make a magic ring. Work 6 unfinished double crochet stitches into the ring, then yarn over and pull through all loops on the hook to close the bobble. Ch 1 to secure.
More Free Amigurumi Patterns You’ll Love
")


")
FO and leave a tail for sewing.
If you are new to double crochet stitches, you can practice with my How to Double Crochet tutorial before making the bobbles.
Assembly
- Sew the head to the body. Make sure the face is centered before closing the seam.
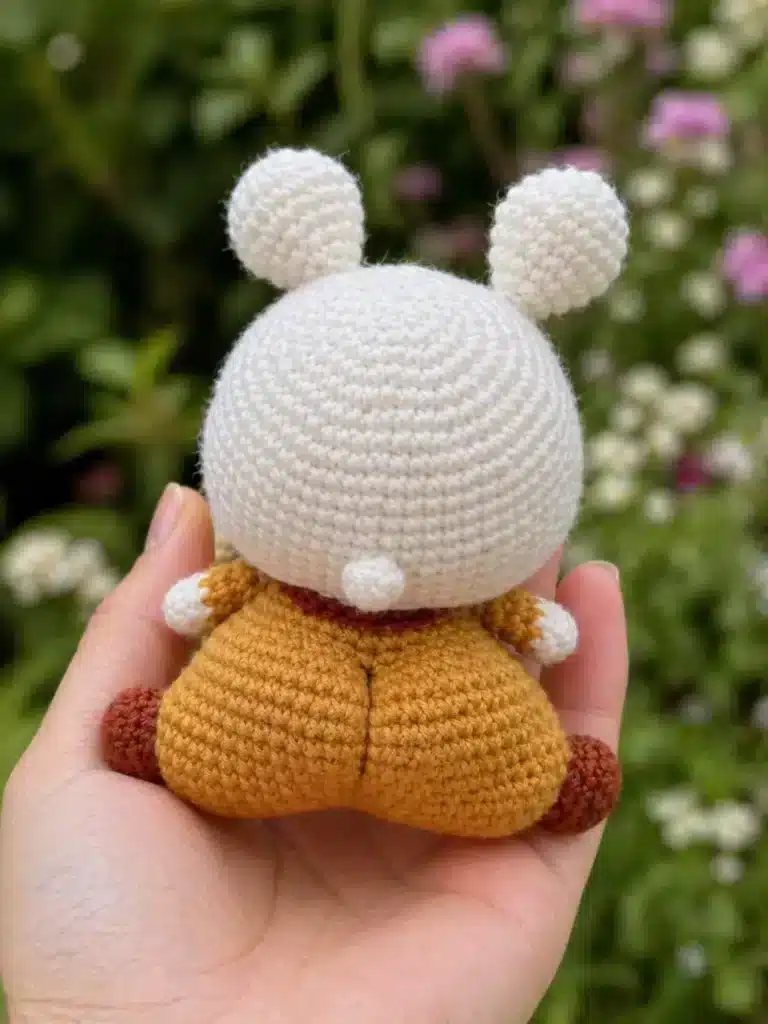
- Place the bunny hood over the head and sew it securely around the lower edge. Attach the bunny ears to the top of the hood. For a natural look, place the ears slightly forward instead of directly on the back of the head.
- Sew the two white muzzle pieces onto the front of the face, then add the small nose/mouth piece in the center. Embroider the mouth with black thread.
- Sew the arms to the sides of the body and attach the belly patch to the front. Sew the brown bobble feet to the lower body and add the tail to the back if desired. If you want help with neat placement, my guide on how to Attach Amigurumi Limbs Evenly is very helpful.
- Add safety eyes or embroider the eyes with black thread. Use pink yarn or blush to color the cheeks and the inside of the bunny ears.
- For the tiger details, embroider small stripes on the face and body using brown yarn or embroidery thread. You can make three short stripes on the forehead and a few tiny stripes on each side of the body. Keep them small so the tiger still looks soft and cute.
Color Ideas for Your Sitting Tiger in Bunny Hood
You can keep the classic tiger look with golden brown yarn and a white bunny hood, or create a softer pastel version.
Here are some cute color combinations:
- Caramel tiger with cream bunny hood
- Mustard tiger with white hood and pink ears
- Soft beige tiger with ivory hood
- Orange tiger with snowy white hood
- Pastel peach tiger with pale cream hood
For a playful collection, you can make several tiny animals in costume style and display them together. You may also pair this tiger with the Boba Cat Amigurumi Free Pattern for a cute handmade animal shelf.
Helpful Tips
- Use tight stitches so the stuffing does not show through the head and body. If your stitches look loose, go down half a hook size.
- Do not overstuff the bunny ears. They should stay soft and slightly flat so they sit nicely on top of the hood.
- Sew the hood after finishing the tiger face placement. This helps you avoid covering too much of the face.
- Add the stripes last. This makes it easier to balance the expression and avoid placing stripes under the hood seam.
- If you want to change colors neatly for paw tips, belly details, or decorative stripes, my Changing Colors in Amigurumi guide will help you keep the transition cleaner.
Final Thoughts
This sitting tiger in bunny hood crochet pattern is a sweet mix of cute animal amigurumi and costume-style crochet. The rounded tiger body, tiny paws, white belly patch, soft bunny hood, and long ears make it a charming project for gifts, craft fairs, keychains, or seasonal decorations.
You can keep it classic with warm tiger colors, or make a pastel version for a softer nursery-style look. Once you finish one, it is very easy to imagine a whole collection of tiny animals wearing bunny hoods.
FAQ
Is this sitting tiger in bunny hood crochet pattern beginner-friendly?
Yes, it is suitable for an intermediate beginner. You should know how to crochet in continuous rounds, increase, decrease, sew pieces together, and embroider small details.
Can I make this tiger smaller?
Yes. Use thinner yarn and a smaller hook. For example, cotton thread or fine sport yarn with a smaller hook can create a tiny bag charm version.
Can I use plush yarn?
Yes, but the final tiger will be much larger. Plush yarn can make the bunny hood look extra soft, but small details like the muzzle and bobble feet may be harder to sew neatly.
Can I embroider the eyes instead of using safety eyes?
Yes. Embroidered eyes are a good option, especially if the toy is made for a baby or small child.
How do I make the bunny ears stay in place?
Flatten the ears before sewing, then stitch across the base several times. Sew them slightly forward on the hood so they do not fall backward too much.
Can I turn this tiger into a keychain?
Yes. Use cotton yarn, firm stuffing, and a smaller hook. Add a keychain ring or charm loop securely to the top of the bunny hood.