


Looking for a beginner-friendly free crochet pumpkin pattern you can finish in under an hour? You’re in the right patch 🍂. This guide covers both starts, the Magic Ring vs Chain Circle, with three sizes (mini, medium, large), neat rib shaping, and quick leaf & tendril add-ons. New to amigurumi? Skim the First Amigurumi: Step-by-Step Guide and keep our Top 10 Amigurumi Mistakes handy. We’ll also share a printable PDF and a bonus Halloween ideas section you can pair with your pumpkin for a cute seasonal set.
Jump to section
Materials & Gauge (quick table)
| Item | Recommended | Notes |
|---|---|---|
| Yarn | Worsted (#4) cotton/acrylic for standard; Bulky (#5) for large | Consistent texture makes rib shaping pop See the Craft Yarn Council overview of yarn weights for reference |
| Hook | 3.5–4.0 mm (worsted); 6.0 mm (bulky) | Tight amigurumi tension; adjust to remove gaps |
| Stuffing | Polyester fiberfill | Firmly packed for round shape |
| Notions | Yarn needle, stitch marker, scissors | Optional: cinnamon stick/wood dowel for stem |
| Gauge | “Fit-to-finish” (tight SC fabric) | Exact gauge not critical; see size guide below |
| Stitches | MR (or CH circle), sc, inc, dec, BLO | Review Invisible Decrease if you like seamless shaping |
| Helpful refs | US vs UK Terms Chart, How to Read a Pattern | Keep these open in a new tab |
Tip: If you’re brand-new, tighten your MR tail firmly or use the chain-circle start to avoid early-round gaps.
Size Guide (mini • medium • large)
Use this quick chart to pick your size and materials. Times assume steady beginner speed with tight amigurumi tension.
| Size | Yarn Weight & Amount | Hook | Even Rounds* | Finished Size (H × Ø) | Stuffing (approx.) | Typical Time |
|---|---|---|---|---|---|---|
| Mini | Worsted (#4), ~15–20 g | 3.5–4.0 mm | 3 | ~6–7 cm × 7–8 cm | 6–8 g | 25–35 min |
| Medium | Worsted (#4), ~35–40 g | 3.5–4.0 mm | 6 | ~9–10 cm × 10–11 cm | 18–22 g | 45–60 min |
| Large | Bulky (#5), ~60–70 g | 6.0 mm | 8 (or +2 if you want extra height) | ~13–15 cm × 14–16 cm | 40–55 g | 60–80 min |
* Even rounds = single crochet rounds worked straight (no increases/decreases) between your increase and decrease sections. More even rounds = taller pumpkin.
Sizing notes
- Tight fabric matters more than exact gauge. If you see gaps, drop your hook size.
- For a perfectly plump look, overstuff slightly before the final decrease round.
- Want extra-deep ribs? Add 1–2 more even rounds and do an extra shaping wrap later.
Pattern A : Pumpkin (Magic Ring start)
Use this free crochet pumpkin pattern if you like starting with a Magic Ring (MR).
Abbreviations: MR = magic ring, sc = single crochet, inc = 2 sc in same st, dec = invisible decrease (or standard dec), st(s) = stitch(es).
Work in a spiral; use a stitch marker for the first stitch of each round.
Base & Body
- R1: MR, 6 sc into ring → 6
- R2: inc around → 12
- R3: (sc, inc) ×6 → 18
- R4: (2 sc, inc) ×6 → 24
- R5: (3 sc, inc) ×6 → 30
- R6: (4 sc, inc) ×6 → 36
Now work even rounds (no increases) to set the height.
Mini: 3 rounds • Medium: 6 rounds • Large: 8 rounds
- R7–R9 (Mini) / R7–R12 (Medium) / R7–R14 (Large): sc around → 36
Shaping & Close
- After your last even round above, start decreases:
- Next round: (4 sc, dec) ×6 → 30
- Next round: (3 sc, dec) ×6 → 24
- Next round: (2 sc, dec) ×6 → 18 — Stuff firmly (push filling to edges)
- Next round: (sc, dec) ×6 → 12
- Final round: dec ×6 → 6
- Fasten off leaving a long tail (≈40–60 cm) for rib shaping. Close the hole neatly.
Rib Shaping (pumpkin grooves)
- Thread the long tail on a yarn needle.
- Insert needle from top center to bottom center and back up, cinching gently to create one groove.
- Repeat 6–8 wraps spaced evenly around the pumpkin. Do not overtighten (avoid puckering).
- Secure the tail with a small knot hidden under the stem area.
Stem (quick yarn stem)
- Option A (fast): Attach brown/green yarn at top center; R1: pick up 6 sc around the hole; R2–R3: sc around; R4: sl st, fasten off; tug tail slightly to plant the stem.
- Option B (wood/cinnamon): Dab a bit of hot glue on a short stick; press in while glue sets.
- Option C (stitch-built): Ch 5, sl st back; sew the cord upright as a stem.
Leaf & Tendril (add-ons)
- Leaf (tiny): ch 7; in 2nd ch from hook work sc, hdc, dc, tr, dc, hdc, sc along both sides of the chain to form a mirrored leaf; fasten off.
- Tendril: ch 20; 2 sc in each ch back to start → it spirals naturally; sew beside stem.
Size tuning (at a glance)
- Mini: stop even rounds at R9; continue the decrease sequence as written.
- Medium: stop even rounds at R12.
- Large: increase height by stopping even rounds at R14; if you want extra plumpness, add +2 more even rounds before decreasing.
Finishing
- Roll the pumpkin between your palms to smooth lumps.
- Hide all ends under the stem.
- Add safety eyes/face only if you’re making a kawaii version (optional).
Pattern B : Pumpkin (Chain-circle start no MR)
This free crochet pumpkin pattern also includes a chain-circle start if you don’t like the MR.
Abbreviations: ch = chain, sc = single crochet, inc = 2 sc in same st, dec = invisible decrease (or standard), st(s) = stitch(es).
Work in a spiral; place a marker in the first st of each round.
Base & Body
- Setup: ch 2.
- R1: 6 sc in 2nd ch from hook → 6
- R2: inc around → 12
- R3: (sc, inc) ×6 → 18
- R4: (2 sc, inc) ×6 → 24
- R5: (3 sc, inc) ×6 → 30
- R6: (4 sc, inc) ×6 → 36
Work even rounds (no increases) to set height:
Mini: 3 rounds • Medium: 6 rounds • Large: 8 rounds
- R7–R9 (Mini) / R7–R12 (Medium) / R7–R14 (Large): sc around → 36
Shaping & Close
- Next round: (4 sc, dec) ×6 → 30
- Next round: (3 sc, dec) ×6 → 24
- Next round: (2 sc, dec) ×6 → 18 — Stuff firmly
- Next round: (sc, dec) ×6 → 12
- Final round: dec ×6 → 6
Fasten off with a long tail (≈40–60 cm). Close the hole cleanly.
Rib Shaping (grooves)
- With the tail on a yarn needle, go from top center → bottom center → back to top, snug the wrap to form one groove.
- Repeat 6–8 times evenly around, tightening gently each pass.
- Secure the tail under the stem area.
Stem Options
- Yarn stem: join brown/green at top; R1: 6 sc; R2–R3: sc; R4: sl st, fasten off.
- Cinnamon/wood: glue a short stick into the top.
- Cord stem: ch 5, sl st back; sew upright.
Leaf & Tendril (quick)
- Leaf: ch 7; in 2nd ch from hook work sc, hdc, dc, tr, dc, hdc, sc along both sides; fasten off.
- Tendril: ch 20; 2 sc in each ch back; attach beside stem.
Size tuning
- Mini: stop even rounds at R9.
- Medium: stop at R12.
- Large: stop at R14 (add +2 even rounds if you want extra height).
Troubleshooting (chain-circle specific)
- See a tiny center hole? After R1, pull the starting tail firmly, then weave across the first round once to seal.
- If your first round twists, restart and ensure all 6 sc sit in the same 2nd chain.
Variations (pick your favorite style)
These easy tweaks extend the free crochet pumpkin pattern into fast gifts and decor.
A) Large Pumpkin (bulky yarn, ≈1 hour)
- Yarn/Hook: Bulky (#5) ~60–70 g; 6.0 mm hook.
- Increase to 48 sts for a fuller body:
- R1: MR 8 sc → 8
- R2: inc around → 16
- R3: (sc, inc) ×8 → 24
- R4: (2 sc, inc) ×8 → 32
- R5: (3 sc, inc) ×8 → 40
- R6: (4 sc, inc) ×8 → 48
- Even rounds: 8–10 rounds at 48 (taller = deeper ribs).
- Decrease:
- (4 sc, dec) ×8 → 40
- (3 sc, dec) ×8 → 32
- (2 sc, dec) ×8 → 24
- (sc, dec) ×8 → 16
- dec ×8 → 8 — close, shape ribs 8 wraps.
Pro tip: Pack stuffing toward the side walls before the last two decrease rounds to avoid a flat top.
B) Mini Pumpkin (keychain size)
- Yarn/Hook: Worsted (#4) ~15–20 g; 3.5–4.0 mm.
- Increase only to 24 sts:
- R1: MR 6 → 6
- R2: inc around → 12
- R3: (sc, inc) ×6 → 18
- R4: (2 sc, inc) ×6 → 24
- Even rounds: 3 rounds at 24.
- Decrease: (2 sc, dec) ×6 → 18; (sc, dec) ×6 → 12; dec ×6 → 6 — close.
- Rib wraps: 6 wraps; add a tiny stem (ch 4 cord) and a split-ring/keychain.
C) Ribbed / Knit-Look Pumpkin (BLO trick)
- Work all even rounds in BLO (back loop only).
- Keep increases/decreases through both loops so the ridge sits between sections.
- Add one extra even round vs. the plain version for more dramatic grooves.
- When shaping, pull each wrap slightly tighter than usual to seat into the BLO channels.
D) Velvet / Plush (chunky chenille)
- Yarn/Hook: Super bulky chenille (#6) with a larger hook than label (to reduce worming).
- Reduce increases by one tier (e.g., stop at 36 instead of 48), plush expands.
- Use smaller, firmer stitches on the final two rounds (tighten grip) to prevent gaps while closing.
- Wrap ribs fewer times (5–6) , plush fabric already reads thick.
E) Leaf (two sizes)
- Small Leaf (1–1.5 in):
- ch 7; in 2nd ch from hook: sc, hdc, dc, tr, dc, hdc, 3 sc in last ch to turn; continue on the other side of chain: hdc, dc, tr, dc, hdc, sc; sl st at base; FO.
- Large Leaf (2–2.5 in):
- ch 9; in 2nd ch from hook: sc, hdc, dc, tr, tr, dc, hdc, 3 sc in last ch; opposite side back: hdc, dc, tr, tr, dc, hdc, sc; sl st; FO.
- Steam-block lightly to flatten; sew near stem at a slight angle for a natural look.
F) Tendril (spiral curl)
- ch 20–30; 2 sc in each ch back to start.
- For a tighter curl, do 3 sc in each ch; for looser, alternate (2 sc, sc) along.
- Stitch the inner end under the stem; let the curl hang.
G) Pumpkin Hat (toddler/child teaser)
- Panel: Foundation ch to head circumference; work BLO rows of sc to form a ribbed rectangle (≈ 16–18 cm height for toddler).
- Join: Seam short edges to make a tube; gather and close the top.
- Stem: At the top center, pick up 6 sc; work 3–4 short rounds, sl st, FO.
- Leaf/Tendril: Attach one small leaf and a tendril as above.
(You can expand this into a full, size-graded hat post later and link it from this section.)
Assembly & Finishing
Finish your free crochet pumpkin pattern project neatly:
- Close & shape
After the final decrease round, fasten off with a long tail. Weave the opening shut, then run the tail top → bottom → top to form ribs. Do 6–8 wraps, snug but not crushing the stuffing. - Stem options
- Yarn stem: pick up 6 sc at the top, work 2–3 rounds, sl st, fasten off.
- Cinnamon/wood: add a drop of glue and press in gently.
- Cord: ch 5, sl st back; sew upright.
- Leaf & tendril
Stitch the leaf slightly off-center for a natural tilt. Add one curled tendril and hide ends under the stem. - Final shaping
Roll the pumpkin between your palms to smooth the surface. If it domes, redistribute filling toward the edges and give the rib wraps one last gentle pull.
Troubleshooting (quick fixes)
Common issues with a free crochet pumpkin pattern, solved fast:
- Center hole won’t close: Pull the tail firmly; if needed, weave across R1 once.
- Visible gaps: Drop hook size or tighten tension; add one extra even round for structure.
- Flat top/bottom: Pack more filling just before the last two decrease rounds; add one extra rib wrap to compress the middle.
- Lumpy sides: Break up big stuffing clumps; massage the shape after closing.
- Stem wobble: For yarn stems, stitch through the core 2–3 times; for sticks, use a dab of hot glue and let it set fully.
Halloween Pairings 🎃
Turn your pumpkin into a mini Halloween set with these themed companions:
- Black Cat pattern: pairs perfectly with a medium pumpkin for a spooky shelf scene : Black Cat Crochet Pattern (Halloween)
- Grim Reaper mini: a fun contrast beside a tiny pumpkin : Grim Reaper Crochet Pattern
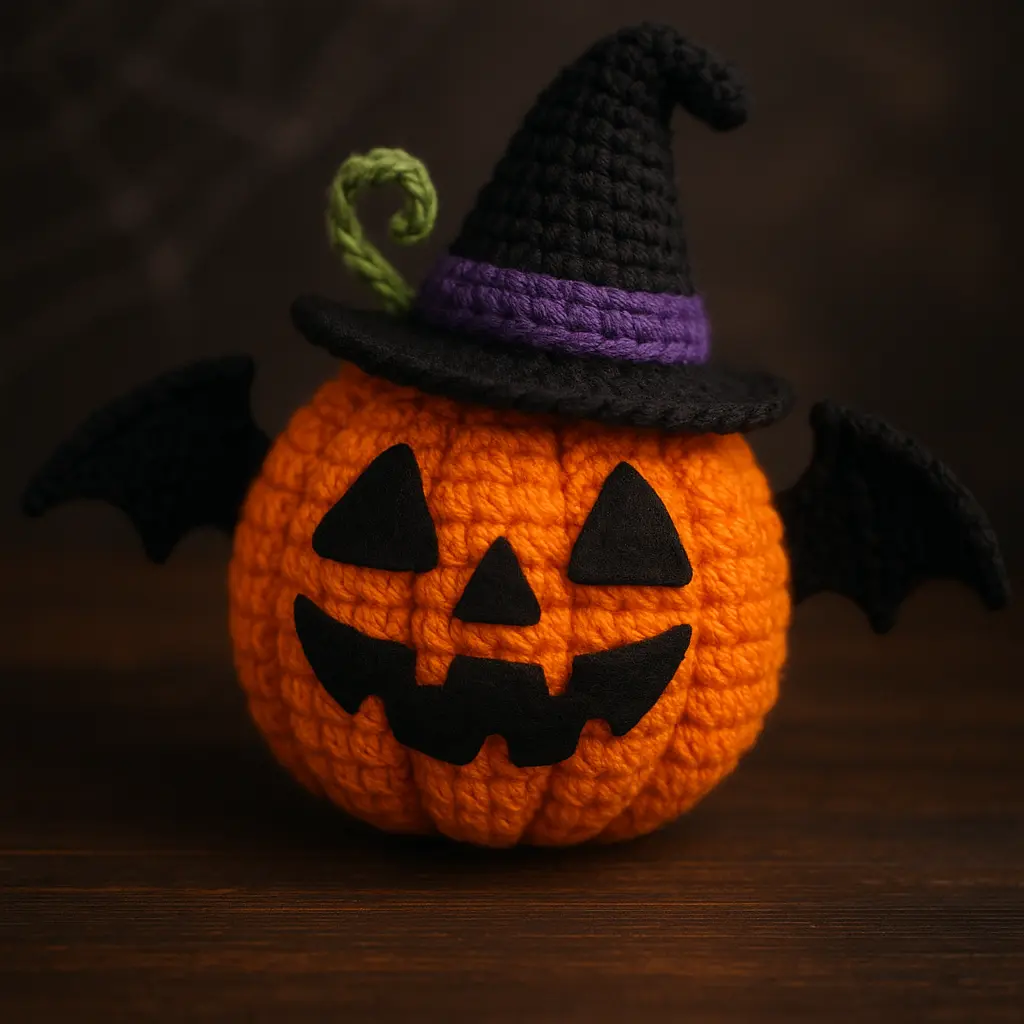
- Pumpkin Witch: style your set with a witchy friend : Pumpkin Witch Crochet Pattern
- Candy Corn: add a pop of color to your display : Crochet Pattern for Candy Corn
- External bonus (one click): friendly ghost buddies to complete the trio : Crochet Ghost Pattern — Free Variations
Styling tip: Arrange one large pumpkin behind two minis, then tuck a leaf and tendril on the front mini for depth. Photograph on a neutral surface with soft side light for Pinterest-ready shots.
FAQ about Free Crochet Pumpkin Pattern
How can I make this Free Crochet Pumpkin Pattern if I don’t like the magic ring?
Use the chain-circle start: ch 2, work 6 sc into the 2nd ch from hook, then follow the same increase path. Tighten the tail and weave once across Round 1 to seal the center.
What yarn and hook should I pick for a big, plush pumpkin?
Bulky (#5) yarn with a 6.0 mm hook is the fastest route. Stop increases at 48 sts, add 8–10 even rounds for height, then decrease and shape with 8 rib wraps.
How do I attach the leaf and tendril neatly?
Sew the leaf slightly off-center at the stem base, then tack the tendril’s inner end under the stem. For clean joins on small parts, see this guide: Attach Amigurumi Limbs Evenly.
My sides look lumpy. What did I do wrong?
Usually it’s stuffing distribution. Break up clumps into small tufts, overstuff just before the last two decrease rounds, then massage the sides and tighten rib wraps evenly.
Can I turn this Free Crochet Pumpkin Pattern into a quick gift set?
Yes—make one large pumpkin plus two minis, add one leaf and a single tendril per mini, and finish with a simple yarn stem. Neutral colors photograph beautifully for gift tags or listing photos.
Finish your fall makes fast with this free crochet pumpkin pattern two easy starts, three sizes, and simple leaf/tendril add-ons for perfect ribbed pumpkins.
Love this? Pin & save for later and share your finished pumpkin with #TopAmigurumi so others can try the pattern too!